Hortensia Hot Red
Indhold:
En udsøgt og ikke helt almindelig dekoration af ethvert personligt plot vil være Hot Red hortensia. Hot Red hortensia kendetegnes ved sine blomsterstande, der udadtil ligner ildkugler, omgivet af store mørkegrønne blade. Omsorg for denne plante vil ikke være svært, og selv en nybegynder kan klare avlsmetoder. Hvis du vil have din busk til at blomstre ganske rigeligt og frodigt, bør du lære om nogle af reglerne og funktionerne ved at dyrke denne sort. Og med de rigtige og rettidige handlinger vil resultatet ikke lade dig vente, Hot Red hortensiaen vil indtage en førende plads i din have blandt andre prydplanter.
Hortensia Hot Red: sortbeskrivelse
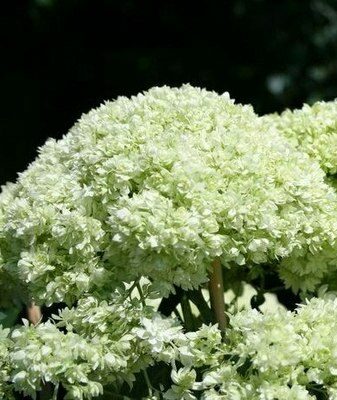
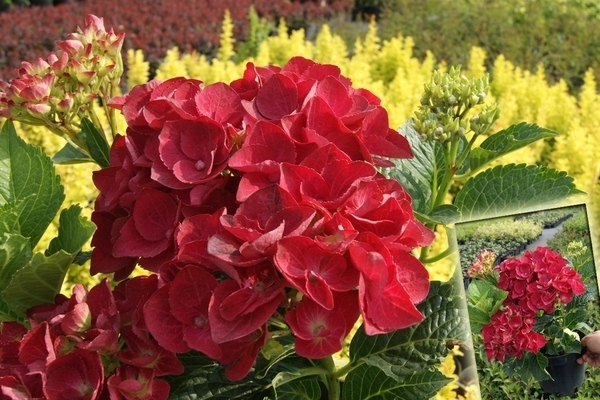
Hortensia Hot Red: foto
Hortensia Hot Red karakteriserer sig selv som en flerårig løvfældende busk, der har en kugleform. Hver stængel af en plante danner på sig selv mange små blomster med en lys skarlagen farve. Blomster samles på den øverste del af hovedstammen i en stor og omfangsrig hat, der når 15 centimeter i diameter. Begyndelsen af blomstringsperioden for denne sort falder i juni måned og fortsætter indtil september. Men en ret lang blomstringstid vil kun være, hvis planten er isoleret til vinteren. Situationen er, at blomsterne dannes på knopperne, som er blevet lagt siden efteråret. I mangel af et buskely om vinteren vil unge knopper ikke modstå den lave temperatur og vil simpelthen dø. Men Hot Red -hortensiaen har det særegne ved at komme sig hurtigt nok i løbet af sæsonen, så i det andet år kan du roligt vente på en ny frodig blomstring.
Den modne busk af Hot Red hortensia er både cirka en meter bred og cirka en meter høj. Plantens vækst pr. Sæson er 20 centimeter i alle parametre, både i bredde og højde. unge skud af denne plante har en lysegrøn farve, de øvre stilke vokser lodret, mens de laterale har en bøjning i form af en bue. Bladene på denne busk er store og temmelig brede, mørkegrønne i farven. Hortensia blade er ret tæt placeret til hinanden og til blomsterne. De er ægformede, savtakket i kanterne og spidse i toppen. Efter blomstringsperioden dannes en kasse med kamre i mængden af 2-5 stykker, inden i hvilke der er frø. Det vigtigste er at overvåge jordens surhedsgrad, da skyggen af blomsterne afhænger af dette.
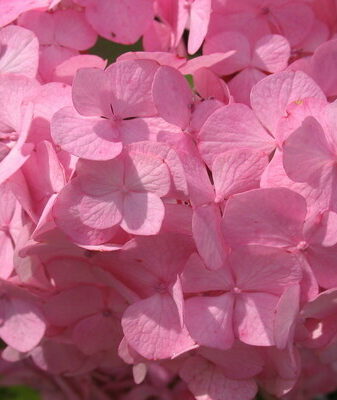
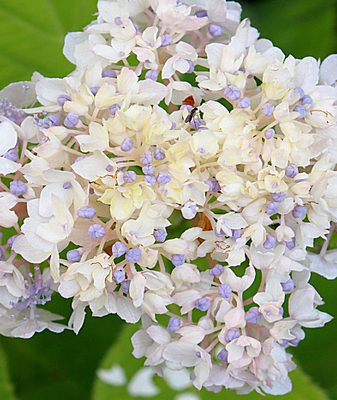
Lidt forsuret jord betragtes som den ideelle jord til denne hortensia -sort. Med en stigning i jordens surhed begynder blomsterstandene at få en blå nuance. Og når de vokser i jord med et neutralt surhedsgrad, blomstrer blomsterne i hvid, creme eller lilla farve.
Hot Red storbladet hortensia betragtes som meget fugtelskende, så det er meget vigtigt at behandle vandingsprocedurer. Men overdriv det ikke, det er bydende nødvendigt at følge tidsplanen for disse procedurer for at forhindre vandlogning af jorden.
Efter at have opfyldt betingelserne for vanding af denne hortensia, bør du seriøst overveje proceduren for beskæring af busken, som også betragtes som et vigtigt stadie i plejen af denne sort. Selve busken er ret god til denne procedure, men du skal stadig vide, hvordan du beskærer busken korrekt.
Med hensyn til fodring anbefales det ikke at bruge en stor mængde organisk gødning, da organisk stof bidrager til en stor og hurtig vækst af blade og grene og reducerer blomstringen betydeligt.På grund af det faktum, at busken har form som en kugle, kan den visuelt øge pladsen på stedet. Denne funktion er velegnet til små baggårde og til dekoration af en lille del af haven.
Storbladet hortensia Hot Red: landing
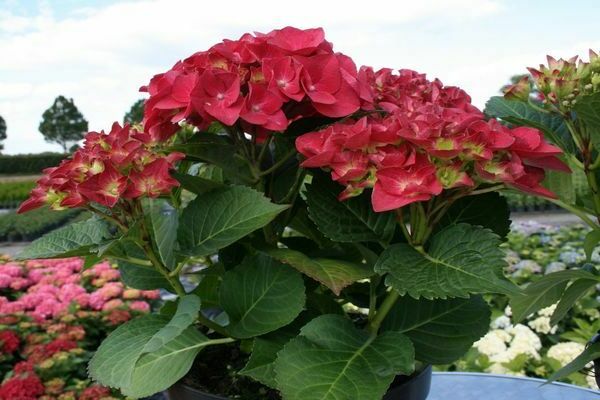
Hortensia Hot Red: foto
For at Hot Red storbladede hortensia skal have en god udvikling i hele vækstsæsonen, skal du ikke bare passe på jorden til plantning og følge alle plantningsreglerne, men også at vælge det rigtige sted for hortensiaen at vokse . Men selv disse vækstbetingelser vil ikke forårsage vanskeligheder for enhver gartner, selv for begyndere.
- Vælg et sted til vækst.
Når du vælger et sted til dyrkning af en storbladet Hot Red hortensia, bør du overveje sådanne punkter som en tilstrækkelig mængde belysning og en åbenhed af plantningsstedet. Samtidig kan blomsterne blive brændt af den varme middagssol. Baseret på dette bør denne busk plantes i et område med delvis skygge, som kan dække busken ved middagstid. En god mulighed for afstigning ville være et sted nær strukturen og hegnet, men sørg for at tage hensyn til, at solens stråler skulle falde på planten om morgenen og aftenen. Til dette vil parceller placeret i øst være gode. Landing nær strukturer er også i stand til at beskytte buske mod stærk og vindstød. Men at plante disse planter nær store træer eller i skyggen er ekstremt uønsket, da busken ikke dannes normalt. Blomsterne ved busken bliver meget mindre, eller de blomstrer slet ikke. Selvom denne plante betragtes som fugtelskende, kan plantning i lavlandet eller nær overfladegrundvand også temmelig dårligt påvirke det generelle velbefindende for hortensiaer. Denne kendsgerning kan føre til, at plantens rødder begynder at rådne, og risikoen for infektion med svampesygdomme øges også. - Klargøring af jorden til plantning.
Den første ting, du skal være særlig opmærksom på, er jordens surhed til dyrkning. Selv en lille afvigelse i surhedsgraden kan føre til, at blomsterstandens skygge ændrer sig. Et gennemsnitligt niveau af jordens surhed er den bedste mulighed for at plante en plante af denne sort. Når de vokser på temmelig sure jordarter, får farven på blomsterne af denne sort en lys skygge, men skifter samtidig til en blå farve. Og jorden, med en overvægt af et neutralt surhedsgrad, kan bremse udviklingsprocessen, plus det ændrer blomsterstandens farve til lyse nuancer. Du bør også undgå kalk i jorden, det har en dårlig effekt på planten, og du bør ikke tilføje kridt og træaske til drænlaget ved plantning, da dette vil føre til et fald i jordens surhedsgrad. Alkalisk jord er kontraindiceret til denne hortensia, da plantens løv får en gul farvetone, og sandsynligheden for klorose øges, når den vokser i sådan jord. I dette tilfælde mangler busken ekstremt i stoffer som magnesium og jern. Med et lavt surhedsgrad skal jorden til dyrkning af hortensia syres regelmæssigt, og den nødvendige mængde jern skal tilføjes til den. Topdressing skal påføres jorden i form af mineralgødning med en sådan hovedkomponent som jern. Men organisk gødning bør påføres i små doser for at forhindre et overskud af næringsstoffer, der kan reducere blomstringen af hortensiaer. Sandjord er også helt uegnet til dyrkning af denne plante. Hortensia udvikler sig godt på lerjord eller med et højt humusindhold. Baseret på dette konkluderer vi, at det ikke er værd at tilføje sand til jorden under plantning. Dette er baseret på, at denne plante er meget glad for fugt.Men det er også nødvendigt at regelmæssigt udføre proceduren for at løsne lerjord, især efter vanding eller regn, så der ikke kommer en skorpe på jordoverfladen nær planten. Inden plantning blandes lige store mængder humus, spadestik, bladjord og tørv for at danne en jordblanding. Landet vil også være fremragende til plantning af en sådan sammensætning: to dele sort jord, en del humus og en del tørv. Fra forbindinger skal du tilføje i henhold til instruktionerne for et kilo af en blanding af jord: superphosphat, urinstof og kaliumsulfat. Erfarne blomsteravlere griber til et sådant valg af jord som brug af jord til plantning nær nåletræsbuske og træer, da det er en temmelig løs struktur, let forsuret, og når du bruger den, kan du begrænse dig til at klæde dig. Hvis du er i tvivl om jordens surhedsgrad, samt hvilken slags gødning der skal bruges, kan du som ekstraudstyr købe en færdiglavet jordblanding til dyrkning i specialforretninger. - Funktioner ved plantning af frøplanter.
Denne plante kan kun plantes i et åbent rum, efter at der er gået to år siden dannelsen af skud eller rodfældning af stiklinger. Hvis du har købt færdige frøplanter, så glem ikke først at undersøge dem omhyggeligt for skader, infektion, spor af råd og andre ubehagelige nuancer. Frøplanter bør kun købes fra pålidelige leverandører og specialiserede planteskoler. For at frøplanternes rødder skal bevares i plantningsperioden, bør denne busk kun købes i en beholder. Selvom det i dette tilfælde vil være problematisk at inspicere plantens rødder. Derfor køber blomsteravlere ofte denne unge plante med åbne rødder. Rødderne til denne busk, i god stand, bør ikke være tørre, fleksible og modstandsdygtige nok, så de hurtigt kan vende tilbage til deres oprindelige position, når de er snoet. Det er meget vigtigt at se på tilstanden af buskens knopper, de skal være levende og uden tørre kanter. Toppen af spiren skal have et intakt udseende, og barkens skygge langs hele længden skal være ensartet.
Det vil være bedst at plante denne plante om foråret, især i de mere nordlige regioner i landet. Dette vil hjælpe med at give frøplanten tid til efteråret til at slå rod og tilpasse sig samt forberede sig til vintersæsonen. Det er kun muligt at plante buske i efteråret i de sydlige regioner, hvor de mest gunstige klimaforhold for vækst, mod nord er dette kontraindiceret.
Overvej hovedreglerne og funktionerne ved at plante en storbladet hortensia af Hot Red-sorten:
- Denne busk kræver en stor mængde ledig plads, når den vokser, så der er en afstand på omkring tre meter tilbage fra andre buske og træer. En afstand på omkring 1,5 meter er påkrævet mellem buskene i denne hortensia -sort. Hvis planten er plantet som en hæk, skal du forberede en meter bred grøft. Hullet til plantning af en frøplante forberedes på forhånd, cirka 3 måneder før plantning. Hullet bør ikke være for dybt, da rødderne til denne busk er placeret næsten på overfladen. Derfor ville en huldybde på 35-40 centimeter være en ganske god mulighed. Men lav hullets bredde til mindst 50-60 centimeter, så plantens rødder er godt placeret, desuden har de det særlige ved at vokse ikke i dybden, men i bredden.
- Dernæst placeres et drænlag i det forberedte hul. Hæld en lille jordblanding til plantning, tilberedt på forhånd, i hullet. Lav et lille dias ud af det. Placer en frøplante i midten af hullet, og på en sådan måde, at plantens rodkrave er placeret på jordoverfladens niveau. Spred derefter forsigtigt alle buskens rødder og dæk med jorden. Tamp jorden lidt nær stammen og lav kanterne af fossaen.
- Efter alle manipulationer med plantning skal den unge plante vandes rigeligt med varmt vand, og jorden skal mulkes. I de første par måneder efter plantning skal den unge plante beskyttes mod vind og direkte sollys.
Storbladet hortensia pleje
Omsorg for denne sort af hortensiaer i et åbent rum kræver ikke nogen særlig indsats og omkostninger, selv en amatørbegynder kan klare det. Selvom der er nogle forudsætninger, der er nødvendige for at dyrke denne busk. Og dette er ikke kun den regelmæssige vanding af planten og beskæringsproceduren, men også plejen af blomsterne og hvert år.
- Omsorg for Hot Red hortensia i haven. For at blomsterne af denne plantesort skal udvikle sig godt, bør regelmæssig ukrudt udføres og ganske ofte. Dette betragtes som en af de vigtigste betingelser for pleje af hortensia. Og det skyldes, at denne busks rødder praktisk talt er på jordoverfladen, og ukrudtet kan fjerne næringsstoffer og næringsstoffer og sporstoffer i jorden fra rodsystemet. Det er på grund af dette, at planten ikke vil være i stand til at udvikle sig godt. Desuden kan ukrudt være sygdomsbærere. Den næste vigtigste betingelse for pleje er også proceduren for at løsne jorden nær busken. Ved hjælp af disse handlinger øger du luftningen af buskens rodsystem og forhindrer også lidt vandlogning efter vandingsproceduren. Men at løsne jorden skal gøres med stor omhu, for ikke ved et uheld at skade plantens rødder. Jorden skal løsnes flere gange om sæsonen, i foråret og sommerperioderne, og selv efter en periode med regn. Under denne procedure skal du sørge for, at haveredskaberne er begravet i jorden med mere end 4-5 centimeter. I nærvær af mulch er løsningen ikke nødvendig.
- Vandingsprocedure. Vandingsproceduren for denne plante betragtes som et særligt sted i plejen af betydning. Dette skyldes, at denne busk elsker fugt ganske stærkt. Derfor kræver det regelmæssig og rigelig vanding, især i en ung alder. Men det er værd at bemærke, at du ikke bør overdrive det med vanding, du skal forhindre vandlogning i jorden, dette er behæftet med en generel forringelse af plantens sundhed. Hortensiaer vil også være meget dårlige under tørke, buskens udvikling kan stoppe, eller der vil ikke være nogen blomstring overhovedet.
I normalt vejr er vanding påkrævet en gang hver 14. dag, afhængigt af plantens alder, og der skal bruges omkring 20 spande væske til en busk. I tørre og varme perioder bør du øge antallet af vandinger, cirka en gang om ugen. Og i regnvejr reduceres vandingshyppigheden naturligt. I dette tilfælde vandes planten cirka 4-6 gange på en sæson.
Til vandingsproceduren skal du bruge varmt vand, hvortil der tilsættes en lille mængde kaliumpermanganat, ca. 2-3 gram. Dette vil hjælpe med at beskytte plantens rødder og stilke fra at rådne. Det er værd at vande jævnt og præcist over hele overfladen nær bagagerummet. For at solens stråler ikke brænder bladene og blomsterbladene på denne busk, bør vandingsproceduren udføres tidligt om morgenen eller om aftenen.
I efteråret bør vandingshyppigheden reduceres for de fleste planter, men ikke for denne busk. For hvis du reducerer antallet af vanding i efteråret, vil dette føre til et fald i frostbestandighed i denne type hortensia. På baggrund af dette, hvis efterårsperioden ikke er rig på regn, udføres vanding i henhold til den sædvanlige ordning. - Fodringsprocedurer. Denne busk har en temmelig hurtig væksthastighed og rigelig, frodig blomstring. Og tilstedeværelsen af en sådan kendsgerning kræver brug af en tilstrækkelig mængde forbindinger. Men først når syreniveauet i jorden ændres, hvilket fører til en ændring i blomsternes skygge, skal du kun anvende den nødvendige gødning på et bestemt tidspunkt.
Hvis du i øjeblikket forberedte jorden til plantning, tilføjede du gødning, så kan du i de første to sæsoner forlade planterne uden at befrugte. Den første fodring finder sted indtil midten af sommerperioden og indeholder sur gødning, hvis basis er ammoniumsulfat eller kaliumsulfat. Den næste topdressing skal påføres mellem juli og oktober, den skal bestå af fosfor-kaliumstoffer.
Under intensiv vækst og før blomstringsperioden fodres busken med mineralsk kompleks gødning. For at gøre dette skal du fortynde 30 gram af stoffet i 10 liter væske. På vækststadiet er tilsætning af organisk stof tilladt, men kun i små mængder. Denne befrugtning gentages efter 14 dage.
Du skal ændre sammensætningen af gødning to uger før plantens blomstringsperiode. I løbet af denne periode skal topdressing laves med kaliumindhold. De vil kunne understøtte dannelsen af knopper og vil gøre farven på blomsterne den mest intense. På dette tidspunkt forbereder vi en flydende topdressing på denne måde: vi blander 70 gram superphosphat og 45 gram kaliumsulfat med vand. Denne opløsning skal vandes under buskens rod.
Umiddelbart efter at knopperne begynder at blomstre, skal den kaliumbaserede befrugtning gentages. Dette vil hjælpe med at forlænge blomstringsperioden og kan give knoppesætning for den næste sæson. Inden vinterperioden, cirka en måned før busken opvarmes, er det påkrævet at lave en topdressing, der indeholder benmel.
Du bør ikke tilføje træaske til topdressing, da de reducerer jordens surhedsgrad betydeligt og derfor vil give blomsterne en bleg skygge. I mangel af særlige fodringer til hortensiaer kan komplekse præparater til lyngafgrøder og rhododendron anvendes. Kvælstofbaseret gødning bør kun anvendes i de sidste dage af april eller i midten af maj. En stor mængde kvælstof vil reducere frosttolerancen i busken og vil også bidrage til udviklingen af råd. Og for meget organisk materiale kan øge væksten af plantens jorddel og vil ikke afgive den frodige blomstring af hortensia. - Beskæringsregler. Denne sort af prydbuske tilhører den første beskæringsgruppe, det vil sige, at blomsterstilke dannes på sidste års skud. Denne plante skal gennemgå en sanitær og kosmetisk beskæringsprocedure. Den bedste periode for denne procedure betragtes som det tidlige forår, når plantens knopper begynder at hæve, og saftstrømmen langs grenene endnu ikke er begyndt. Der er flere faser i beskæringsproceduren for denne plante. Første gang beskæring foretages i plantesæsonen for unge buske og den næste sæson. Blomsterstanderne skal fjernes på knoppdannelsesstadiet, som er små i størrelse, omtrent på størrelse med en ært. Disse handlinger vil hjælpe hortensiaen med at fokusere på at udvikle sine rødder og jorden. Den anden fase af beskæringsproceduren sker på et tidspunkt, hvor busken allerede er flere år gammel og fuldt dannet. Hele planten er ikke afskåret, men kun lidt forynget. Dette gøres hvert forår ved at fjerne hvert fjerde skud, som er mere end tre år gammelt. Du bør også afskære de stilke, der er begyndt at vokse inde i busken. Således kan du tynde det ud og sikre rigelig og frodig hortensiablomst i fremtiden. I slutningen af vinterperioden skæres frosne skud samt beskadigede og svage stængler ved roden. I efterårsperioden er beskæring af blomsterstande påkrævet, lige før buskens isolering. Ellers kan det ske, at grenene går i stykker under snedækkets vægt.
Hortensia Hot Red: vinterhårdhed
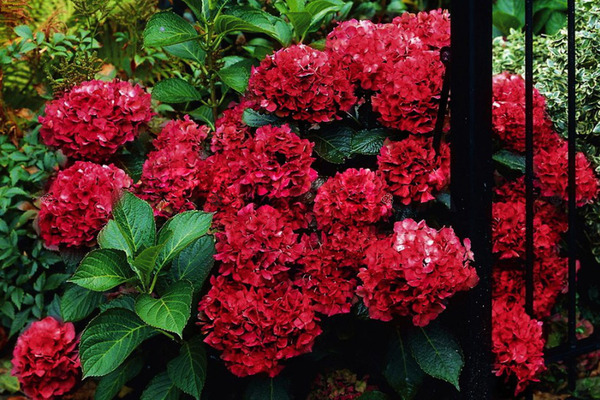
Hortensia Hot Red: foto
På ethvert niveau af frosttolerance for en plante afhænger dens isolering af vækstområdet og buskens alder.Så for eksempel er de i de første to år af en ung plantes liv fuldstændig dækket med tør jord før frost, og ældre planter er dækket med yderligere dækmateriale, hvis kanter presses med noget tungt, såsom mursten, eller tagmateriale. For områder, hvor der hersker et ret mildt klima om vinteren, vil det være nok at isolere kun plantens rodsystem. For at gøre dette laves der en jordbund omkring den centrale stamme, og jorden skal være helt tør. I områder med en vanskelig og frostrig vinterperiode er det også påkrævet at dække plantens grene. Dette skal gøres på et obligatorisk grundlag, fordi fremtidige blomster begynder at danne sig om efteråret, så de bør beskyttes mod frysning.
Inden denne busk isoleres til vinterperioden, bør der udføres rigelig vanding for den samt den nødvendige fodring. I efteråret skal du fjerne absolut alle blade fra stilke og tørrede blomsterstilke. I de sidste dage af oktober er det påkrævet at sprøjte stammen med tørret jord, og et lag mulch laves ovenpå, ganske tykt, bestående af tørv, nåle og savsmuld. Hvis buskens stilke er små, bøjes de forsigtigt ned til jorden og klemmes fast med hæfteklammer, derefter dækkes med tørt løv, og en træhamret kasse placeres ovenpå.
Hvis Hot Red -hortensiaen allerede har nået sin voksne alder og har lange stængler, er princippet om husly til vinteren et andet. Stænglerne samles i deres øvre del og bindes let med et tykt reb eller garn. En ramme er konstrueret ovenfra, bestående af et dækmateriale, og tørre blade hældes inde i den. Denne struktur er dækket af en havefilm eller en burlap, og denne film er ikke strakt for tæt rundt om strukturen, der er et lille ledigt rum tilbage, så luften kan flyde roligt, ellers kan busken rådne om vinteren.
Det er ganske muligt at øge modstanden mod frost i busken kunstigt, forudsat at planten får den nødvendige mængde gødning, og vanding af høj kvalitet udføres om efteråret. Men hvis du ikke har stærk tillid til vejret i vinterperioden, skal du ikke tænke over det og dække planten for sikkerheds skyld.
Formering af hortensia
Hortensia Hot Red: foto
For ikke at bruge penge på at købe en Hot Red hortensia frøplante, kan du begynde at formere den derhjemme. Der er flere muligheder for dette. For at bevare alle buskens sortsegenskaber under reproduktion, ville det være bedst at ty til sådanne formeringsmetoder som ved hjælp af stiklinger og dannelse af lag fra stærke og sunde grene af busken. Reproduktion forbundet med såning af frø betragtes som en ret lang proces, og desuden er det ikke altid vellykket, især når man formerer denne hortensia -sort. Når avl, nybegynder blomsteravlere ofte ty til at dele busk. Men for denne metode er der en række af sine egne egenskaber, som du skal kende og udføre for at danne peduncles for det næste år.
- Vokser med stiklinger. Forberedelsen af stiklinger af denne busk skal udføres i tre perioder, dette er umiddelbart efter forårets beskæring, under knoppernes hævelse; i midten af juli eller før den indledende fase af lignificering af nye skud. Til dette skæres stiklinger, der vokser i delvis skygge. Først skal du vælge tilstrækkeligt sunde stængler med små blade og skære i små stykker, cirka 15 centimeter hver. Hver af grenene skal have 3 bladknude. Dernæst skal du lave et diagonal snit 3 centimeter fra den nederste knude og lave et lige snit over den øvre knude. Derefter skal du helt afskære det nederste par blade fra skæringen og efterlade en tredjedel af bladernes længde på den øvre del af skæringen. Forbered en jordblanding bestående af to dele tørv og en del fint sand.Fyld en beholder med denne blanding og vand godt. Skiver skal behandles med et vækststimulerende middel. Plant stiklinger i jorden med det samme, og dette skal gøres i en dybde på tre centimeter, og grenene skal placeres i en lav vinkel. Når du planter, skal du efterlade en afstand på cirka fem centimeter mellem de forberedte stiklinger. Når du har plantet stiklinger, skal du fugte jorden godt ved kunstvanding, ikke vanding. Sørg regelmæssigt for, at jorden konstant er fugtet, men husk på, at der ikke må være stillestående væske. Beholderen med stiklinger skal placeres et sted med delvis skygge og sørge for, at der ikke falder direkte sollys på dem. Du bør også overvåge lufttemperaturen, den må ikke være højere end +17 grader. Stiklinger skal transplanteres i separate beholdere efter cirka 2-3 uger, når de allerede har slået rod. I løbet af denne periode, for vækst af unge buske, skal du fodre dem hver uge ved hjælp af ammoniumnitrat og mineralgødning. Hvis du bemærker, at løvet er blevet gult på stiklinger, kan det betyde, at der er sket et fald i jordens surhedsgrad. For at undgå dette skal du vande jorden med en eddikeopløsning en gang hver 14. dag, til dette skal du blande to milliliter eddikesyre og 200 milliliter vand. Om foråret, når stabilt varmt vejr er etableret, kan du overføre frøplanterne til et åbent rum for akklimatisering, gradvist øge tiden i luften, bare sørg for, at direkte sollys ikke falder på stiklinger. Og i maj måned skal du udføre den første beskæringsprocedure for en ung busk, for dette skal du fjerne den øverste del af planten med to fuldt udviklede blade. Det næste forår begynder disse frøplanter at blive plantet på et permanent sted. Efter at de første blomsterstande er vist, skal de skæres af. Dette gøres for at optagelsen kan udvikle sig og tilpasse sig godt. I vinterperioden, i det første år efter plantning af planten, er det bydende nødvendigt yderligere at isolere den unge busk.
- Reproduktion ved dannelse af lag. For lagdeling skal du vælge skud fra det foregående år. Stammen skal være meget omhyggeligt bøjet til jorden. Der laves et lille snit i barken på det sted, hvor skuddet er kommet i kontakt med jorden, og dette snit skal behandles med et vækststimulerende middel. Denne gren skal placeres i et lille hul og sikres med havehårnåle eller tynd tråd. Laget ovenfra skal dækkes med jord, og så knopperne på grenen er helt lukkede, og den øverste del er over overfladen. I de første dage skal lagene beskyttes mod vind og sol. Jorden skal konstant vandes, så den regelmæssigt er fugtig, indtil stiklingerne slår rod. Men overdriv det ikke, overskydende fugtighed vil påvirke frøplanten negativt. Derefter modtager det unge skud gennem sæsonen fugt i den fugt, der er sædvanlig for denne plante. Topdressing er ikke nødvendig, det samme er tilfældet med løsning. Ellers kan du ved et uheld skade de unge rødder af hortensia. I vinterperioden er landingsstedet dækket med et lag tørret løv eller savsmuld. Det er værd at fjerne lagene fra hovedbusken først det næste år, om foråret. For at gøre dette skal du finde de mest forstærkede og sunde spirer og fjerne dem med en havebeskærer og derefter plante dem på et permanent opholdssted. Glem ikke at forberede landingshullet på forhånd, cirka 2-3 måneder før dette øjeblik. Jorden skal være den samme som til plantning af frøplanter af denne plante.
- Reproduktion ved at dele busken. Denne avlsmetode betragtes som den hurtigste og letteste. Det vil være ideelt, hvis du ikke vil spilde tid på lag og stiklinger. Plus, det vil være en fantastisk metode til at forynge busken. Det er værd at dele busken i årets forår eller efterår.I foråret sammen med dette kan du også lave en sanitær rengøring af skudene og fjerne de døde grene efter vinteren.
Forbered hullerne på forhånd til plantning af nye buske af denne plantesort. Bemærk, at hullets størrelse skal være lidt større end til plantning af frøplanter, fordi du transplanterer en voksen busk. Et drænlag lægges i hullet, en jordblanding indeholdende mineraler hældes. Hele busken graves ud, og gør det meget omhyggeligt, da plantens rodsystem er tæt nok på overfladen. Ydermere er rødderne opdelt i flere dele, og således at der på hver af disse dele er cirka 2 fornyelsesknopper. Plant hver busk i et tidligere forberedt hul på samme måde som ved plantning af kimplanter.
Denne busk kan formeres ved delvis grave. På denne måde vil du være i stand til at bevare de fleste af plantens rødder. For at gøre dette skal du langsomt lirke buskens rodsystem med en pitchfork på den ene side, og afstanden fra grenene skal være 15 centimeter. Bøj over busken og afskær den ønskede del til genplantning. Om efteråret foretages opdeling af busken ved at grave hele planten op for at overføre vinteren. Her er buskene opdelt på samme måde, med tilstedeværelse af knopper er fornyelse nødvendig. Først nu sidder buskene i separate beholdere og overføres til rummet til vinteren.
Hortensia Hot Red: anmeldelser af gartnere
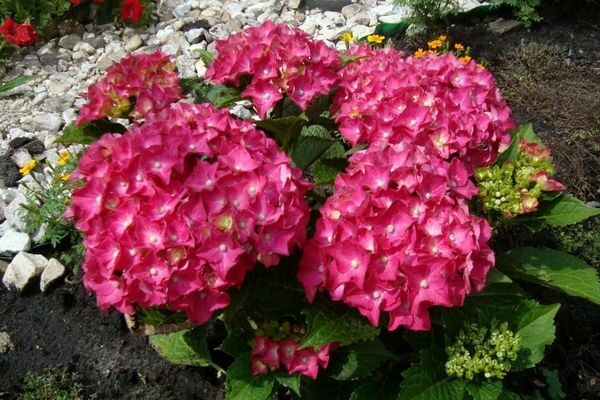
Med forbehold af alle regler og funktioner i denne busk, vil han være i stand til at glæde dig med sit smukke udseende. Volumetriske ildkugler af denne plante med store og brede blade vil se simpelthen fantastiske ud selv på baggrund af andre smukke blomster og buske.
Der er masser af oplysninger på internettet om denne smarte hortensia, her er nogle af dem:
- Jeg vidste, at jordens surhed i høj grad påvirker denne plante, men da jeg plantede, savnede jeg dette øjeblik, så efter et stykke tid blev den røde farve på blomsterne temmelig bleg. Jeg besluttede at rette min fejl og først bestemme surhedsgraden. Jeg kunne ikke gøre det selv, så jeg købte lige en speciel enhed i butikken. Derefter kontrollerer jeg konstant, og hvis indikatoren er for lav, begynder jeg at tilføje bladkompost eller rådne nåle sammen med gødning. Jeg bruger også ferrosulfat. Som et resultat fik blomsterstandene en brændende skarlagenrød nuance.
Svetlana, 64 år- Min smukke hortensia Hot Red har været behagelig med sine frodige og knaldrøde blomster i flere år, men der var en vinter med meget kraftige frost, og det skete, at min busk var helt frosset ud. Derefter dækker jeg mine buske til vinteren hele tiden, selvom vi har ret milde vintre, og alvorlige frost er ekstremt sjældne. Mens busken var få år gammel, bøjede hun simpelthen sine grene nedad og dækkede den derefter med savsmuld og lagde den ovenpå med tagmateriale. Når busken voksede, bandt hun stænglerne og dækkede den på siderne med et tørt grantræ og bandt den med havefilm. Med forårets ankomst gør jeg alt rent.
Elena, 51 år- Det skete for mig, at alle buskene på denne plante frøs ud, så jeg besluttede at grave denne hortensia -sort helt og transplantere den i en beholder. Jeg fjernede busket i haven, vandede det ekstremt sjældent, planten udholdt overvintring bemærkelsesværdigt. Kun beskæringsproceduren med forårets ankomst skal udføres meget omhyggeligt, ellers kan du ved et uheld fjerne knopperne med fremtidige blomster.
Sergey, 59 år gammel