Clematis Blue Explosion
Indhold:
Clematis Blue Explosion er en meget udbredt sort af en prydplante kaldet clematis. Dens blomster er ret store, og selve planten tilhører krøllede: dens vinstok vokser smukt og bøjer sig omkring lysthusets søjler eller strukturer specielt bygget til det. Clematis, i sammenligning med nogle andre blomster, blomstrer i meget lang tid: faktisk i hele den varme sæson, fra maj til september. Så hvis du vil øge din have ikke kun i bredden, men også opad, er Clematis Blue Exploded det, du har brug for.
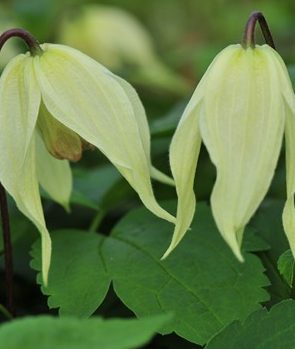
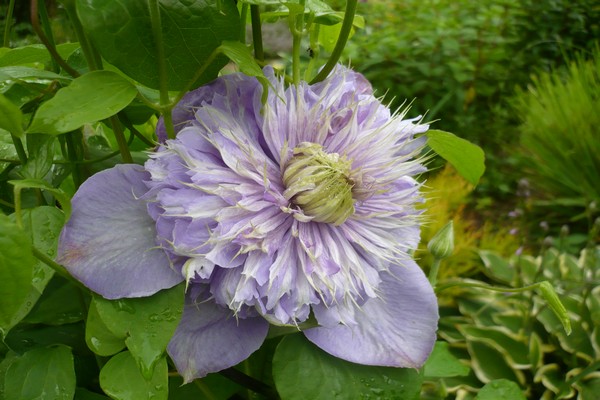
Clematis Blue Explosion: foto af sorten
Clematis Blue Explosion: sortbeskrivelse
Denne sort dukkede først op takket være en polsk opdrætter. Hans navn var Sh. Marchinsky, og hans opdagelse blev gjort i 1995. Opdrætteren selv tilskrev Clematis Blue Explosion til de tidlige storblomstrede sorter.
Blomstringen af Clematis Blue Explosion, som du allerede har bemærket, er meget lang. Derudover er det imidlertid to-trins. Den første fase opstår i begyndelsen af blomstringen, og blomster vises på plantens gamle skud. Anden etape finder sted i midten af juli. Det er på dette tidspunkt, at den omtrentlige midten af blomstringen falder. Derefter begynder blomster at dukke op på unge skud og fortsætter med at glæde øjet indtil midten af september.
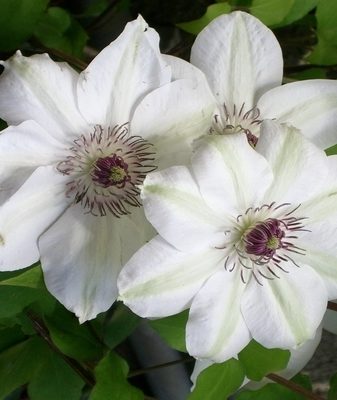
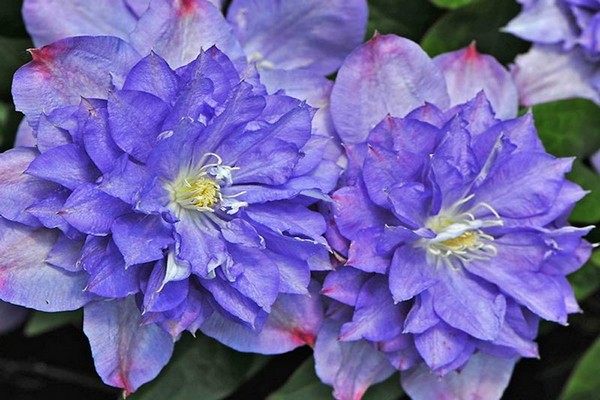
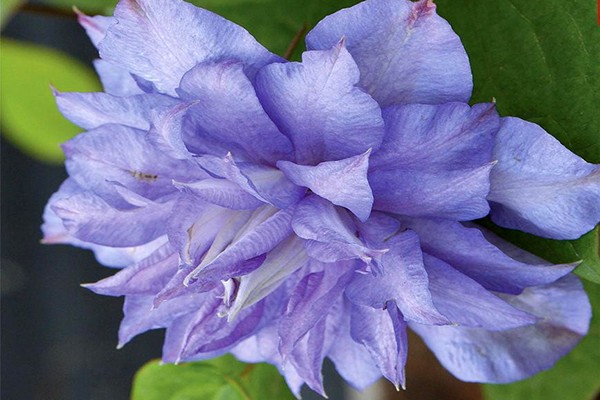
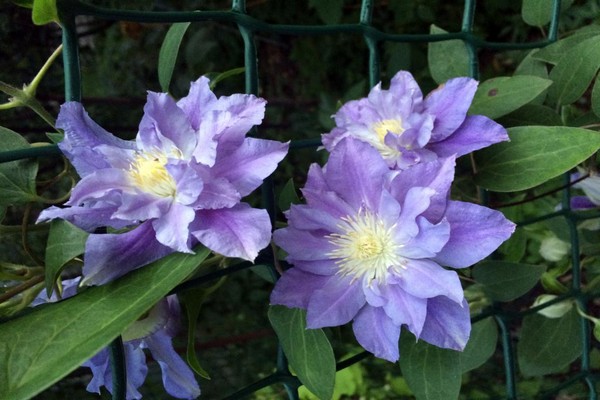
Blomsterne af sorten Exploded clematis er af utrolig skønhed: de er ret store, og dem, der vokser på gamle skud, har også en dobbelt tekstur. Desværre kan prøver dyrket på nyligt optrådte skud ikke prale af denne kvalitet. Diameteren af den gennemsnitlige blomst er omkring 15 centimeter. Hver har en halvåben form. Farven, som du måske gætter ud fra navnet, er imidlertid blå, hvilket giver denne sort en særlig charme: kronbladets spidser er malet i en lyserød nuance.
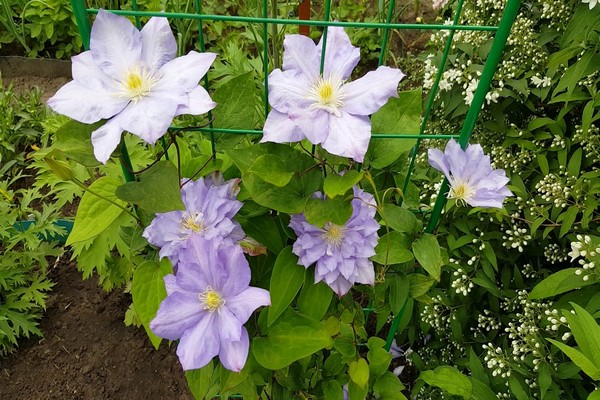
Da Clematis Blue Explosion er en klatreplante, når den en ret imponerende størrelse. I gennemsnit er det 2,5-3 meter, og derfor skal der for at vokse sikkert placeres en særlig støtte til planten i haven. En anden mulighed er at give ham en struktur som et havepavillon, omkring hvilket clematis kan sætte sin vinstok.
Clematis Blue Explosion: foto af sorten
Voksende betingelser for clematis sorter Blue Explosion
Blue Exploded Clematis er planter, der er ekstremt solelskende, og derfor vil placering i et solsikkeområde give dem et betydeligt løft i væksten. Ikke desto mindre er det også muligt og ikke kritisk at plante en blomst på et delvist skyggefuldt sted.
Baseret på hvor meget clematis elsker solen, er det let at konkludere, at denne plante foretrækker et varmt klima, og derfor er de sydlige regioner de bedste steder at dyrke denne plante, og især sorten Blue Explosion. Som årtiers praksis har vist, viser clematis den lyseste og mest langvarige blomstring i løbet af en varm sommer. Men kolde vintre kan være dødelige for en blomst. Ved temperaturer langt under 15 grader under nul dør Blue Explosion.
Clematis Blue Explosion: foto af sorten
Regler for plantning og pleje af Clematis Blue Exploited
Foråret er bedst egnet til plantning af clematis. Vær dog opmærksom på: du skal vælge et tidspunkt, hvor alle frost allerede er blevet efterladt, og du er sikker på, at frost ikke kommer fra ingen steder. Hvis foråret stadig er langt væk, og vinteren er lige om hjørnet, kan du plante Clematis Blue Explosion i efteråret.Du skal dog skynde dig: hvis du ikke gør dette halvanden måned før begyndelsen af december, kan landingen vise sig at være beklagelig.
Ud over at plantestedet for Clematis Blue Explosion skulle være oplyst af solen det meste af dagen, er der en anden vigtig betingelse - jorden. Den mest neutrale jord uden alle slags urenheder er bedst egnet til dyrkning af kimplanter, men clematis Blue Explosion vil føles behagelig både i let sur og let alkalisk jord.
Inden plantning er det nødvendigt at grave et hul i en passende størrelse til Blue Exploited clematis. Dens dimensioner afhænger ikke kun af selve frøplanten, men også af jorden, hvor den skal graves: hvis et hul bryder ud i tung jord, er dimensionerne 70 x 70 x 70 cm egnede til det, men hvis jorden er let , det er ganske muligt at kassere 20 centimeter fra hver side.
Derudover er der en ting, der skal undgås, når du planter clematis ikke kun af den blå eksploderede sort, men også af enhver anden: de tolererer ikke konkurrence, og derfor er det en stor fejl at plante dem så tæt på hinanden som muligt der kan ødelægge din dekorative levende væg. Husk: den optimale afstand mellem buske er 1 meter.
Overdriv heller ikke det med hyppigheden og overflod af vanding: dette kan have en ekstremt negativ effekt på planten. Derfor, hvis du pludselig har en vane med at vande planter "fra hjertet", så prøv at gøre en undtagelse for Clematis Blue Exploited.
Vigtig! I nogle tilfælde er grundvandet meget tæt på plantegraven, som ligesom for rigelig vanding godt kan ødelægge Clematis Blue Exploited. For at beskytte din busk skal du hælde dræning på bunden af plantegraven. Lille knust sten eller brudt mursten er egnet til dette.
Clematis Blue Explosion: foto af sorten
Men at gøre drænlaget for tykt er også en dårlig idé. Mere end 15 centimeter vil være nok.
Efter at dræningen er tilføjet graven, er det næringsblandingens tur, som er nødvendig for alle planter ved plantning. For at forberede det har vi brug for to spande almindelig græstørv, en spand tilberedt humus og kun 100 gram superfosfat.
Den ideelle dybde til at begrave frøplanter af sorten Clematis Blue Explosion er fra seks til otte centimeter. Som et resultat skulle det ligne et lille pænt krater omkring anlægget. Imidlertid er seks til otte centimeter en gennemsnitsværdi, der bruges til let jord. I tilfælde af at jorden på dit websted er tung, vil det være nødvendigt at uddybe Clematis Blue Explosion med ti til femten centimeter.
Når du er færdig med at plante og Clematis Blue Exploded har fundet sit nye hjem, er det tid til beskæring. Det er upraktisk at efterlade mere end to eller fire knopper på et skud, og derfor er det ikke tilrådeligt at afskære det, så der er så meget tilbage. Beskæring er afgørende for unge frøplanter, da der takket være det vil blive brugt flere ressourcer på udviklingen af et kraftfuldt rodsystem og smukke blomster. Hvis foråret blev valgt som tidspunkt for plantning, foretages genbeskæring to uger efter den første (for at konsolidere effekten).
Ud over beskæring, efter plantning, er det også nødvendigt at vande planten grundigt. Den brønd, der er dannet af os, vil gøre et fremragende stykke arbejde med at bevare fugt.
Derudover anbefales det stærkt at udføre en anden efterplantningsprocedure: mulching. Det er ikke påkrævet, men det vil i høj grad hjælpe dig i den videre dyrkning af Blue Exploded Clematis. Et lag tørv eller savsmuld forhindrer ikke kun fugt i at fordampe fra hullets overflade, men forhindrer også spredning af ukrudt.
Forresten, som allerede nævnt, efter plantningsarbejde eller endda før dem, skal du sørge for at give Clematis Blue Explosion den rette støtte. Uden dem vil planten simpelthen falde sammen under sin egen vægt, og clematis vil hverken vokse eller blomstre.Når du køber understøtninger eller endda laver dem på egen hånd, skal du dog ikke glemme at tænke på, at væksten af Clematis Blue Exploited er en ret lang proces, og derfor er det tilrådeligt at vælge smukkere understøtninger, for i lang tid de vil tiltrække meget mere opmærksomhed end selve busken, der snor sig omkring dem.
Vigtig! Det, at du har støtte, betyder ikke, at planten er helt sikker, og du kan ikke følge den. Clematis Blue Explosion er som enhver anden blomst skrøbelig, og derfor skal dens grene bindes i tide, så et flygtigt vindstød ikke skærer dem af.
Efter plantning skal du også passe på fodring af clematis. Til dette er værktøjer såsom træaske eller forskellige mineraler egnede. For ikke at overdrive det med fodring og ikke dræbe planten, er det nødvendigt at observere et interval på to uger mellem tilsætning af gødning til hullet. Afhængigt af hvilket middel du har valgt til fodring, ændres dens procentdel med vandet, som du vil fortynde det i også. Oftest fortyndes et stof i 10 liter vand, og derfor tager vi dette nummer som et eksempel. Når du bruger mineralgødning, skal du bruge 30 gram pr. 10 liter vand. I tilfælde af træharpiks tilføjes et 10 liter glas og mullein baseret på et forhold på en til ti.
Vigtig! I de første par uger skal frøplanten beskyttes mod direkte brændende solstråler, hvilket meget vel kan skade både bladene og rodsystemet.
For at beskytte sidstnævnte mod varmeskader kan Clematis Blue Explosion være omgivet af små årlige blomster. Dette er en midlertidig, men vanskelig metode til at hjælpe med at beskytte din busk.

Clematis Blue Explosion: foto af sorten
Hvordan tilbereder man clematis til vinteren?
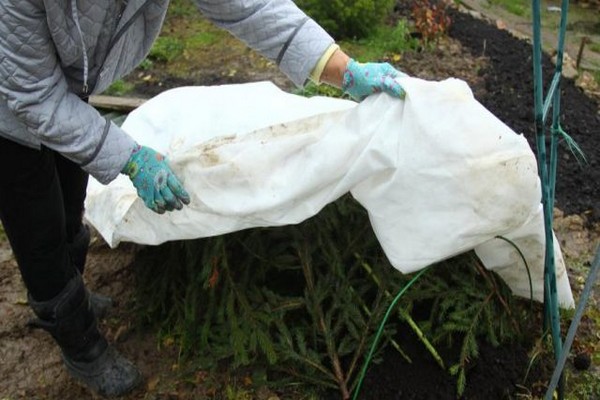
Som allerede nævnt tilhører Clematis Blue Explosion de planter, der elsker varme og ikke tåler kulde så meget, at for lave temperaturer kan ødelægge dem. Derfor ville den rigtige beslutning være at dække denne blomst med en film inden det kolde vejr begyndte. Inden du gør dette, skal den sidste og vigtigste beskæring dog udføres.
Det mest passende tidspunkt at udføre denne beskæring er efterår, nemlig perioden lige før frostens begyndelse. Skud skæres i en højde af cirka en meter fra jorden. Hvis du selv ser, at nogle grene ikke er sunde eller beskadigede, kan du skære mere. Buskens sundhed kommer først. Hvis skuddet er for svagt, kan du slippe af med det helt. Efter afslutningen af skæringen skal skuddene fjernes fra støtten, som de er bundet til, og lægge dem på jorden. Dette skal af indlysende årsager gøres så omhyggeligt som muligt. Efter at frøplanten er helt på jorden, er den dækket med en film. For mere pålidelig isolering kan du også bruge savsmuld eller tørv.
Derefter er det nødvendigt at udføre clematis Blue Exploded tøjnåle. Til dette er højderne under jorden bedst egnede: 30 centimeter, 70 centimeter og 100 centimeter.
Hvordan man formerer Clematis Blue Exploited?
Der er et stort antal metoder til avl af Clematis Blue Exploited, men den mest effektive og ofte anvendte af dem er familiemetoden. Det sikrer pålidelighed og varighed af reproduktion.
For at implementere det skal du forberede passende stiklinger i begyndelsen af blomstringssæsonen. Dele skåret fra midten af vinstokken fungerer bedst for dem. Det skal huskes på, at mindst 2 centimeter skal være tilbage over knuden og 3-4 centimeter under knuden, selvom det ikke er forbudt at forlade lidt mere. For at stikkernes rødder skal dannes så hurtigt som muligt, gennemblødes de i en speciel løsning, som inkluderer heteroauxin. Dette stof stimulerer ikke kun hurtig, men også korrekt vækst. Det fortyndes efter følgende formel: 50 gram pr. 1 liter vand.Til dyrkning af stiklinger, der er høstet på denne måde, bruges almindelige kasser, hvor jorden hældes i, hvilket er en lige så proportional blanding af sand og tørv. Hvis temperaturen i den nærmeste fremtid efter plantning ikke falder til under 22 grader Celsius, vil stiklinger rodne hurtigt nok, men ellers gør de muligvis slet ikke dette. For at sikre en højere temperatur kan du dække stiklinger med folie. Under de rigtige forhold vil stiklinger slå rod inden for en måned, hvorefter hver skal transplanteres i sin egen gryde. I disse krukker vil fremtidige frøplanter overvintre. Temperaturen under overvintringen bør aldrig falde til under 3 grader Celsius. Vanding er ikke nødvendig ofte, men der skal sørges for hele tiden at holde jorden fugtig. Hvis du gjorde alt korrekt, vil dine stiklinger allerede i foråret blive til frøplanter, og til efteråret vil de kunne blomstre for første gang.
En anden, ikke mindre effektiv metode til avl af Clematis Blue Exploited er metoden til lagdeling. Dens essens ligger i det faktum, at buskens unge skud er bøjet på en sådan måde, at kløften mellem roden og spidsen er i jorden.
Vigtig! Selve spidsen bør aldrig være under jorden! Det ender ikke godt for den valgte flugt.
Derefter bliver han begravet i jorden, så han ikke ved et uheld trækker sig ud af den. For en mere sikker vedhæftning kan du ty til at bruge en ledning. Nu er det kun tilbage at sikre, at stiklingerne regelmæssigt vandes. Prøv også, når det er muligt, at begrave nye internoder i jorden, når de dukker op. Når tiden for overvintring kommer, transplanteres stiklingerne ikke, men de overlades til vinter ved siden af moderplanten.
Efter at vinteren giver plads til foråret, bliver stiklinger til mere end en fuldgyldig frøplante, som nu kan skilles fra moderplanten og plantes andre steder. Når du udfører denne operation, skal du dog være forsigtig og forsøge ikke at skade noget unødvendigt.
Den sidste avlsmetode, som vi vil overveje, er den almindelige opdeling af busken. For at implementere det bliver vi nødt til helt at grave busken ud og være forsigtig med ikke at beskadige den. Derefter skærer vi det i to eller tre dele, men det er vigtigt at sikre, at der forbliver mindst tre skud på hver af disse dele. Hvis du ser, at de ikke er nok til en fuldstændig adskillelse, er det bedre at udskyde operationen til den næste sæson.
Vigtig! Valget af metode afhænger udelukkende af dine subjektive præferencer, og derfor vil vi ikke engang forsøge at skille den bedste ud.
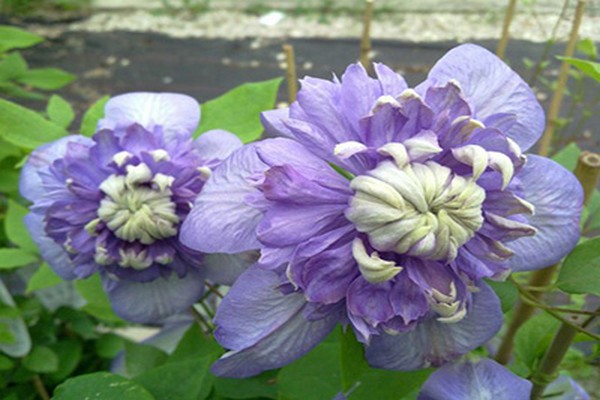
Clematis Blue Explosion: foto af sorten
Sygdomme i Clematis Blue udnyttet
Som allerede nævnt er for våd jord ikke den mest egnede betingelse for dyrkning af denne plante, og her er grunden: under sådanne forhold formerer sig svampe og spredes meget aktivt, hvortil clematis slet ikke er tilpasset til at modstå. Som et resultat af svampeangreb vises mørke pletter på bladene af Blue Exploded clematis, som vokser over tid og dækker det meste af buskens overflade. Du kan redde dig selv fra dette ved at ty til svampedræbende midler eller ved at gøre alt for at forhindre vandlogning.
Ud over svampe er klematis imidlertid også truet af alle slags parasitter, hvis liste er enorm. Bladlus, edderkoppemider og nematoder kan imidlertid skelnes fra de farligste.
Udover dem er der også mus og bjørne, der ikke har noget imod at spise rødderne på din plante, hvilket heller ikke vil føre til noget godt.
Og endelig, lad os tale om snegle og snegle: På trods af deres uskadelige udseende medfører de hvert år store problemer for gartnere rundt om i verden. Den bedste måde at klare dem på er mulching af en busk ved hjælp af nåle, hvorigennem skadedyr med blød krop simpelthen ikke kommer igennem.
Clematis Blue Explosion: foto af sorten
Clematis Blue Explosion: sort anmeldelser
Margarita Vasilievna, 35 år gammel
Et lysthus dukkede op i vores have for nogen tid siden, og vi tænkte længe over, hvordan vi skulle dekorere det. Som følge heraf valgte vi sorten Blue Exploded clematis, og jeg har stadig ikke fortrudt denne beslutning. Blomsterne ser flotte ud og lysthuset er blevet et rigtigt hjørne. Jeg plantede stiklinger, som en ven gav mig, og næsten alle slog rod. Generelt et mirakel, ikke en blomst.
Elizaveta Viktorovna, 46 år
Jeg kunne virkelig godt lide sorten Exploded clematis for, hvor let det er at passe. Det kræver ikke meget ekstra tid fra gartneren, du skal bare sørge for, at jorden ikke bliver vandtæt. Men dette er slet ikke svært, og for mig i betragtning af det enorme antal blomster, jeg følger i min have, forårsagede Clematis Blue Explosion ikke unødvendige problemer, hvilket jeg selvfølgelig er meget glad for.
Konklusion
Hvis du stadig ikke kan beslutte, hvilken plante der er bedst egnet til lodret udsmykning af din have - stop med at tænke og vælg Clematis Blue Exploited. Ikke alene forkæler han din tid, men han belønner også for simpel pleje med smukke blomster, som du og dine kære kan nyde hele sommeren og endda lidt mere.
Clematis Blue Explosion: video om sorten