Clematis Grunwald
Indhold:
Ofte vokser sommerboere clematis ikke på væggene, men på specielle vævede understøtninger af garn og træplanker. Men du bør omhyggeligt overvåge planten, så den ikke spreder sig til naboplanter, der vokser i sommerhuset. Det kan se smukt ud, eller det kan forstyrre hinanden. Af denne grund er det bedst at holde øje med din plante. I dag vil vi se på en hybrid som Clematis Grunwald.
Clematis Grunwald: sortbeskrivelse
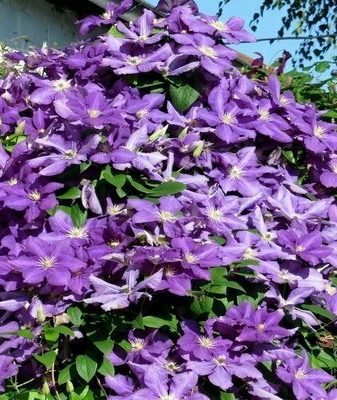
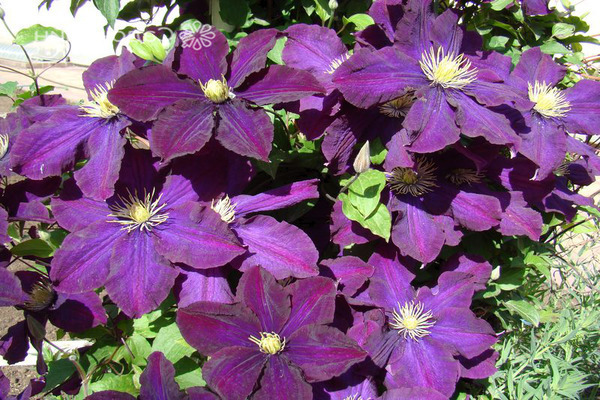
Clematis Grunwald: foto af sorten
Clematis Grunwald er en dekorativ liana, dekoreret med grønne blade, nogle gange med en lilla nuance, samt et stort antal blomster, der kan observeres over en periode (flere måneder). Planten er velegnet til at dekorere hegn, vægge, lysthuse. Erfarne gartnere siger, at du ikke bør dyrke en sort, hvis din deltager har et godt område, så ville det være rart at dyrke 2-4 sorter, der vil blomstre på forskellige tidspunkter, så du kan få en blomstring, der vil fortsætte fra forår til efterår. Hvad angår sorten Grunwald, tilhører den de sene storblomstrede hybrider. En ret ny sort, den blev skabt i 2014 af flere polske opdrættere. De karakteristiske træk ved sorten kan skelnes:
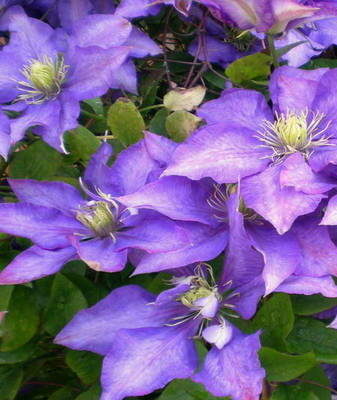
• Store blomster (ca. 12 cm i diameter), har en rig lilla-violet nuance. kronbladene har en fløjlsagtig tekstur. I dette tilfælde er den centrale del af blomsten gul, og den sømløse side af kronbladene har en mørkere farve, som har en lys strimmel.
• Blade har en mat overflade med lysegrøn farve, først vokser de på burgunderskud, over tid - brune.
• Vinlængden kan være op til 3,5 m.
• Et stort antal antenner, som findes i hver ung vinstok.
De fleste gartnere foretrækker clematis for deres lange og smukke blomstring - den starter i juni og varer indtil august. Men med passende pleje kan planten blomstre selv indtil oktober.
Clematis Grunwald reproduktion
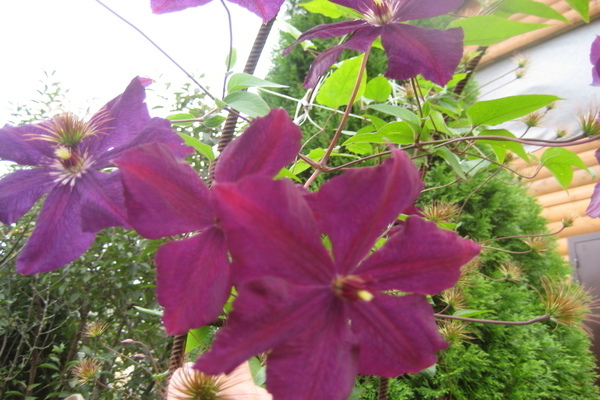
Clematis Grunwald: foto af sorten
Frømetoden er ikke egnet til avl af klematis. du kan samle dem på din egen grund, efter blomsterne er bestøvet. Men spiringsprocessen vil være lang og smertefuld, og selvom du formår at dyrke en vinstok, vil den afvige betydeligt fra den oprindelige sort. derfor er det bedre ikke at bruge denne form for avl.
Skæremetode.
Skæring af stiklinger foretages bedst i juni. Handlingsplanen er som følger:
• På den midterste del af vinstokken er det nødvendigt at skære flere skud ud, så der er 1-2 internoder. Men det skal huskes på, at der er ca. 4 cm tilbage under den nedre internode og ca. 2 under den øverste.
• Den nederste del skal dyppes i en ko eller i enhver anden analog af stoffet.
• Et fugtigt underlag, såsom tørv og sand, er velegnet til plantning af stiklinger. Glem ikke at vippe skydningen.
• Det er nødvendigt at spire stiklinger ved en temperatur på +22 grader ved hjælp af en film. For at gøre dette skal du lægge en pose på beholderen. Dette er en måde at holde fugtniveauet i nærheden af planten på det korrekte niveau. Fra tid til anden skal planten sprøjtes, for dette fjernes polyethylen, og substratet skal forsynes med god vanding.
• Når du bemærker, at planten er fuldt rodfæstet, dvs. rigtige blade vises, skal planten transplanteres i en separat beholder med almindelig havejord.Det er bedre at varme jorden lidt op i ovnen.
• Kapaciteten skal føres til kælderen til opbevaring til vinteren. fra tid til anden skal du inspicere planten og overvåge jordens tilstand, måske har planten brug for vanding. Men vanding skal være i små mængder, fordi på et køligt sted og mindre væskeforbrug. Der er gartnere, der straks planter stiklinger i åben jord til vinteren, de dækker det bare meget godt.
• I slutningen af foråret er det nødvendigt at transplantere stiklinger i åben jord. I sommerperioden vil clematis slå rod, ved efteråret kan du endda se flere knopper. Men det er bedst at afskære dem, så planten ikke bruger meget energi på spirende proces. Plantens styrke skal bevares til vinteren.
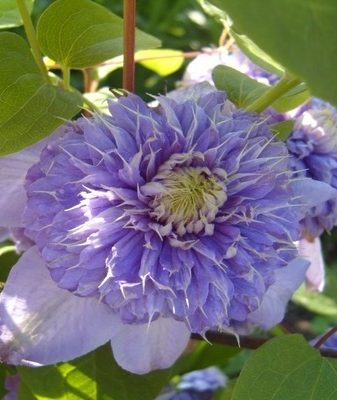
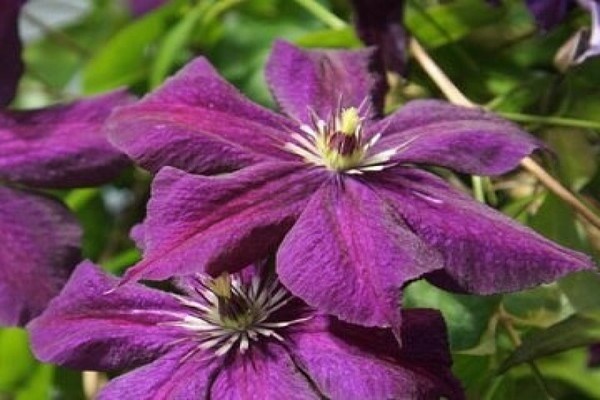
Storblomstret Clematis Grunwald: foto
Reproduktion ved lagdeling.
Reproduktion ved lagdeling betragtes som den enkleste og mest besværlige metode til plantespredning. dens essens koger ned til følgende:
• Det er nødvendigt at træffe valget af det sundeste og stærkeste skud.
• Du skal forberede en rille, hvor du derefter vil lægge planten. Men der skal sørges for, at hovedplantens rodsystem ikke bliver beskadiget. rillens dybde skal være fra 5 til 10 cm. at gøre grøften for lille er heller ikke god, da jorden i den konstant tørrer ud, og det kan føre til, at planten muligvis ikke slår rod i en ny placere.
• Det er nødvendigt at lægge vinstokken i rillen, så skal du gennembore den flere steder med træpinde, eller du kan tage en tyk tråd. Nå, du skal adskille planten fra moderbusken. Toppen af skuddet skal være synlig fra jorden, og en lille mængde løv skal være synlig i hele vinlængden.
• Derefter skal stiklingerne vandes og mulkes, så jorden forbliver fugtig så længe som muligt.
• Når du bemærker, at vinstokken har slået rod og er begyndt at slippe et par blade ud, så drys dens bund med en lille mængde fugtig jord.
• Storblomstret clematis Grunwald elsker vand, derfor skal det vandes oftere - jorden skal ikke have lov til at tørre ud.
• Ved efterårets begyndelse skal stiklingerne have et tilstrækkeligt dannet rodsystem. Men det er bedst ikke at adskille det, men lade det stå om vinteren med moderbusken.
• Med forårets begyndelse kan en allerede uafhængig plante transplanteres separat til et permanent sted.
Vi deler busken.
Nogle gange kan du se en datter plante vokse ved siden af de vigtigste vinstokke. Om foråret, efter beskæring, kan en sådan plante opdeles. Det er nødvendigt at grave "babyen" op og overføre den til det fremtidigt voksende sted.
Voksende klematis
Planten adskiller sig ikke i finurlig pleje. det vigtigste for hende er at få den rigtige pasform. Clematis er en flerårig plante. Men det skal huskes, at en ung plante, der lige er blevet plantet på et permanent sted, ikke tåler vinterfrost særlig godt, men hvis den slår godt til, vil ingen kulde være frygtelig for den. Der er regioner, hvor planten ikke har brug for ly til vinteren.
Vi beskæftiger os med at plante sorter.
Frøplanter af Grunwald clematis skal plantes i åben jord med begyndelsen af sommerperioden, når muligheden for frostretur vil blive helt elimineret. Plantning af en plante i efterårsmånederne, fra september til oktober, er også en god idé. Men før det skal du kigge på vejrudsigten for at undgå froststart i mindst 1 måned. denne tid vil være tilstrækkelig til, at planten kan slå rod og være i stand til at udholde vinterperioden. ved landing skal følgende punkter tages i betragtning.
• Landingsstedet skal være roligt og solrigt, med mulig skygge.
• Hvad angår jorden, stiller sorten ingen krav til den.Det vil være rart, hvis jorden ikke er sur, nærende og let. Ved plantning skal jorden, som du overfører planten, også beriges med humus (2 spande pr. 1 busk) og mineralgødning (100 g superfosfat pr. 1 busk).
• Dybden af plantegraven skal være omkring 50 cm, men hvis jorden er leret, bør dybden være omkring 70 cm. Hvis dit websted er præget af høj luftfugtighed, skal gruben stadig uddybes med 10 cm, og glem ikke at tænke over dræningssystemet for at undgå stillestående vand ... Hvis jorden er lys, skal planten uddybes endnu mere.
• Du skal uddybe rodkraven med 6 cm. Glem heller ikke at bygge et cirkulært hul omkring planten. Efter 1 år skal det fyldes med jord på en sådan måde, at den nedgravede del af rodkraven stiger til 10 cm. Hvis jorden er lys, bliver rodkragens uddybning endnu stærkere.
• Hvis du vil plante flere planter, skal du holde en afstand på 1 m mellem dem.
• Det er også nødvendigt at installere en pinde i midten af plantegraven, som vil tjene som en støtte til vinstokken og klamre sig til den i de første måneder af dens eksistens. Støtten skal derefter fjernes for at undgå beskadigelse af plantens rodsystem.
• Efter plantning skal planten skurres godt og mulkes. Til mulching er kompost godt, du kan tage klippet græs eller tørv. Hvis der falder en stor mængde sollys på planten, kan du skygge planten lidt.
• Efter plantning skal 3 knopper fjernes fra skuddet. Efter cirka 3 uger, når planten har nye vinstokke, vil det være nødvendigt at fjerne 3 knopper igen. På denne måde kan du forbedre plantens vækst, og den vil se meget smukkere ud, når den vokser.
• Mange gartnere installerer en stationær støtte, som er god til at hjælpe planten med at vokse i forskellige retninger, men sorten skal stadig bindes.
Vi tager os af Clematis Grunwald
• Storblomstret Clematis Grunwald har brug for regelmæssig og rigelig vanding. I 1 års levetid har planten brug for 3 spande vand, fra 2 års alder vil 2 spande være tilstrækkeligt.
• Hvis du klemmer tidlige skud, vil plantens blomstring være frodig, men vær forberedt på, at knopperne vil dukke op lidt senere.
• Clematis Grunwald tilhører den 3. beskæringsgruppe. Det betyder, at planten med foråret eller efteråret skal skæres over 2-3 par knopper.
• Hvis planten dyrkes i regionerne i det centrale Rusland, har planten brug for ly til vinterperioden.
• Om sommeren skal jorden løsnes. Du skal også fjerne ukrudt, så de ikke forstyrrer plantens normale vækst.
Clematis Grunwald: anmeldelser af gartnere
Mange gartnere, der dyrker Clematis Grunwald, taler om dens styrke og kravløshed. Mange gartnere er også enige om, at det er bedre at plante Grunwald clematis på en lys baggrund. Kun unge planter har brug for husly. den har god frostbestandighed, så den behøver ikke ly. Hvis du bemærker, at rodhalsbåndet er begyndt at blive set i efteråret, skal du tilføje savsmuld.
Erfarne sommerboere er også enige om nogle andre punkter i væksten af Clematis Grunwald:
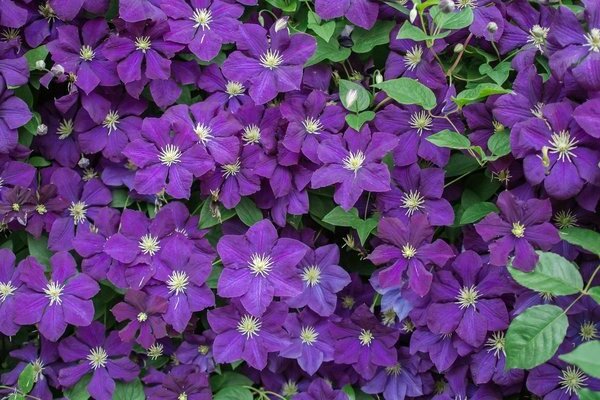
- Storblomstret clematis Grunwald blomstrer i lang tid og rigeligt. Blomsterne har en lilla-lilla nuance. planterne blomstrer fra juni til august. Men selv i efterårsmånederne kan man observere tilstedeværelsen af ensomme blomster.
- For at reproducere en plante skal du bruge frøplanter. Vegetative formeringsmetoder - stiklinger og lagdeling, sjældnere er det nødvendigt at opdele busken. Men at bruge frø virker ikke på nogen måde.
- Voksearealet skal belyses uden træk.
- Planten er let at passe. det er nødvendigt at vande til tiden og gøre stærk beskæring.