Clematis Fru Cholmondeli
Indhold:
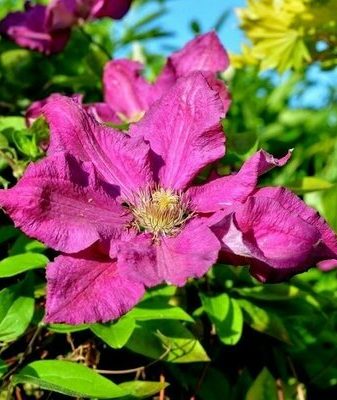
Clematis Fru Cholmondeli: sortbeskrivelse
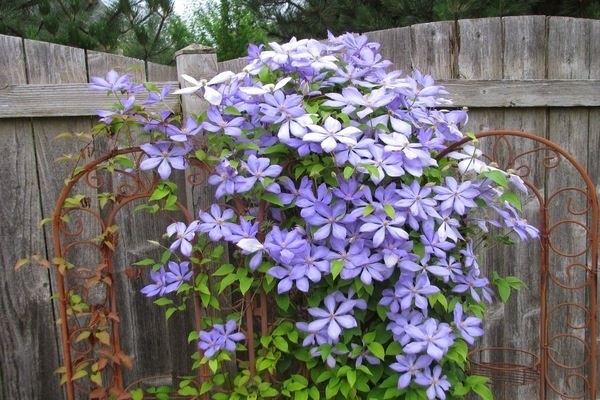
Clematis fru Cholmondeli: foto
Clematis Mrs. Cholmondeli er en flerårig prydplante, der har en lang blomstringstid. sortens værdighed ligger i den rigelige og lange blomstring fra maj til august. På grund af tilstedeværelsen af store lilla blomster ser kulturen godt ud ved siden af stedsegrønne og løvfældende afgrøder. Planten er præget af uhøjtidelig pleje, rigelig og malerisk blomstring. Planten tilhører lianer, hvilket gør det muligt for den at krølle langs understøtninger af naturlig og kunstig karakter. Hvis du passer godt på planten, kan den nå en højde på omkring 3-3,5 m. Plantens blomster er store, diameteren kan nå 25 cm. Knoppernes farve kan være anderledes: lilla, lys blå, lavendel og lilla. Midten af blomsten er fyldt med støvdragere indeni, som er små i størrelse, gul og lysebrun, fløjlsagtig i farven. På et ungt skud har blomsterne en enkel struktur, på voksne er de halvdoble. Plantens blade er små - 5 cm lange, 2 cm brede, aflange, spidse, lysegrønne i farven.
Hvilken beskæringsgruppe tilhører sorten?
Beskæring af fru Cholmondellis clematis kan hjælpe med at regulere blomstringstiden for en given plante. hvis planten tilhører beskæring af type 2, skal den være svag. Denne plantetype blomstrer fra maj til august. Fru Cholmondeli er en beskæring af type 3. Sådanne planter begynder at blomstre i juli til september. I begge tilfælde vil blomstringen være rigelig og langvarig. Planten er en hurtigt voksende hybrid. Efter beskæring har planten brug for cirka 1 måned for at komme sig.
Clematis Fru Cholmondeli Plantning og pleje
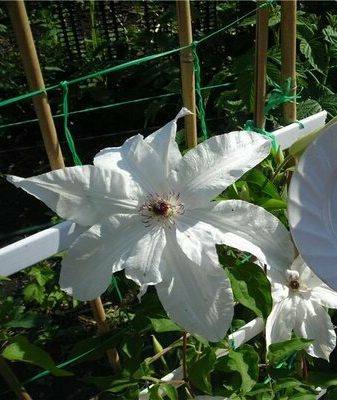
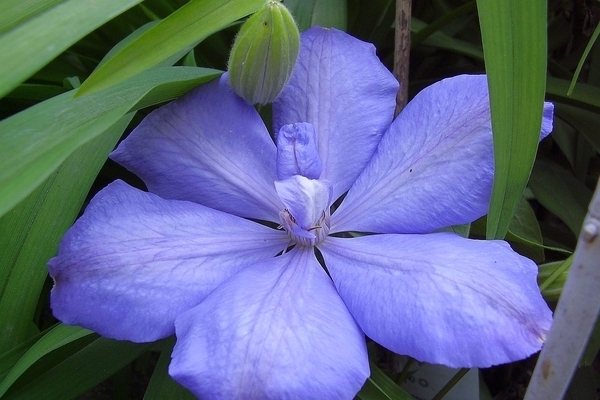
Clematis fru Cholmondeli: foto
Til plantning af clematis er fru Cholmondelli bedst at vælge april eller slutningen af september. På forhånd skal du nøje overveje det sted, hvor du planlægger at dyrke planten. Planten kan vokse godt både på et solrigt sted og i delvis skygge. Glem ikke at oprette en støtte, så planten kan vokse og udvikle sig opad. Inden plantning skal plantens rodsystem være gennemblødt i vand i cirka 30 minutter. I løbet af denne tid skal jorden graves op og laves den nødvendige topdressing. Det er også nødvendigt at deltage i fremstillingen af en ernæringsformel. For at gøre dette skal du tage humus, jord, træaske. Alle ingredienser tages i samme mængde. Det er nødvendigt at forberede en landingsgrav. Den skal have en passende størrelse, så rødder, gødningslag og rodkrave let kan passe der. Helt i bunden af gruben er det nødvendigt at lægge et lag af den tilberedte næringsblanding, placere planten ovenpå og rette rodsystemet. Installer rodkraven, så den er placeret under jordoverfladen. Dette vil hjælpe med at beskytte det mod vinterfrost. Ovenfra er det nødvendigt at tilføje jord og stampe den godt. Efter plantning skal planten vandes rigeligt og beskyttes mod direkte sollys. Fugtig jord skal mulkes, for hvilket der tages savsmuld eller hø. Det vil ikke være svært at passe på planten. Kulturen skal forsynes med vanding, løsne jorden, beskære skud, fjerne ukrudt.Vanding bør være moderat, men regelmæssig, når jorden tørrer. fugtstagnation bør ikke tillades. Dette kan føre til udvikling af svampesygdomme. I det første år efter plantning behøver planten ikke at befrugte. Fra det andet leveår skal gødning påføres i henhold til følgende skema:
- Når planten begynder at vokse, før knopperne vises, er det nødvendigt at anvende gødning, der indeholder nitrogen.
- Når blomsterstanden forekommer, skal kompleks gødning påføres.
- Når blomsterne falder af og væksten slutter, i slutningen af august, er det nødvendigt at anvende gødning indeholdende fosfor og kalium.
De knopper, der vises i plantens første år, skal afskæres. For at forbedre overflod af blomstring i fremtidige sæsoner. Til udvikling af laterale skud er det nødvendigt at klemme toppen. Beskæring kan foretages allerede i plantens første år. i efterårsperioden er det nødvendigt at forkorte alle skudene og kun efterlade den centrale stamme, hvis længde vil nå 0,5 m. planten er mere end 1 år gammel, skal skæres i efteråret, før kulden sætter ind . Alle tørre, beskadigede og syge skud skal fjernes. Derefter udføres en formningsbeskæring. Der er en universel beskæringsmetode, der er velegnet til alle clematis - fjern kun toppen af 1 skud, behold længden på den næste ca. 15 cm. På den måde vil du forynge planten, stimulere dens ensartede blomstring og udvikling af laterale skud om foråret.
Vi udfører forberedende arbejde til vintersæsonen
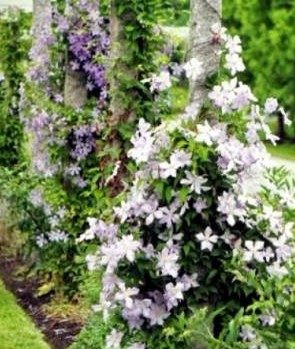
Clematis fru Cholmondeli: foto
Inden han overtager læ for Clematis fru Cholmondelli om vinteren, har han brug for behandling af forskellige svampesygdomme. Det er nødvendigt at behandle både selve planten og området ved siden af med en fungicidopløsning; en lille mængde træaske kan tilsættes ovenpå. Først da kan planten dækkes. Med udseendet af den første frost skal planten dækkes til vinteren. hilling af hovedstammen med tørv eller havejord i bunden af planten. i højden bør beskyttelseshøjen ikke falde under 15 cm fra jorden. Dette kan holde din plante fri for frost om natten om efteråret. Efter lufttemperaturen falder til under 0 grader, er det nødvendigt at tage ly af skud. Til at begynde med skal området ved siden af busken være beklædt med gran, tørre grene eller hø. Clematis skal fjernes fra understøtningen og sænkes til jorden, så planten ligger på plantesubstratet. Hvis skuddet er langt, skal det omhyggeligt vrides. Derefter kan du dække planten med et dækmateriale. Det kan være: tagpapir, forstærket eller boblet plastfolie eller agrofibre. Oven på den resulterende struktur skal du tilføje et lag jord, grene og tørt løv. Derefter tilføjes tagpap eller tagmateriale igen. Glem også at trykke belægningsmaterialet ned med planker, så stærk vind ikke kan beskadige strukturen. Ved faldet af fjersne skal den kastes ovenfra på strukturen. Dette vil give planten yderligere beskyttelse mod lave temperaturer og vind.
Clematis Fru Cholmondeli: reproduktion
Det er bedst at bruge metoden til opdeling af busken, som bruges om foråret eller efteråret. du skal vælge en stærk og veludviklet plante, der når en alder af 5 år. Det er nødvendigt at grave planten ud med rødder, ved hjælp af en skovl er det nødvendigt at adskille et bestemt antal børn, der vil have 2-3 knopper hver. Derefter plantes de som en selvstændig plante.
Sygdomme og skadedyr
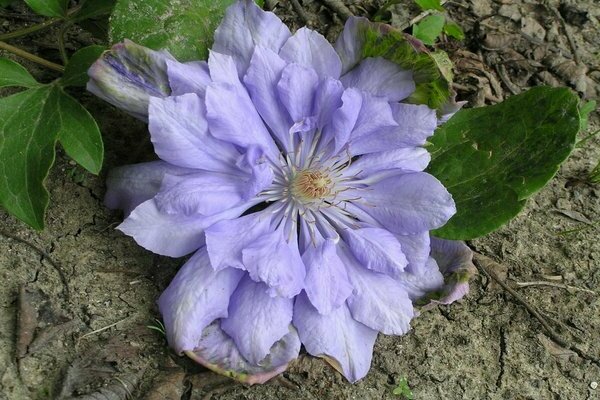
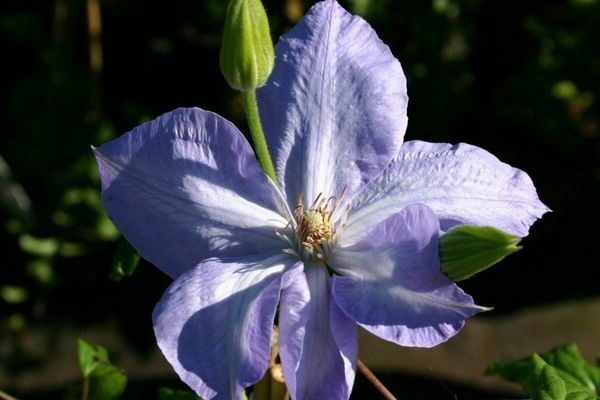
Clematis fru Cholmondeli: foto
Hvis Clematis fru Cholmondelli er plantet for dybt, så er planten i stand til at gennemgå forskellige svampesygdomme.For forebyggende formål er det nødvendigt at justere mængden og kvaliteten af vanding, men samtidig for at forhindre fugtstagnation. Sådanne sygdomme er karakteristiske for mange hybridklematis. Planten kan blive udsat for sygdomme som grå råd, meldug, rust. Hvis du vil undgå sådanne ubehagelige situationer, er det nødvendigt at udføre behandling med fungicidopløsninger 2 gange om året. Planten kan også angribes af bladlus, edderkoppemider og snegle, som skader plantens blade og stilke. Hvis du bemærker udseendet af sådanne insekter, er det nødvendigt at sprøjte busken med insekticidopløsninger.
Fru Cholmondelli Clematis er en smuk prydplante, der er velegnet til dyrkning under forskellige naturforhold. Hvis du planter planten korrekt og sørger for ordentlig pleje, har du ingen problemer med at dyrke planten. På grund af sin lange blomstringstid er den velegnet til dyrkning i et sommerhus.