Støtte til Clematis
Indhold:
Clematis er meget smukke klatreplanter, der simpelthen er uimodståelige under blomstring. Der er dog nogle punkter, der er vigtige at overholde, for at clematis kan udføre sine dekorative funktioner. Et af disse luner er behovet for tilstrækkeligt sollys. Rotsystemet skal dog være i skyggen. Desuden vil vinstokken kun se smuk ud, når den er rettet mod den lodrette støtte. Hvis du lader buskens udvikling gå sin gang, vil stilkene flette sig sammen, og planten dør. Desuden er lodrette hække (lodret støtte) en glimrende og fashionabel løsning inden for landskabsdesign. Med en sådan lodret havearbejde kan du foretage en zonering af stedet, du kan skjule nogle iøjnefaldende hjørner og omvendt tilføje en zest til enhver sammensætning, så valget af støtte skal nærmer sig grundigt.
Yderligere i artiklen vil vi tale om, hvilke understøtninger der er bedre at vælge, hvor de skal få dem, og hvad konstruktionsmaterialet skal være.
Support funktion
Støttestrukturen er en forudsætning for at dyrke ikke kun clematis, men alle klatreplanter.
Vinstamler når normalt 2 eller 3 m, og nogle gange endda 4 m. Stænglernes diameter er imidlertid lille, så tynde skud kan simpelthen bryde under påvirkning af vinden eller under egen vægt af store blomster.
-For det første udføres den dekorative funktion af clematis, som vokser på den foreslåede støtte, her mere effektivt.
-Moderne landskabsdesign er ikke komplet uden lodrette grønne hegn.
- Det er nødvendigt at organisere en lodret støtte også fordi planten har brug for konstant luftcirkulation i blade og stilke. Derudover skal blomsterne belyses jævnt af solen. Dette kan ikke opnås uden at etablere en støtte. En overfyldt vinstok vil til sidst rådne, og der vil blive skabt et gunstigt miljø inde i busken til udvikling af råd, svamp og reproduktion af parasitter.
- Derudover er det meget lettere at pleje clematis, krølle langs en støtte, da du let kan nærme dig planten, dens rødder er frit tilgængelige til vanding, sprøjtning og fodring. Det er lettere at udføre formativ og sanitær beskæring af busken lodret.
Det moderne valg af understøttende strukturer giver dig mulighed for at etablere lyse og usædvanlige former, geometriske former. I efteråret og vintersæsonerne vil en sådan struktur se ikke mindre smuk ud end sammenflettet med clematis i sommersæsonen.
Der er forskellige buer, espalier, hegn til salg, men enhver husstandsblomsterhandler kan bygge en struktur på egen hånd, hvis han har et minimum af værktøjer.
Typer af understøtninger
Der er ingen strenge regler for valg af en støtte og dens form. Gartneren inkluderer fantasi og gør alt efter sin smag og også design af stedet. Nedenfor er de mest almindelige måder at organisere en support på.
-Vægge og facader af huset, samt andre strukturer på stedet kan tjene som en støtte. Dette kan være en veranda, terrasse, stald og andre strukturer.
-Støtter kan være lodrette lange pinde, pæle, lanterner, rør osv.
-Du kan lede vinstokken rundt om forskellige åbninger: vindues- og døråbninger, åbninger i lysthuset.
-Vægge og tage samt buer er meget efterspurgte som støtte.
- Du kan bruge separat bygget strukturer, blomsterpotter, stande eller andre klatreplanter.
- Og endelig kan hegnet, der omgiver stedet, anlægges med blomstrende liana.
Udover at vælge et sted til landing, samt valget af selve bærestrukturen, bør du overveje, hvordan og hvordan du fastgør klatrevinen på den støtte, den tilbydes. Så der er særlige beslag og fastgørelseselementer til at binde voksende stilke.
Da clematis har en meget høj vækstkraft, er det ikke kun nødvendigt at lede de førende stængler om foråret, men også at binde planten gennem hele sæsonen.
Byggemateriale
Der er heller ingen krav til det materiale, hvorfra støtten skal laves. Det kan være ethvert materiale. Hvis du ikke har mulighed for at købe færdige strukturer eller nye materialer, kan du klare dig med de værktøjer, du måtte have efterladt efter at have bygget et hus eller udført reparationsarbejde. Der er helt sikkert ting i skuret, der passer.
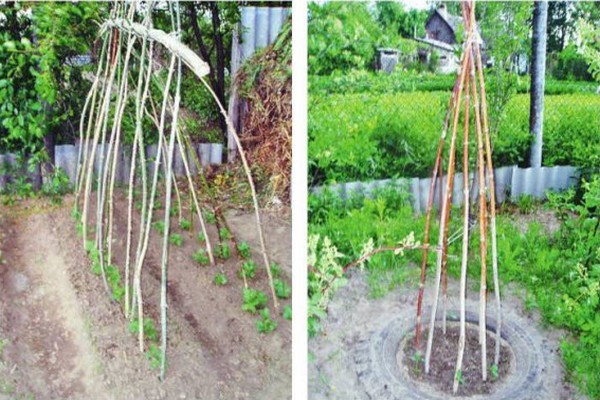
-Kan muligvis have brug for træmaterialer: forskellige brædder, stænger og lameller.
- Stammer og grene af store træer, pilekviste, bambus er også velegnede.
-Metalstrukturer vil tjene i meget lang tid.
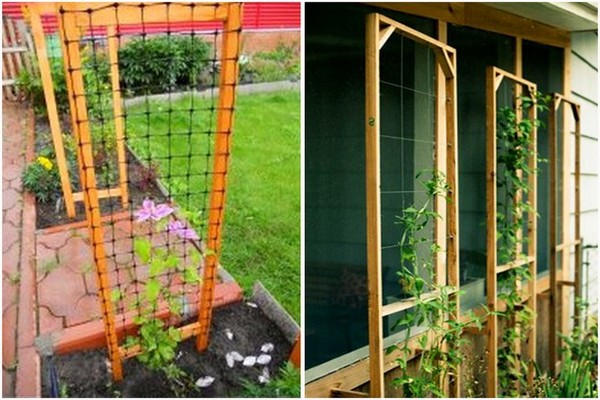
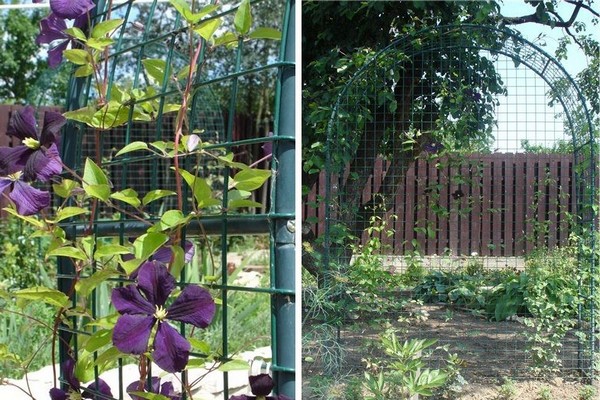
-Net, du har efterladt fra hegnet eller fra andre strukturer, såsom et kædeled, er velegnede til at bygge en understøtning.
-Derudover kan du bruge en ledning af metal, en snor, en fiskelinje, et reb vil også være nødvendigt for at forberede understøttelsesstrukturer.
-Måske vil gamle rammer eller døråbninger komme godt med.
-Nogle bruger endda ting som legegårdsdele, gamle rustne cykler, hjul, scootere og boksfjedre.
Konstruktionstyper
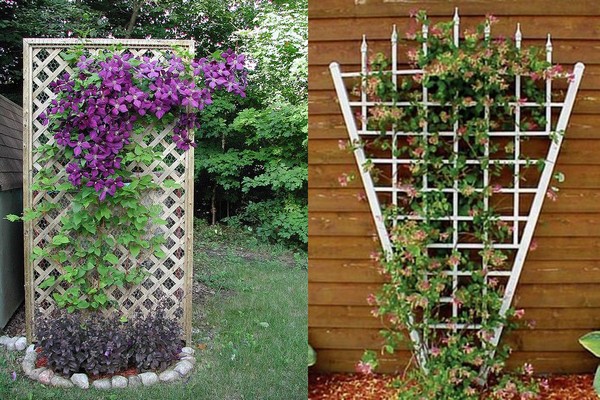
Den nemmeste måde at bygge en træstøtte på, da det ikke kræver særlige færdigheder og evner. Et par træmaterialer er tilstrækkelige, samt en sav, hammer og søm. Hvis værtinden er en kvinde, vil støtter fra forskellige net såvel som andre lette materialer være efterspurgte her.
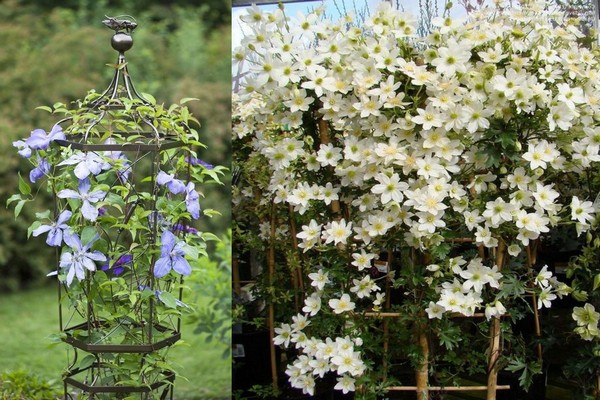
De mest professionelle gartnere, der ved, hvordan man arbejder med metalkonstruktioner og har de nødvendige værktøjer ved hånden, kan bygge smedede og andre strukturer.
Du bør passe på strukturens skønhed, da liana kun kan dække den med et blomstret tæppe først i midten eller slutningen af sommeren. Resten af tiden skal støtten også se attraktiv ud, så det er bedre at male eller lakere den eller dekorere den på en anden måde.
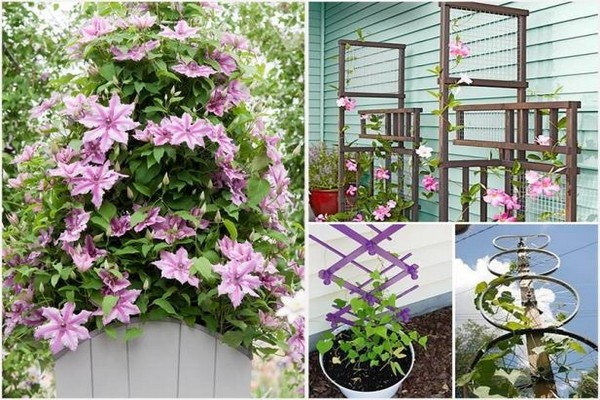
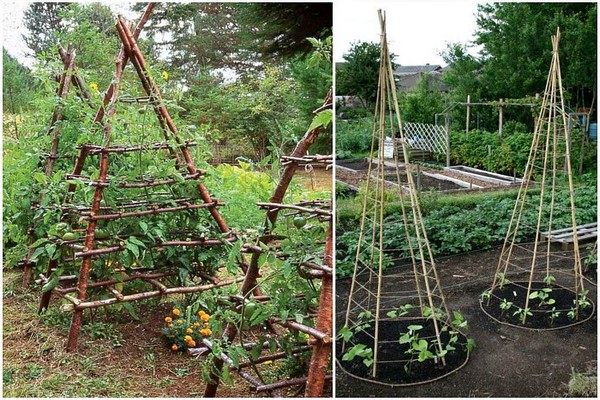
Hvad angår formen, afhænger det hele af gartnerens smag og fantasi. Det kan være en bue, en obelisk, det kan være en espalier, espalier. Det kan være enhver geometrisk figur: en bold, en terning og endda dyrs silhuetter.
Her er det vigtigt at fokusere specifikt på designet af dit websted, på dine personlige præferencer og naturligvis på mulighederne. I mangel af mulighed og ønske om at oprette separate ekstra støttestrukturer kan du bruge de nederste grene af gamle træer eller bare gamle stammer eller store buske, der ikke har brug for godt sollys som dem.
Typer af espalier
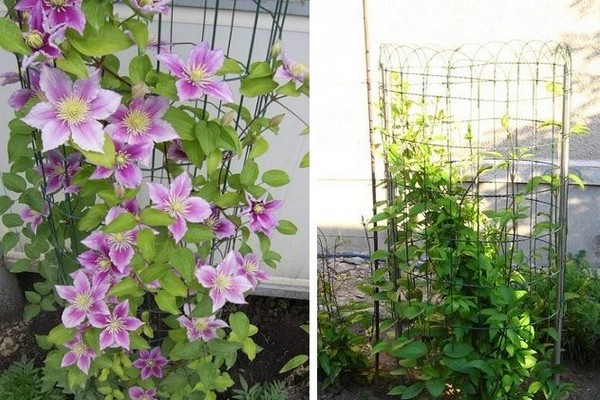
Hvis vi taler om den enkleste måde - det vil være to støttebjælker, rør forbundet med ledning. Lad supporten se så kreativ ud for mig, men den vil opfylde sine funktioner.
For at lave en så enkel struktur skal du bruge to identiske støttepinde - dette kan være et rør, et hjørne, beslag og så videre. Højden på de lodrette understøtninger bør være cirka 2,5 m. Længden her afhænger imidlertid af vinstokke, da hver af dem er forskellig i stilkens længde.
Efter at have noteret en afstand, der er omtrent lig med buskens bredde, og denne vil være omkring en meter, bør søjlerne samtidig styrkes i jorden og hamre dem med en slædehammer.
Yderligere trækkes en tråd eller garn mellem disse to understøtninger, der kan være et gammelt kabel parallelt parallelt. Afstanden skal være omkring 25-30 cm. Således har du allerede det enkleste design klar.
På samme måde kan du lave en bueformet støtte. Du kan også bruge en net-rabitsa i stedet for garn. Du kan lave en slags vævning af garn eller reb.Alt dette er tilgængeligt for enhver gartner, både mand og kvinde.
Vægspalster
Denne mulighed vil være vanskeligere, da du her ikke kun har brug for trælameller, stænger og brædder, men også en hammer og søm, da espalierne skal sømmes fast på væggen i et hus eller en anden bygning. Men en sådan støtte vil se mere dekorativ ud, og desuden er strukturen tilgængelig til fremstilling, selv for en nybegynder.
Det er vigtigt at vælge smukke og identiske lameller, så de ikke ser for omfangsrige ud. Bedre hvis de er 40 mm x 10 mm. Træ -drejning kan have absolut enhver form. Det kan være en ventilator og et rektangel og en struktur i flere lag, og det kan også være i form af et gitter og gitter.
Størrelsen mellem de vandrette og lodrette bjælker her vil være mindst 5 cm. Dette er nødvendigt, så luften cirkulerer frit inde i hele planten, og også så blade og blomster frit kan passere gennem risten. Det skal huskes på, at cellernes maksimale størrelse ikke må være mere end 20 cm, da det vil være nødvendigt at binde de nyligt voksende stilke og blade. Antennerne selv skal også nå støtten.
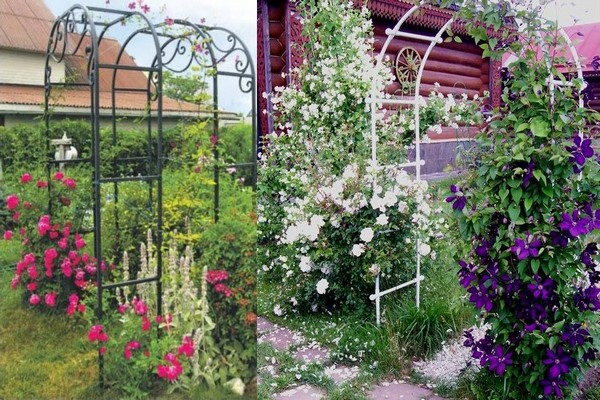
Metalbue
Strukturen af metal er stærkere, mere pålidelig og holdbar. Der er ingen grund til at være bange for, at støtten vil bryde under plantens vægt eller rådne om vinteren under sneen. Det er også nødvendigt at behandle metalstrukturen og male den, så der ikke forekommer rust. En velplejet metalstøtte vil vare meget længe og udføre en understøttende funktion ikke kun for clematis, men også for andre planter.
I øjeblikket kan du se alle former for kunstsmedningsprodukter til salg. Omkostningerne ved et sådant design ville imidlertid være meget høje. En mere økonomisk mulighed er præfabrikerede rammer, men de vil være mindre holdbare.
Hvis du ved, hvordan du bruger en svejsemaskine, vil det ikke være svært for dig selvstændigt at lave en smuk metalform til clematis. Hvis der ikke er nogen svejsemaskine, kan du også bygge en metalkonstruktion af metal ved hjælp af duraluminrør og et metalnet.
Dural rør skal bøjes ind i en bue ved hjælp af specialværktøj. Derefter skal du ved hjælp af skruer fastgøre tværstængerne, også lavet af metal. Den færdige struktur skal være dækket med emalje eller akryl. Så har du brug for et net - et kædeled, der vil overstige rammens dimensioner. Således strækkes masken, bøjer over de forberedte understøtninger og fastgøres der. Hele strukturen skal forankres i jorden, så den ikke falder. Dybden her vil være mindst en halv meter.
Hvis du allerede har nogle rammer tilbage på gården, kan de sikkert bruges til konstruktion af understøtninger, forstærket med et metalnet.
Konklusion
Støtte er nødvendig for enhver klatreplante. Strukturen kan købes i specialforretninger eller laves af dig selv ved hjælp af både improviserede midler og metalmaterialer. Strukturens form og størrelse skal vælges baseret på landskabets stil samt størrelsen på vinstokken, der vil vikle rundt om denne støtte.