Hvad skal du vide om en vellykket efterårsplantning af clematis?
Indhold:
Clematis - det vil være den perfekte blomst for alle elskere af vinstokke. Denne smukke blomst kan også kaldes Clematis eller Knyazhika.
Clematis er flerårige klatrende urteagtige planter, som er dekoreret med store lyse og utroligt smukke blomster, der optræder i stort antal under blomstringen. Blomster har forskellige nuancer, som afhænger af sorten og arten. Farven på klematisblade kan være hvid, blå, lilla, rød og pink. Disse blomster kan gøre hvert hjørne af haven smukt. Hvis du er interesseret i timing, regler, plantningsordninger for denne blomst i efteråret samt funktionerne ved yderligere pleje i et åbent haveområde, så vil denne artikel være nyttig for dig.
Du skal vide, at planten vil vise maksimal dekorativitet under blomstring i det fjerde leveår, og i de første år vil den akkumulere styrke for at takke dig for din tålmodighed med skønheden i dens blomstring i mange år fremover.
Efterårsplantning af clematis: timing
Hvad er den mest egnede efterårsmåned til plantning af clematis?
Den bedste løsning ville være september måned eller begyndelsen af oktober. Det anses for meget vigtigt at overholde disse frister. I tilfælde af for tidlig plantning vil planten begynde at vokse og vil ikke kunne overleve vinteren. Hvis plantet senere, vil frøplanten ikke have nok tid til at rode, og den vil fryse under frost, hvilket vil føre til døden.
Når man vælger tidspunkt for plantning i efterårssæsonen, skal man styres af hvilke klimaforhold i regionen, hvor kulturen vil vokse:
Hvis det er de sydlige regioner i landet, bør plantning udføres i begyndelsen af oktober;
Hvis dette er Ruslands midterzone, kan du plante planter i haven i første halvdel af september;
Hvis det er Sibirien, Ural, Nordvest-regionen, skal landingen udføres i slutningen af august eller begyndelsen af september.
Det anbefales at plante clematis i haven i de sibiriske regioner, Uralerne, Leningrad -regionen og i Middle Lane om foråret. Efterår vil være en passende mulighed for landing i regionerne i Krasnodar -territoriet og Nordkaukasus.
Men hvis alle plantningsaktiviteter udføres korrekt og til tiden og derefter følger reglerne for pleje, kan plantning udføres om efteråret og i koldere områder.
Gartnere tyer meget ofte til hjælp fra månekalenderen, men det er ikke den eneste sandhed, når man planter, det vigtigste er at være opmærksom på vejrforholdene. Månekalenderen for 2019 siger følgende landingsdatoer:
Glædelige dage betragtes: fra 2. til 6. august og fra 17. til 28. i samme måned;
Fra 1. til 5. september og fra 7. til 24. september;
Fra 4. til 12. oktober, fra 19. til 25. og 27. oktober.
Ugunstige dage er: 15.-16. August og 30.-31. 13.-15. og 28.-29. september; 14. og 28. oktober.
Valg af en frøplante til plantning i efteråret:
En frøplante, der vælges til plantning i efteråret, skal være zonet, hvilket betyder, at den er velegnet til den klimatiske zone, hvor dyrkning er planlagt.
Det er værd at bemærke, at frøplanten, der er købt på forhånd, skal opbevares korrekt, hvilket skal tages hånd om på forhånd. Nedenfor vil vi tale om præcis, hvordan frøplanten skal opbevares før plantning i haven.
Køb af en clematis -frøplante skal tages ansvarligt.Kun dokumenterede og pålidelige planteskoler, havecentre med et godt ry og anmeldelser samt specialforretninger kan blive garant for plantemateriale af god kvalitet. Forsøg på at købe billigere frøplanter på ubekræftede steder eller fra private ejere vil føre til køb af varer af lav kvalitet.
Når du køber en frøplante, er det vigtigt at være opmærksom på, om klimatisen tilhører en eller anden beskæringsgruppe. Det kan være 1, 2 og 3 grupper. Disse oplysninger hjælper dig med at passe planten ordentligt og beskære den.
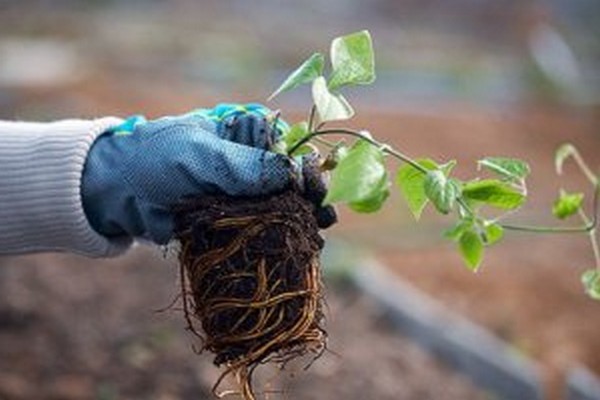
Der er to typer plantemateriale:
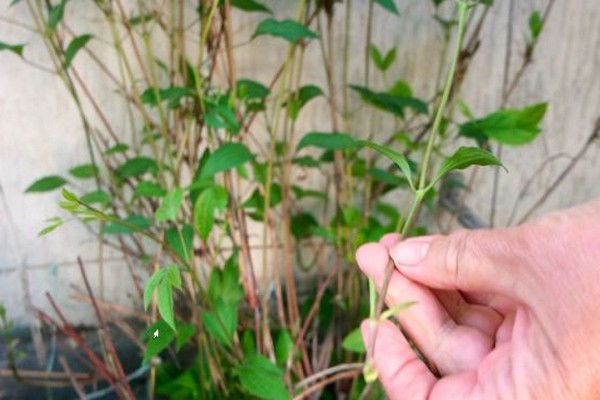
Disse kan være frøplanter i det første leveår med et lukket rodsystem. Som regel sættes de til salg i potter beskyttet af pap.
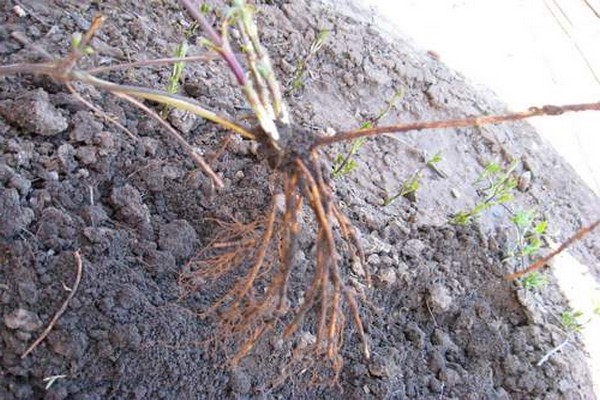
Det kan også være rodfæstede årlige skud med et åbent rodsystem. De vises normalt på tællere i poser, og deres rødder dyppes i tørvejord.
Det anbefales at købe frøplanter med et lukket rodsystem af følgende årsager:
Bedre tolerere opbevaringsperioder før plantning i jorden;
Tilpasning til nye forhold og forankring sker i en kortere periode;
Landing i hullerne er meget lettere og hurtigere.
Men deres pris er lidt højere end dem med et åbent rodsystem.
Plantning af clematis i haven om efteråret:
For at plantningsproceduren er fuldført, er det nødvendigt ikke kun at sænke frøplanten korrekt i hullet, men også at forberede stedet, plantningshullet og frøplanten korrekt.
Dette kan gøres ved hjælp af trin-for-trin instruktioner.
Efter at have plantet en plante på et sted, der vil være det mest egnede og behagelige for det, vil det være muligt at nyde den smukke og frodige blomstring af denne flerårige plante i mange år. Hvis du ikke tager hensyn til dets behov, vil blomstringen være ubeskrivelig, og væksten vil være dårlig og langsom.
Ting at overveje, når du vælger en placering:
Clematis elsker diffust belysning, hvilket betyder, at delvis skygge er det mest egnede sted. Det bør ikke berøres af direkte sollys, især når det kommer til en sort, der producerer lyse blomster, da de mærkbart vil falme under den lyse sol.
Stedet skal beskyttes mod nordlig vind og træk, men luften må ikke stå stille. Det er nødvendigt at skabe betingelser for naturlig luftcirkulation.
Vådområder, lavområder, hvor vand ophobes, og dem, hvor grundvand er placeret tæt på jordoverfladen, eller rettere tættere end 1,2 meter, er ikke egnede til klematis. Sådanne steder vil påvirke rodsystemet dårligt og forårsage råd, der kan føre til, at hele busken dør.
Det er bedre at dyrke planter i forhøjede områder eller i høje bede. Under sådanne forhold vil rødderne ikke være bange for råd.
Metalhegn og andre metalgenstande vil være dårlige naboer til clematis, da de vil have en dårlig effekt på planten i varme dage.
Når du forbereder plantehullerne, er det vigtigt ikke at glemme at holde en afstand på 50 centimeter eller mere fra hegnet eller bygninger.
Hvis busken er plantet ved siden af huset, bør der ikke være et afløb nær dette sted.
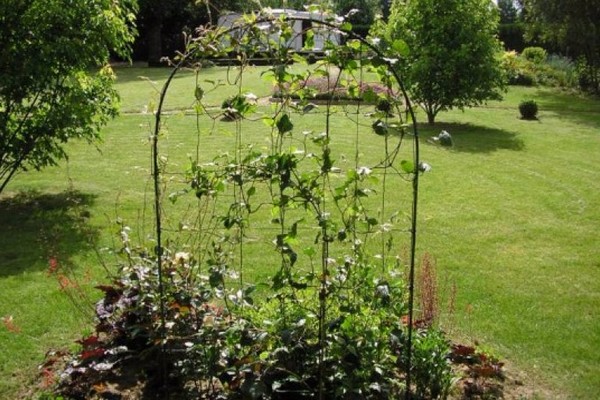
En god idé ville være at plante en plante tæt på et træhegn, et lysthus eller en bue. Her vil de se meget smukke ud.
Når du vælger et sted, skal du huske, at clematis er en klatreplante, hvilket betyder, at den skal bruge en støtte, der skal installeres ved siden af den.
Clematis foretrækker næringsrige, løse, lette, neutrale jordarter med en pH -værdi på 6,7 til 7. Loam er en glimrende mulighed. Lerholdige, tunge og sure jordarter er ikke egnede til denne plante.
Det er vigtigt straks at bestemme det sted, hvor clematis vil vokse, da det ikke er tolerant over for transplantationer. Derfor er det nødvendigt at tage alvoret med valget af stedet, vælge det forkerte sted, planten bliver nødt til at blive transplanteret, hvilket vil have en dårlig effekt på det.
Forberedelse af sted og grube
Forberedelsen af stedet og plantningshullet er et vigtigt trin for korrekt at plante klematis. Forberedende aktiviteter skal finde sted 21 eller 31 dage før ombordstigning.
Hvis der ikke er et område i haven, hvor der var passende jord, kan du selv påvirke sammensætningen ved at forbedre den:
Hvis jorden er tung og leret, skal du grave området op ved at tilføje 1 kvm. meter en spand sand Derudover skal du tilføje lavtliggende neutral tørv i samme proportioner som sand.
Hvis jorden er dårlig, ufrugtbar, skal du befrugte den. Til dette er kompost eller humus egnet. Til 1 kvm. meter forbruger 1 spand organisk stof. Du skal også bruge mineralsk gødning: 40 gr. fosfat, 20 gr. kalium pr. 1 kvm. måler. Ydermere er stedet godt gravet op.
Hvis jorden er for lys og sandet, skal du bruge lavtliggende tørv og kompost eller tørret land. Til 1 kvm. meter 1 spand bruges.
I tilfælde af et højt surhedsgrad i jorden er det nødvendigt at udføre deoxideringsforanstaltninger. Til dette kan du bruge træaske eller dolomitmel. Til 1 kvm. meter bruges 200 gram. Jorden skal graves op. For at reducere surheden kan du bruge specielle deoxidatorer, der sælges i planteskoler eller havecentre. Lægemidlerne skal bruges i overensstemmelse med instruktionerne.
Uanset hvad ovenstående handlinger bruges til at forbedre jordens sammensætning, er det i alle tilfælde efter arbejdets afslutning nødvendigt at løsne og udjævne stedet med en rive. Dette hjælper med at fordele alle ingredienserne jævnt. Derefter skal du vandes godt.
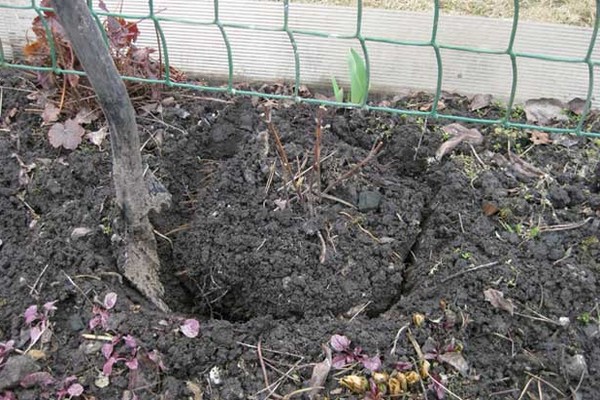
Efter at den generelle forberedelse af stedet er afsluttet, skal du lave et hul, hvor clematis vil blive plantet i efteråret:
Først og fremmest graves et landingshul 60 centimeter bredt og dybt. Det øverste frugtbare jordlag afsættes separat.
I bunden af hullet lægges et drænlag på 15 centimeter tykt ud af brudt mursten, ekspanderet ler, grus eller småsten. Det er især vigtigt i de områder, hvor jorden er tung og leret.
Dernæst tankes plantehullet med en drink af særlig jord og gødning med 2/3. Der anvendes en blanding af det øverste frugtbare jordlag (græstørv kan bruges i stedet), kompost eller humus, lavtliggende tørv og sand. Alle ingredienser blandes godt i lige store mængder. Da en sådan blanding vil være praktisk under plantning, er det vigtigt ikke at glemme at forlade den.
Pas på grundvand. Hvis de er tæt på jordoverfladen, hvilket gør den for våd, skal plantning foregå på en kunstig bakke. For at gøre dette skal brønden være fuldstændigt fyldt med næringsblandingen.
Hvis der ikke blev indført mineraler ved opgravningen af stedet, kan de tilsættes direkte til hullet med en hastighed på 30 gram. fosfat og 15 gr. kalium pr. busk. Hvis de allerede er blevet introduceret, tilføjes træaske-1 glas til hullet.
Efter at gødningen og blandingen er lagt ud i hullet, skal de blandes.
Efter at hullerne er rigeligt vandet, så jorden kan slå sig ned.
Spørgsmålet stilles ofte om afstanden mellem planter i haven. Når man forbereder hullerne, er det nødvendigt at gøre det i en afstand af 1 meter, men hvis der er planlagt en tæt landing, vil et hul på 30 centimeter være tilstrækkeligt.
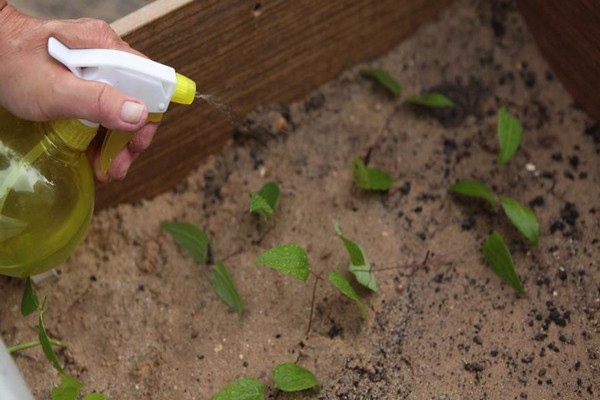
Forberedelse af frøplanten før plantning.
Forberedelsen af frøplanten udføres på dagen for plantning i hullet. Takket være de forberedende foranstaltninger vil tilpasningen af clematis ske hurtigere, og det bliver lettere for det at slå rod.
Clematis med et åbent rodsystem plantes efter følgende regler:
Først og fremmest skæres meget lange rødder med en tredjedel.
Hvis der ses mug eller rådne på rødderne, skal de syge områder skæres til et sundt område ved hjælp af en skarp og desinficeret kniv. Ydermere placeres rødderne i en fungicidopløsning som en forebyggende foranstaltning.
Det vil være meget nyttigt at suge rodsystemet i en rodvækststimulerende løsning.Disse produkter kan købes i din planteskole eller specialbutik. Det skal bruges i overensstemmelse med instruktionerne i vejledningen.
Hvis blade er vokset nær rodkraven, fjernes de.
En frøplante med et lukket rodsystem behøver ikke forberedelse før plantning i åbent terræn. Lette løsninger af den jordiske koma er alt, hvad der er nødvendigt.
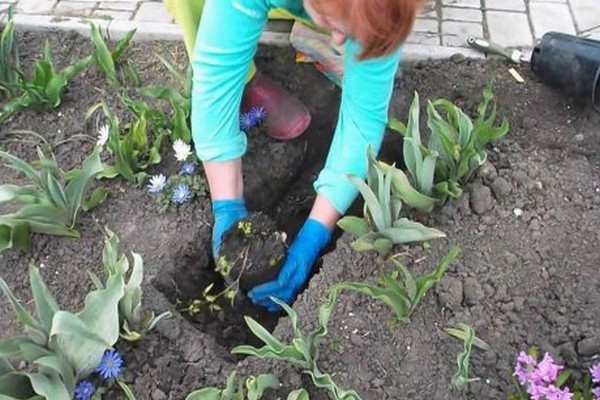
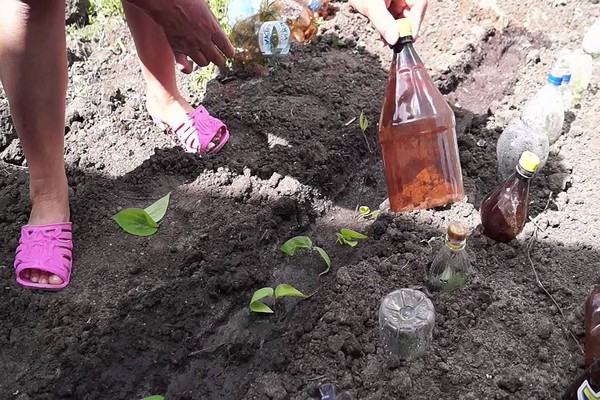
Den korrekte plantning af clematis:
Efter at stedet og plantematerialet er blevet forberedt, såvel som den optimale tid er kommet, kan du plante klimatisbuske i haven.
For at efterårplantningen af clematis -frøplanter med et åbent rodsystem skal være korrekt, kan du bruge følgende skema:
Der laves en lille høj i midten af hullet. Til dette bruges det samme land, som landingsgraven blev fyldt med. Hvis grundvandet er tæt på jordens overflade, skal højen gøres meget højere for at skabe en højde, som blomsten vil vokse på.
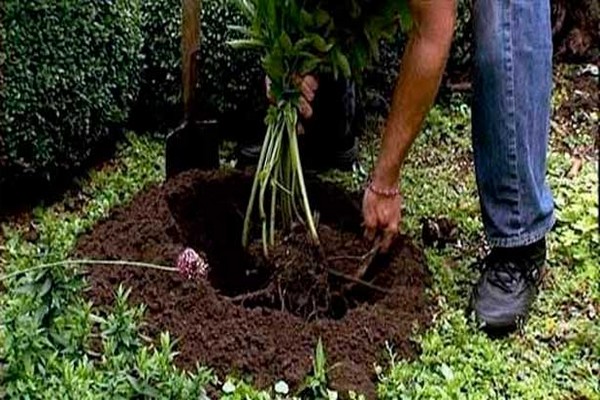
Den spredes forsigtigt frøplanternes rødder og placeres på en bakke, så rødderne, der hænger ned, rettes til forskellige sider. Det er vigtigt at kontrollere, at de er i en jævn position, og at der ikke er knæk.
Rødderne er dækket med det tidligere aflejrede øverste lag jord eller den samme jord, der blev brugt til at fylde hullet. Rodhalsbåndet skal gå under jorden til en dybde på 12 centimeter, og sammen med det sprinkles det første par knopper. Ved at plante en plante på denne dybde påvirker vi styrkelsen af plantens immunitet samt beskytter områder mod frost, der påvirker buskens udvikling.
En støtte i form af en træpind er installeret nær planten for ikke at røre ved rødderne.
Omkring busken komprimeres jorden med dine hænder.
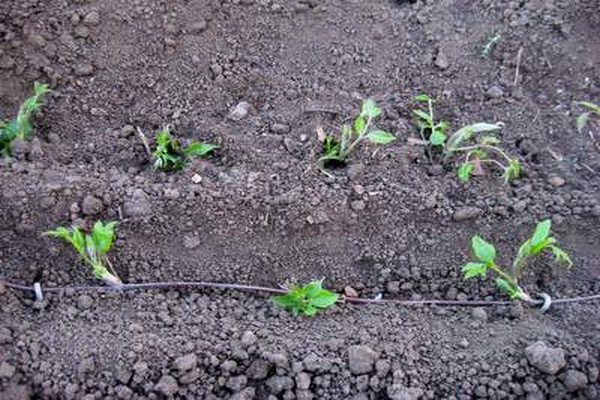
Omkring frøplanten, i en afstand af 10 centimeter, laves en skyttegrav 10 centimeter dyb. Det vil tjene til vanding.
Dernæst udføres vanding ved hjælp af mindst 3 spande under busken.
Det er vigtigt at være opmærksom på, at jorden dækker rodkraven efter vanding. Hvis det sætter sig, skal du drysse det igen til samme niveau.
Efter at clematis -frøplanten er bundet til en støtte.
Jorden omkring planten skal mulkes med et 7 cm lag tørv, humus, kompost eller rådnet savsmuld.
Plantning af clematis med et lukket rodsystem bør være nøjagtig det samme, bortset fra at du ikke behøver at bruge tid på at rette rødderne og lave en høj.
Sådan plejes klematis korrekt efter en efterårsplantning:
Hvad er nødvendigt for at planten lettere kan tilpasse sig og slå rod godt efter plantning? Selvfølgelig er dette den rigtige pleje. I det første leveår i haven har planten brug for kvalitetspleje og tilfredshed med sine behov.
Lad os overveje mere detaljeret, hvad der er inkluderet i pleje af klimatis og hvordan man udfører det korrekt efter en efterårsplantning:
I løbet af de første 14 dage efter at planten er blevet plantet i haven, skal vanding udføres regelmæssigt. Det er nødvendigt at sikre, at jorden konstant er fugtet, men samtidig er der ingen stagnation af vand, da de fører til rådne af rødderne og svampesygdomme. Vanding er vigtig for at rødderne skal vokse. Væsken skal hældes i særlige skyttegrave, der er lavet under plantning. Efter to uger kan vanding helt stoppes, da der allerede vil være nok regn.
Det er vigtigt, efter vandingens ophør, at foretage en dræning i skyttegravene, som ikke tillader fugt at blive hængende, hvilket betyder, at råd ikke udvikler sig.
Rodhalsbåndet bør overvåges både efter den første vanding og efterfølgende udførelse af efterfølgende. Det er vigtigt, at hun ikke er nøgen. Hvis jorden krymper, er det nødvendigt at drysse planten til det ønskede niveau hver gang.
Hvis vejret er varmt og solrigt efter plantning af en plante i efteråret, så skal du oprette en lille skygge til planten, det hjælper det hurtigt med at tilpasse sig og slå rod.
Omsorgen omfatter også mulching af stammecirklen på en plante plantet i efteråret. Takket være denne procedure vil fugt blive i jorden længere, hvilket er meget godt for rodsystemet. Derudover vil det tjene som beskyttelse mod underkøling af rødderne. Mulch kan være fra tørv, rådnet savsmuld, kompost og halm. Laget skal være 7 centimeter tykt og placeret fem centimeter fra bagagerummet.
For at clematis ikke fryser og ikke dør i vinterens kolde årstid, er det nødvendigt at beskytte det med et læ. Dette bør især gøres på territorierne i Moskva-regionen, Sibirien, Ural og Nordvest-regionen. Det er nødvendigt at udføre dækningsforanstaltninger, når de første frost begynder. Inden du påfører dækmaterialet, skal du dække jorden med mulch med et lag på 15 centimeter, og derefter dække clematis med agrofibre eller grangrene.
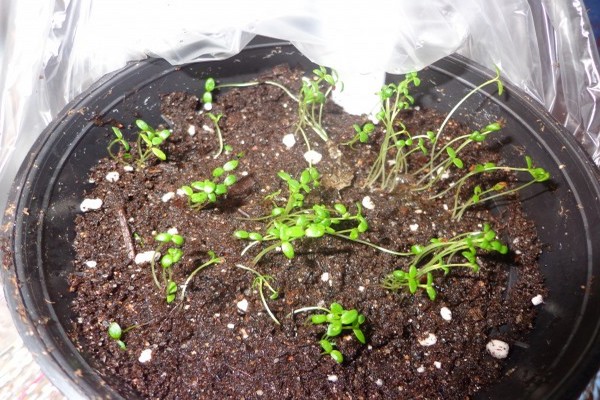
Clematis er en smuk blomst, hvis skønhed kan nydes igen og igen, og vækstprocessen er meget interessant. Planten kan formeres på flere måder: ved hjælp af stiklinger, opdeling af busken, lagdeling og naturligvis ved hjælp af frø. Med sådanne muligheder vil hver gartner kunne vælge den mest bekvemme mulighed for ham. Plantning og pleje af clematis er ganske enkel og kræver ikke særlige færdigheder og erfaring. Det er vigtigt at overholde den korrekte landbrugsteknologi, og dette vil være nok til at beundre planten i mange år.