Sådan transplanteres clematis om foråret til et andet sted.
Indhold:
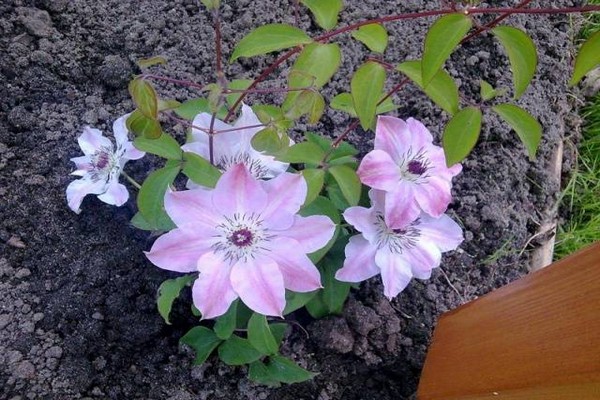
Clematis er ret lunefuld, men samtidig så storslået, at langt de fleste gartnere er klar til at give disse planter de mest behagelige forhold for at kunne beundre deres blomstring. Clematis er vinstokke, varmekærlige planter, deres sundhed og blomstring afhænger direkte af, hvor godt du plejer det, og pleje begynder med en kompetent plantning. Jo mere omhyggeligt du forbereder dig på plantearbejde, jo flere chancer har planten for hurtig rodfæstning og aktiv vækst. I denne artikel vil vi tale om, hvordan man vælger og bevarer clematisplanter før plantning, hvordan man vælger og forbereder et sted til plantning af en plante, og også hvordan man plejer clematis, så de vokser godt og blomstrer frodigt.
Valg af clematis -frøplanter.
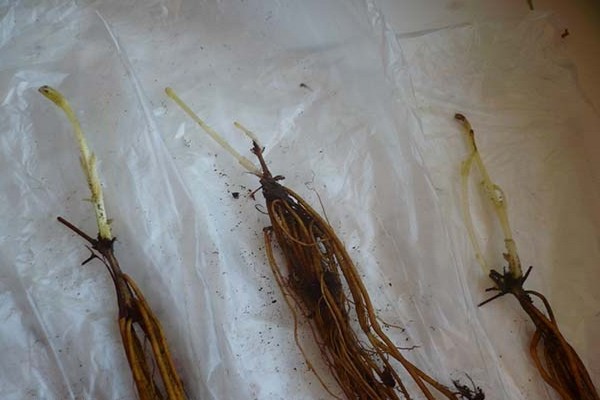
I slutningen af vinteren dukker et stort udvalg af klematisplanter op i blomsterbutikker og havecentre. Når du vælger en plante, skal du sørge for, at pakken indeholder navnet på sorten, for for at kunne vokse klematis skal du kende dens beskæringsgruppe. Frøplanter kan sælges både i hvilende form og med allerede blomstrende blade.
Sovende frøplanter sælges normalt i poser, der er fyldt med tørv. Nogle gange er de pakket i plastfolie sammen med en jordklump. Hvis du køber en sådan frøplante, skal den pakkes ind i fugtigt papir og i en anden pose (efterlade et hul til ventilation) og opbevares i køleskabet i grøntsagsrummet. Undersøg clematis med jævne mellemrum, og så snart knopperne vågner og begynder at vokse, plantes frøplanten i en plastik-, tørv- eller papirpotte (så den let kan skæres, når planten transplanteres til et permanent sted) og placeres i lys på et køligt sted (en glaseret altan ville være ideel, hvor temperaturen ikke falder under nul).
Frøplanter, der allerede har blade i blomst, sælges i små krukker med en installeret støtte til stammen. Hvis du køber lige en sådan frøplante, skal du ikke gøre det længe før plantning, det er bedre at købe det om 10-14 dage og igen placere det i et lyst, men køligt rum. I varmen vil clematis begynde at vokse aktivt, og dette kan komplicere transporten til landingsstedet. Hvis vækstprocessen alligevel er begyndt, skal du under ingen omstændigheder klemme clematisen, dens stamme er en fleksibel vinstok, så prøv at rulle den til en ring og fix den under transport.
Den mest gunstige tid til plantning af clematis.
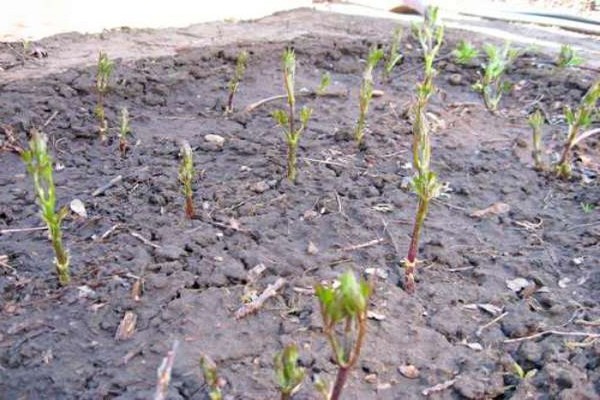
Når du vælger det bedste tidspunkt at plante clematis i jorden, skal der tages flere faktorer i betragtning. Først og fremmest bestemmes tidspunktet for plantning af de klimatiske træk i dit område. Jorden skal varme nok op, i områder med et varmt klima kan du plante clematis i april, og i køligere områder er det bedre at vente til maj. Under alle omstændigheder skal clematis plantes, før de begynder at vokse aktivt, hvorfor det anbefales at opbevare dem på et køligt sted indtil plantning. Sorter, der blomstrer tidligt, bør plantes to til tre uger tidligere end andre.
Hvis du har købt clematis med sovende knopper, så plant den i april, så snart jorden varmes op. I tilfælde af tilbagevendende frost, dæk frøplanten med geotekstiler. Hvis du har købt en frøplante med blade, skal du plante den, så snart nattefrosten stopper.
Spørgsmålet opstår ofte, når det er nødvendigt at plante clematis, om foråret eller om efteråret.Om foråret kan du plante alle slags clematis i enhver region, selv i områder med hårde vintre og korte somre, når plantning om foråret, vil clematis have tid til at slå rod og tilpasse sig godt. Plantning om efteråret er mulig i områder med et varmt klima, hvor vintrene er korte og milde.
Ved plantning om foråret er det tilrådeligt at udføre alt arbejdet senest i midten af maj.
Når du køber en frøplante med et åbent rodsystem, skal du plante den så hurtigt som muligt. Hvis du køber clematis i en gryde, kan du beholde det et stykke tid før plantning, det vigtigste er ikke at tillade aktiv vækst.
Baseret på alt det ovenstående kan det hævdes, at det bedste tidspunkt at plante clematis stadig er forår, april eller første halvdel af maj.
Plantningsregler.
Så du har valgt og købt frøplanter, nu skal du finde ud af at plante clematis, så der i fremtiden ikke vil være problemer med det. Du er nødt til at vælge et sted under hensyntagen til plantens præferencer, forberede plantningsgraven og næringsblandingen og faktisk plante. Sørg for, at clematis har en støtte, som den vil vokse langs, og angiv også beskæringsgruppen, det er vigtigt at vide, om clematis blomstrer på unge grene eller på sidste års skud.
Når du vælger et sted til clematis, skal du være særlig forsigtig. Disse planter tolererer ikke altid godt at transplantere godt, så det er bedre at finde et passende sted for det første gang.
Clematis har brug for solskin, men direkte sollys undgås bedst i dagtimerne, så plant det, så planten er i halvskygge ved middagstid.
Clematis grene er lange og temmelig skrøbelige, så de skal beskyttes mod vinden.
Plant ikke clematis i lavtliggende områder, eller hvor grundvand strømmer tæt på overfladen. Under alle omstændigheder skal du placere et drænlag i hullet, når du planter.
Da clematis har brug for støtte, vil du sandsynligvis lande det ved siden af et lysthus eller en væg i huset. Afstanden fra bygningen skal være mindst en halv meter. Støtten, som clematis vil krølle på, skal installeres på forhånd, da hvis du installerer det efter plantning, kan du forårsage mekanisk skade på planten.
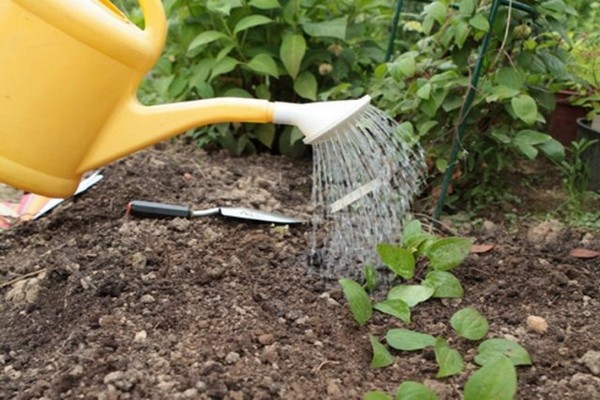
Før plantning skal du grave et hul på cirka 60 cm bredt og dybt. Hvis du planter flere planter, skal afstanden mellem dem være mindst halvanden meter. Dræning skal lægges i bunden, mindst femten centimeter høj. For at gøre dette kan du købe udvidet ler eller bruge byggeaffald (brudt mursten, grus). Hæld en bakke med forberedt næringsrig jord på dræningen (du kan købe jord til clematis i butikken), placer frøplanten ovenpå og ret forsigtigt sine rødder. Rodhalsbåndet skal være placeret på jorden eller lidt lavere; det bør ikke efterlades på overfladen. Fyld derefter hullet med jord, stamp det forsigtigt, vand klematisen godt og byg en lille baldakin, da planten i første gang ikke vil drage fordel af hverken den lyse sol eller kraftig nedbør.
Hvis den clematisfrøplante, du har købt, er i en beholder og allerede har blade og skud, så foregår plantningsprocessen den samme, med den eneste forskel, at rodhalsbåndet skal begraves lidt mere, cirka 5-7 cm (jo større frøplanten, jo mere uddybes rodhalsbåndet).
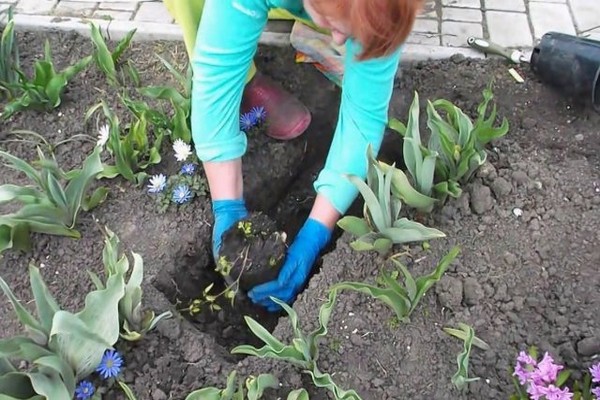
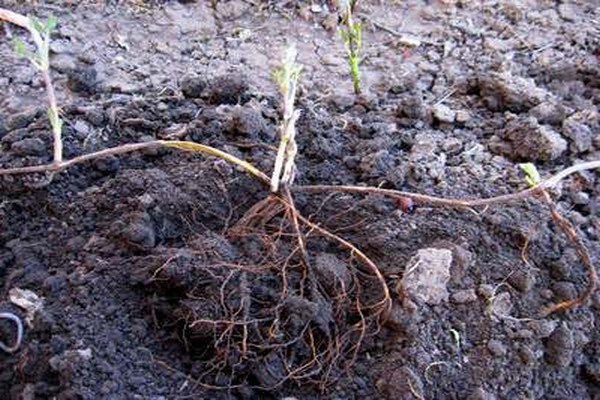
Vi transplanterer clematis til et nyt sted.
Som vi sagde tidligere, tolererer clematis ikke altid transplantation til et nyt sted godt, så denne procedure bør kun udføres i nødstilfælde eller ved opdeling af en busk. Den mest passende periode vil være forårsperioden, når jorden er blevet varm og vejret er konstant varmt. Vælg et sted, og forbered plantehullet ved at gøre det lidt dybere. Du genplanter en voksen plante med et større rodsystem, der vokser dybere. Plantning foregår på samme måde, men der skal lægges maksimal vægt på at grave bushen ud fra det forrige sted.Jo større jordkuglen er, desto mindre er sandsynligheden for at du beskadiger rødderne, så tag dig god tid og vær meget forsigtig. Når du har flyttet planten til et nyt plantehul og dækket den med jord, vandes den rigeligt, og efter 3-4 dage tilføjes topdressing for at fremskynde rodprocessen.
Sådan plejer du clematis.
Hvis du lander korrekt, garanterer dette en 50% succes. Nu er det tilbage at studere alle nuancer af klematispleje og beundre blomstringen.
Om foråret begynder alt med fjernelse af det beskyttelsesrum, der beskytter klematis mod frost om foråret. Du kan ikke undvære ly, clematis er meget termofile, og du skal pakke enhver plante ind til vinteren, uanset sorten. Du kan fjerne læet, når sneen er smeltet, men det er bedre at vente på varmt vejr, og inden det åbner planten lidt efter lidt på solrige dage, hvilket giver ventilation. Efter den endelige fjernelse af huslyet er det om nødvendigt nødvendigt at udføre sanitær beskæring og derefter for at forhindre behandle kronen og jorden med lægemidler, der beskytter planten mod mulige sygdomme og mod invasion af skadedyr. Samtidig udføres den første fodring, for hvilken det er værd at bruge ammoniumnitrat.
En voksen clematis har brug for to eller tre vandinger om ugen, hver med et volumen på cirka fem liter. Det er meget vigtigt at holde jorden i stamcirklen moderat fugtig og ikke lade den tørre ud. Men på samme tid kan du ikke misbruge vanding og arrangere en sump under busken. En dag efter vanding skal jorden løsnes, mens ukrudt fjernes. Efter at der er gået tre måneder efter plantning, vil clematis endelig vænne sig til det, så løsningen kan stoppes.
I hele sæsonen efter plantning af clematis behøver du ikke fodre den, da du har brugt nok gødning og næringsstoffer under plantningen. Og fra det andet år om foråret er det nødvendigt at anvende gødning indeholdende nitrogen, og i den spirende og blomstrende periode har clematis brug for kalium-fosforgødning.
Beskæring udføres om foråret, før saftstrømmen begynder. Reglerne for beskæring afhænger af, hvilken sort din klematis tilhører, og af hvilke skud den danner blomsterstande. Efter den første overvintring er det nødvendigt at skære grenene til den første knop, dette vil have en stimulerende effekt og fremskynde væksten af unge skud.
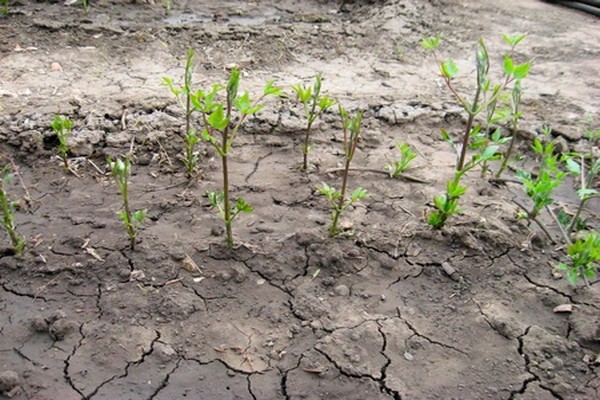
Mod slutningen af foråret vokser clematisskud meget aktivt og tilføjer cirka ti centimeter hver dag. Det er nødvendigt rettidigt at binde grenene til støtten helt fra bunden for at beskytte dem mod mekaniske skader.
Forebyggende sprøjtning med specielle præparater hjælper med at reducere risikoen for at udvikle en infektion eller det uventede udseende af en skadedyrskoloni. Ved beskæring skal alle blade og skud brændes. En god effekt opnås ved at sprøjte clematis med Fundazol eller en svag opløsning af kaliumpermanganat. I bunden af vinstokken anbefaler erfarne gartnere at plante stærkt ildelugtende planter, som ikke kun skygger rødderne for solens stråler, men også skræmmer skadedyr væk med deres skarpe lugt. Plant morgenfruer, mynte, salvie eller calendula ved siden af clematis, dette vil ikke kun være nyttigt, men også smukt.
At lande klematis det er ikke svært i haven, plantningsordningen adskiller sig ikke fundamentalt fra andre plantearbejder. Det er meget vigtigt at vælge det rigtige sted, ikke at beskadige rodsystemet under plantningen og give planten god pleje. Resultatet af dit arbejde bliver en storslået klematisblomst, som du kan beundre fra år til år.