Transplantation af en havehortensia fra et sted til et andet.
Indhold:
Hortensia er en smuk flerårig busk, der for nylig er blevet meget populær. Det er meget ofte blevet brugt i landskabsdesign til at dekorere din have. Denne busk har mange fordele blandt sine stipendiater. For det første blomstrer den i meget lang tid, for det andet vokser den ganske stor, og i den tredje er den slet ikke finurlig. Det kan formeres på flere enkle måder, hvorefter det vil begynde at vokse hurtigt, aktivt udvikle sig og blomstre med smukke, store blomsterstande. Hans farver kan være helt forskellige, hvide, lyserøde, røde og endda blå, og intensiteten af farven afhænger af, hvor sur jorden er i dit område. Det er meget vigtigt for hortensiaer at blive varme i et godt oplyst område, og de elsker fugt meget, så vanding bør være moderat og regelmæssig. Det er fra hvor på dit websted det vil vokse, at dets blomstring afhænger. Hvis du har problemer med at blomstre, blomstrer lidt, blomstrer sent eller meget få blomster, tyder alt dette på, at du ikke har valgt det rigtige sted, og busken skal transplanteres hurtigst muligt. Hortensia transplantation procedure vil blive diskuteret i denne artikel.
Det bedste tidspunkt at transplantere
Efteråret er perfekt til transplantation af hortensiaer, helt i begyndelsen. I dette tilfælde vil busken have tid til at slå rod og blive stærkere, før de første frost begynder. Hortensia kan også transplanteres om foråret. April er god til dette. Det var på dette tidspunkt, at jorden allerede var opvarmet nok til at starte en transplantation. Enhver tid til transplantation er lige så velegnet til denne busk, men har sine egne nuancer. Efteråret er en temmelig farlig tid i den forstand, at buskene simpelthen ikke har tid til at slå rod, fordi frosten kan starte for tidligt. Hortensiaen har mange frostbestandige sorter, men det giver ingen garantier, fordi planten stadig er svækket på dette tidspunkt. Buskene skal være forberedt til vinteren og ordentligt isoleret. Mulch og dæk med cellofanfolie. Men efter efterårstransplantationen begynder busken i foråret at blomstre. Men med en forårsblomstransplantation kan du kun vente til det næste år.
Forårstransplantation
Forårstransplantationen har også sine egne egenskaber og bekymringer. For eksempel kan forårsfrost vende tilbage på det forkerte tidspunkt. På grund af dette kan plantens rodsystem fryse lidt. Hvis dette skete, er der kun to muligheder, enten genopretter det sig over tid, eller også dør det simpelthen. Med muligheden vil restaurering af blomstring og så videre være meget senere end forfaldsdatoen. Det er på grund af denne fare, at de fleste gartnere vælger begyndelsen af efteråret til at transplantere buske. Om sommeren er det generelt ikke tilrådeligt at transplantere en busk, da planten allerede bruger meget energi på blomstring, så det vil være meget vanskeligere for den at komme sig og slå rod på et nyt sted. I tilfælde af en sådan transplantation kan busken stoppe med at blomstre helt i flere år. Det er om sommeren til forplantning af hortensiaer, at det er bedst at afskære lag og stiklinger, så får de tid til at slå rod og er klar til efterårsplantning.
Selvfølgelig kan hortensia i foråret stadig transplanteres, men i dette tilfælde skal alle nuancer tages i betragtning. Hvis alt er udført korrekt, vil buskene godt kunne slå rod, og i den nærmeste fremtid vil de glæde dig med fremragende og smuk blomstring.
Hvis transplantationsprocessen udføres korrekt, vil planten komme sig hurtigt nok og vænne sig til det nye sted.Men glem ikke, at du skal transplantere busken, før knopperne begynder at blomstre på den.
Sådan sidder du
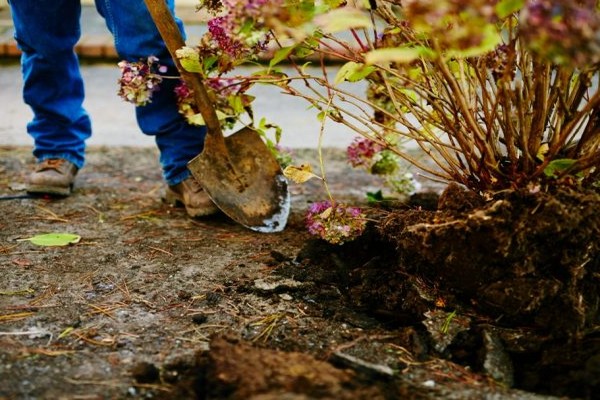
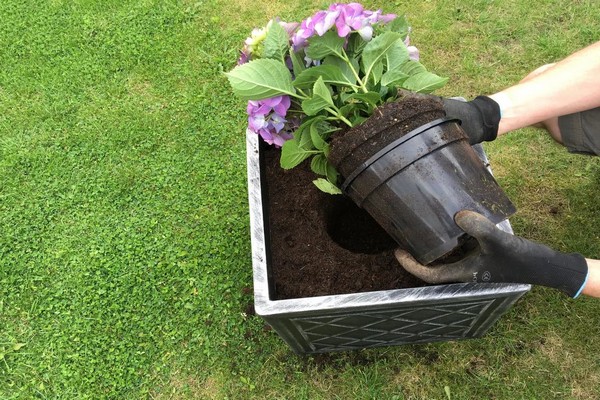
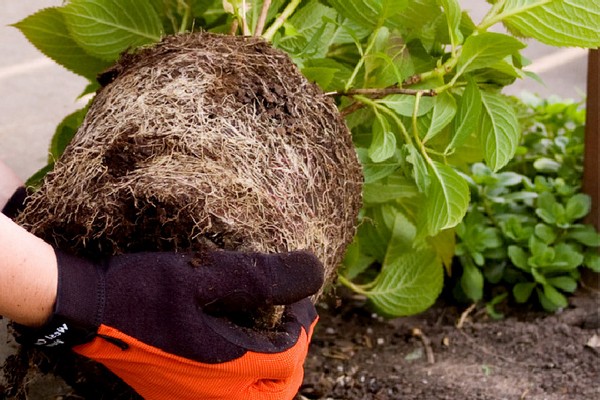
Der er flere måder at transplantere hortensiaer på: dette kan gøres som en hel busk. Dette gøres hovedsageligt, når planten kombineres med andre blomster eller transplanteres til et andet sted under mere egnede forhold. For at gøre dette forberedes en plantningsgrav på forhånd på et nyt sted, busken graves omhyggeligt helt ud for ikke at beskadige rodsystemet, og sammen med den gamle jord på rødderne omarrangeres den til en ny grube. Derefter dækkes de med jord, stampes godt og vandes rigeligt. Du kan også transplantere en hortensia ved at dele busken. Til dette tilberedes der også i første omgang nye gruber. En stor busk graves op og opdeles i flere dele, så hver del har et tilstrækkeligt kraftigt rodsystem. Efter opdeling kan nye buske straks plantes i plantegruber. Under plantningen skal plantens rødder omhyggeligt rettes op. Og glem ikke, at rodhalsbåndet under ingen omstændigheder skal begraves. også hortensia kan let plantes ved stiklinger. I dette tilfælde skal stiklinger forberedes på forhånd. For at gøre dette, fra årlige skud, skæres de i en længde på ikke mere end 15 cm. Der må ikke være mere end 4 blade på hver stikling. Efter skæring skal stiklinger stå i vandet, indtil de har rødder. Efter deres udseende skal stiklinger plantes i jorden og skal dækkes for at skabe det klima, de har brug for. Hver dag skal huslyet fjernes og stiklinger ventileres. Efter et stykke tid vil de slå rod, og læet kan fjernes helt.
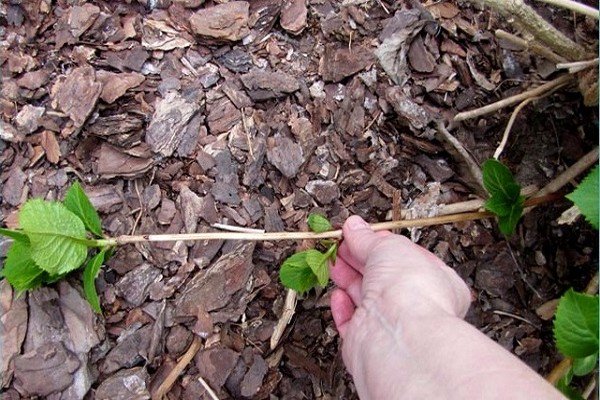
Hortensiaer kan også formeres ganske enkelt ved lagdeling. For at gøre dette har du brug for i begyndelsen af foråret, før knopperne blomstrer, de nederste unge skud nær busken er bøjet til jorden og cirka midt i skuddet er de dækket med jord. Jorden, der hældes på skuddet, skal altid fugtes. Næste år vil stiklinger allerede give deres skud, og det kan afskæres fra en voksen busk og transplanteres til et nyt sted.
Sådan forbereder du en plante korrekt
For at transplantere en plante skal du på forhånd beslutte, hvor den vil vokse i mange år. For at gøre dette skal du først og fremmest være særlig opmærksom: belysning. Hortensia elsker lys meget, derfor bør det vokse på et lyst sted, men lyset skal være diffust, ikke direkte. Direkte sollys skader kun planten, og dette påvirker den fulde udvikling og blomstring. Og effekten er langt fra den bedste.
Hortensia elsker varme meget, så du skal også være opmærksom på temperaturen. Selv med de svageste frost kan buskene begynde at fryse lidt, så hvis perioden med koldt vejr er kommet, skal buskene dækkes.
Du bør også være opmærksom på sammensætningen af jorden på dit websted. Hortensia er meget glad for sure jordarter. Og jo mere sur jorden er, jo mere intens bliver blomsterstandens farve. For det meste blomstrer hortensia med hvide blomster, men farven kan let ændre sig fra jordens sammensætning. Også over tid i løbet af sæsonen kan blomster også gradvist ændre deres farve, hvilket i sig selv er et originalt og usædvanligt fænomen. Om jorden er sur nok på dit websted, kan forstås ved buskens blomstring, og hvis noget ikke er nok, kan dette hurtigt rettes ved at tilføje den nødvendige gødning til det.
Fugt er også meget vigtigt i dyrkning af hortensiaer. Grundlæggende er luftfugtigheden altid standard, selvom hortensia elsker fugt meget, bør den vandes sparsomt. Og bestemt bør vand ikke stagnere på stedet. Dette truer med, at plantens rødder meget hurtigt kan begynde at rådne.
Selve transplantationsprocessen
Når du begynder at genplante din plante, skal plantehullet forberedes på forhånd. Præcis hvilken størrelse din pit vil være i en lige linje afhænger af, hvor gammel busken vil blive plantet.Hvis din busk er yngre end tre år gammel, er et halvt hul både bredt og dybt nok til det. Men hvis busken er ældre end tre år, men yngre end fem, skal hullet være omkring en meter. Nå, hvis buskene er ældre end fem år, skal hullet graves omkring halvanden meter.
Gruben tilberedes altid på forhånd og halvt fyldt med en specielt forberedt blanding af jord, sand, tørv og sort jord. Det er bydende nødvendigt at lægge dræning i bunden af graven.
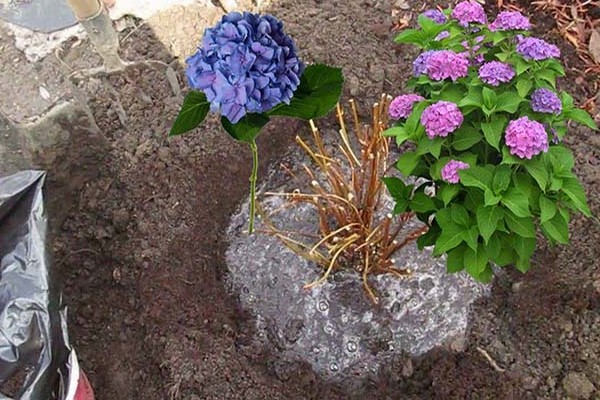
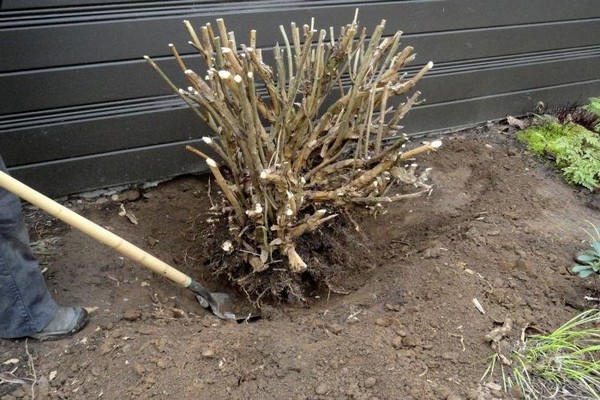
Når du har besluttet, hvilken busk du vil transplantere, skal den i foråret skæres af, så den ikke er tyk. For at busken let kan transplanteres senere, kan unge skud simpelthen bindes sammen. Jorden omkring busken skal graves forsigtigt ind for ikke at beskadige plantens rødder. Det er nødvendigt at trække busken ud og transplantere den sammen med jorden, som vil være på plantens rødder. Busken placeres i midten af plantegraven, omhyggeligt dækket med jord og komprimeres, hvorefter den skal vandes rigeligt. Igen, glem ikke, at du ikke kan begrave busken.
Hvis hortensiaen transplanteres om foråret, er det ikke nødvendigt at vande den umiddelbart efter transplantationen. Dette kan kun gøres efter et par dage. Ved en forårstransplantation er denne betingelse nødvendig, så rodsystemet ikke overkøler. I princippet er hortensia -transplantationen ikke meget forskellig fra hinanden, men foråret har stadig sine egne nuancer, som efterårets plantning ikke har: buskens skud behøver ikke at blive afskåret, beskæring udføres kun for de grene der allerede er tørret op. I efteråret skal du vande planten umiddelbart efter transplantationen, men om foråret skal du vente et par dage og først derefter vande planten.
Om foråret og i princippet i efteråret efter transplantationen er det ikke nødvendigt at foretage yderligere befrugtning. Dette vil provokere væksten af nye skud, og den endnu ikke stærke plante, i stedet for at bruge energi på at slå rod og slå godt rod, vil blive distraheret af disse skud. Derfor vil alle processer forekomme senere.
Når du har transplanteret dine buske, skal du organisere regelmæssig vanding, det skal være to gange om ugen. Vandet skal altid have normal, varm nok temperatur, for koldt vand vil kun stresse planten. Alle planter skal vandes enten om morgenen eller om aftenen. Det er bestemt umuligt at gøre dette i løbet af dagen, for i den varme sol kan planten brænde. Det er bydende nødvendigt at løsne jorden omkring busken mindst en gang om ugen. Dette gøres for at ilt kan strømme til rodsystemet. Jo oftere du løsner jorden, desto sjældnere skal du fjerne ukrudt fra den. Mulching er også godt til dette. Umiddelbart efter transplantation af hortensia er der absolut ikke behov for fodring, men mens knopperne begynder at danne, skal der stadig påføres gødning. Komplekse mineralgødninger, der sælges i enhver haveforretning, er perfekte til fodring på nuværende tidspunkt.
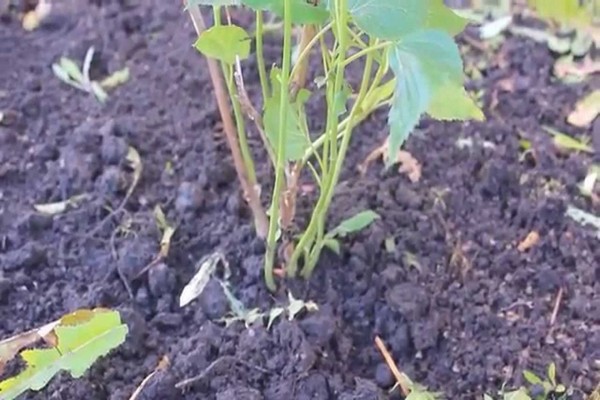
Når den transplanterede plante giver de første unge blade, kan vi roligt antage, at den er fuldstændig rodfæstet, har slået rod og føles godt. Derfor vokser den perfekt på et nyt sted og glæder dig med dens lange og rigelige blomstring.