Hvorfor blomstrer ikke violer
Indhold:
Violer er en af de mest populære dekorative blomstrende planter. Men når man dyrker disse skønheder, er alle blomsteravlere opdelt i to lejre: nogle hævder, at den violette er en af de mest uhøjtidelige indendørs planter, som glæder sig over sin blomstring næsten hele året, mens andre efter købet ikke kan vente på blomstring og klag over plantens luner og nøjagtighed .... Hvilken har den rigtige? Begge har ret. Hemmeligheden er, at nogle avlere ved, hvordan de skal give planten den rette pleje, mens andre endnu ikke har lært dette. Når du forstår det vanskelige ved at passe på planten, blomstrer dine violer det meste af året og efterlader kun i vintermånederne en kort hvileperiode for at få styrke og om foråret for at glæde dig med blomstring igen. Hvordan plejer man en violet, så den blomstrer regelmæssigt, og hvordan finder man ud af årsagen til, at violer ikke blomstrer?
Dette er, hvad vi vil tale om i denne artikel. Der er seks hovedårsager til den manglende blomstring. Efter at have læst disse oplysninger, undersøgt dine planter og analyseret deres pasningstrin, kan du identificere og løse problemet, og dine violer blomstrer igen.
Hvorfor blomstrer ikke blomstrer - forkert plantning
Plantepleje begynder med plantning eller transplantation efter køb. Mere præcist med valget af en passende blomsterpotte og den rigtige jord, som er velegnet til netop denne plante.
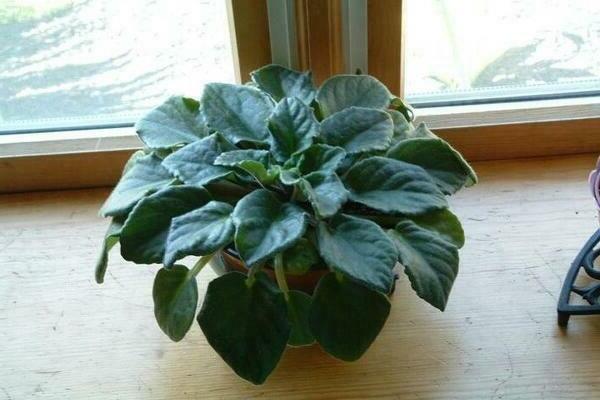
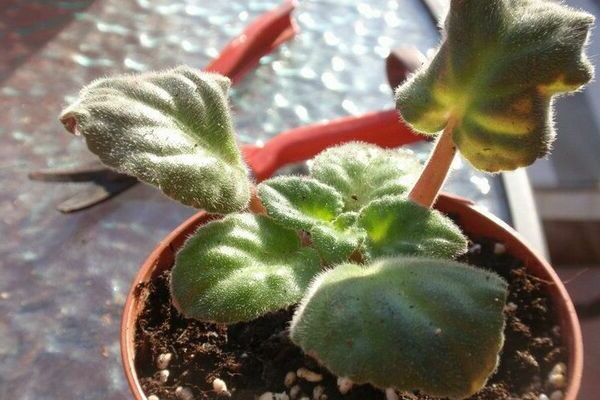
Violer har meget sarte rødder, så de er ret kræsne med hensyn til jordens kvalitet og sammensætning. Det er kategorisk umuligt at bruge tæt og tung jord; jord med et øget surhedsgrad vil ikke fungere. Den bedste løsning ville være at købe en særlig jord til violer i en blomsterbutik, som er designet under hensyntagen til alle plantens egenskaber og behov.
Hvis du foretrækker at forberede jordblandingen selv, skal du bruge tørv af højmor, frugtbar havejord (det bør ikke være mere end 40% af jordblandingens samlede volumen, ellers bliver planten overmættet med tilsætningsstoffer og alt dens kræfter går til voksende blade og ikke til blomstring).
Tilsæt vermiculit til blandingen som bagepulver, fordi løs jord er nøglen til violernes helbred. Også ved plantning er det ekstremt vigtigt ikke at glemme drænlaget af ekspanderet ler eller små sten. Men med tiden vil selv løs jord kage og blive tættere, og med forkert vanding vil det også blive delvis skyllet ud, så det er nødvendigt ikke kun regelmæssigt at løsne jorden i en blomsterpotte, men også tilføje jord og forny toppen lag.
Violer skal ompottes mindst en gang om året. Hyppigere transplantation kan være nødvendig i nødstilfælde, når planten kræver genoplivningsforanstaltninger.
En violet krukke skal vælges ikke særlig stor, ellers vil planten i stedet for at blomstre vokse rødder. Men ved at plante en violet i en beholder, der er for lille, opnår du heller ikke det ønskede resultat - jorden vil blive udtømt for hurtigt, og planten vil ikke have styrke til at blomstre. For en voksen plante er en krukke med en diameter og højde på 9-10 cm velegnet; for unge planter og miniaturevarianter er en beholder med en diameter på 5-7 cm nok.
Hvilken gryde man skal vælge: plast eller keramik? Nogle hævder, at plastikpotter er mere velegnede til violer, da de opvarmer mindre, men stadig foretrækker de fleste miljøvenlige lerpotter. Det vigtigste er, at der er et drænhul i bunden af hver beholder.
Violer vokser i en gryde og danner stedbørn - hvilket også er derfor, at det er så vigtigt regelmæssigt at genplante planter. Under transplantationen skal de adskilles, for under overfyldte forhold vil de heller ikke blomstre.
Hvorfor blomstrer ikke violer derhjemme: utilstrækkelig belysning
Nogle gange kan det være svært at finde et passende sted til en violet i en lejlighed, fordi det er ret krævende for belysning. Disse planter har brug for meget lys, men samtidig kan de kategorisk ikke tåle direkte sollys, som forbrænder de sarte blade af violer.
Hvis der vises pletter på bladene på din violet, som er placeret i vindueskarmen, så er solens direkte stråler sandsynligvis årsagen til dette. Hvis bladene bliver mere og mere blege og mister deres oprindelige grønne nuance, er årsagen bare mangel på lys.
Om vinteren kan den violette også placeres på den sydlige vindueskarme - der vil være nok sol, men dens stråler er ikke farlige, men i sommermånederne vil vindueskarme mod nord, øst og nordøst gøre det.
På den anden side, hvis der vokser træer under dine vinduer, der spreder sollys, er den side af verden, som vinduerne vender imod, ligegyldig - du kan roligt sætte planterne på vindueskarmen om sommeren, de får ikke forbrændinger.
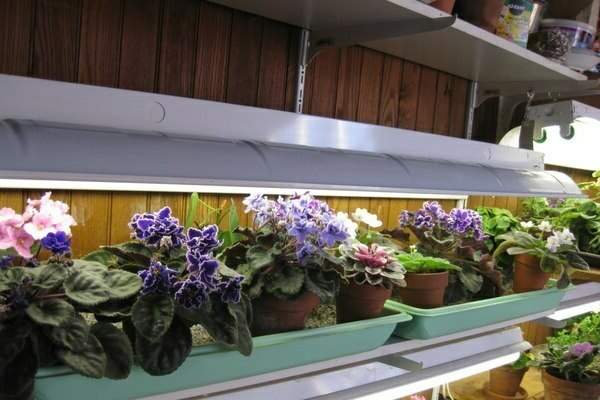
For violer kræves en lang lysdag, som skal vare mindst ti timer. Hvis du har en eller to planter i din samling, og deres forårs-sommerblomstring er nok for dig, behøver du ikke at tage yderligere foranstaltninger.
Men hvis du planlægger at fylde rummet med blomstrende violer, har du muligvis brug for ekstra belysning med efteråret. Til dette formål er en fluorescerende lampe egnet, som skal installeres strengt over planterne (i en højde på ca. 30 centimeter).
Violer elsker stabilitet i plejen, så du skal tænde og slukke for ekstra belysning på samme tid hver dag. Takket være denne belysning vil fotosynteseprocessen fortsætte som normalt, og den violette vil blomstre meget længere.
Det forkerte regime og vandingsmetode er en anden grund til, at violer ikke blomstrer
Regimet, mængden og vandingsteknologien er meget vigtig for hver plante. Som du allerede ved, må du ikke tillade fugt at komme på bladene, blomsterne og stilkene på den violette. Desuden bør fuldstændig tørring af det jordiske koma og vandlogning af jorden ikke være tilladt.
Vandingsvioler anbefales på en af tre måder:
- Sædvanlig vanding ved hjælp af en vandkande med en lang smal tud eller en volumetrisk sprøjte - sådanne enheder er nødvendige, så vand kun falder på jorden og ikke på dele af planten. Efter et stykke tid efter vanding skal den resterende fugt tømmes fra pallen.
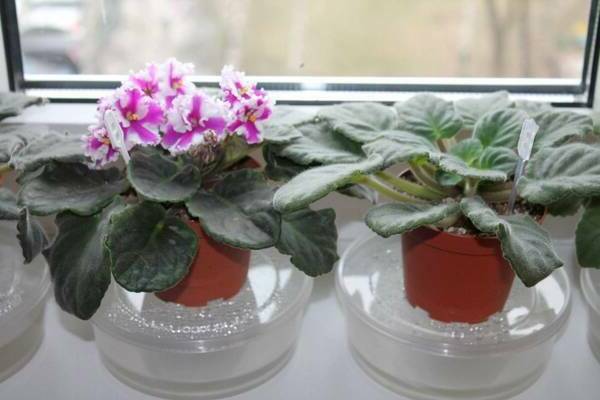
- Vanding i palle - den mest almindelige og letteste måde at vande violer på. Vand skal hældes i bakken, hvori gryden er placeret, og vent, indtil planten absorberer den nødvendige mængde fugt. Så snart det øverste lag af jorden mørkner, kan det overskydende vand fra sumpen tømmes.
- "Væge" vanding. Det vil tage noget tid at finde ud af teknologien og etablere en sådan metode til kunstvanding, men så kræver det ikke nogen indsats fra dig, du skal bare sørge for, at der altid er vand i den nederste beholder. Ved transplantation af en plante skal du strække en snor eller en strimmel stof gennem drænhullet, derefter sænke den frie ende i en beholder med vand og lægge en blomsterpotte med en violet oven på den. Efter behov vil planten absorbere vand gennem blonderne. Men denne metode har to ulemper. For det første er jorden ikke altid fugtet ensartet.Og for det andet, hvis den violette er på vindueskarmen, kan vandet om vinteren køle ned, og vanding af violer med koldt vand er kontraindiceret.
Uanset hvilken vandingsmetode du vælger, glem ikke, at vandet først skal koges eller forsvares i to eller tre dage uden at lukke låget. Og vandtemperaturen under vanding skal være mindst stuetemperatur.
Temperaturfejl og høj luftfugtighed
Indendørs planter kan ikke lide ændringer i temperaturen, violet er ingen undtagelse. Den mest behagelige lufttemperatur vil være + 20 ... + 22 grader, med en fejl på 1-2 grader i den ene eller anden retning. Ved højere eller lavere temperaturer vil den violette ikke føle sig særlig godt, hvilket umiddelbart vil påvirke blomstringen.
Den violette har ikke brug for yderligere luftbefugtning; tværtimod anbefales det at placere den væk fra planter, der regelmæssigt skal sprøjtes. Men hvis varmeenhederne om vinteren arbejder med fuld kapacitet, og luften i rummet bliver for tør, kan du installere en beholder med vand ved siden af den violette, som vil fordampe og regulere luftfugtigheden.
Om vinteren anbefales det også at fjerne stænglerne, så planten kan hvile og få styrke til en mere frodig forårsblomstring.
Hvorfor blomstrer indendørs violer ikke: mangel eller overskud af gødning
Gødning er nødvendig for violer, men de er nødvendige i tide og med måde. Når planten er i dvale, er det ikke nødvendigt at befrugte den. Men med forårets begyndelse og begyndelsen af aktiv vækst er det nødvendigt at udføre regelmæssig fodring med speciel gødning, der er velegnet til violer: "Saintpaulia", "Uniflor", "Ideal", "Forte".
Alle introduceres i flydende form under vanding, de skal først fortyndes i henhold til instruktionerne (aldrig øge dosis med de bedste hensigter, dette fører aldrig til gode resultater).
Hvis du forbereder en blanding til at fodre dig selv, er det værd at minimere procentdelen af nitrogen til et minimum, idet kalium og fosfor foretrækkes - det er de elementer, der er ansvarlige for blomstringen.
Hvis du lige har transplanteret planten, vil den næste halvanden måned ikke have brug for befrugtning, da den friske jord indeholder tilstrækkelig tilførsel af næringsstoffer. Udover købt gødning kan du også bruge folkemusik: infusioner af gær, appelsin- eller citronskaller, løgskaller samt teblade eller sødt vand. Sådanne midler vil have en positiv effekt på blomstring og hjælpe med at styrke violernes immunitet.
Skadelige insekter eller sygdomme
Hvis du efter at have læst alt det ovenstående kom til den konklusion, at du gør alt korrekt og ikke fandt en løsning på dit problem, er sagen måske i en slags sygdom af violer eller en koloni af skadelige insekter, der har valgt din plante.
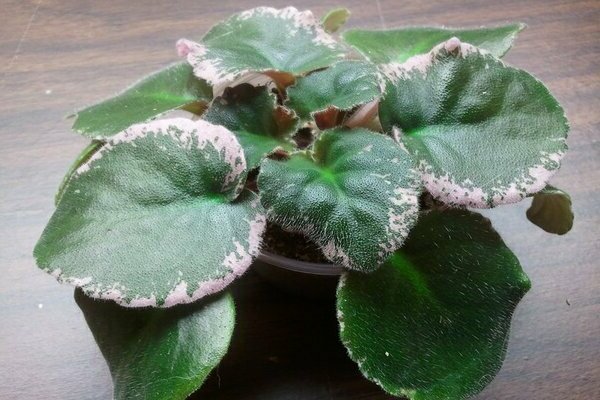
Undersøg omhyggeligt alle dele af den violette: plak på bladene, en ændring i deres farve og tæthed kan indikere spredning af meldug, sen rødme eller forskellige former for råd.
Hvis vi taler om parasitter, foretrækker en orm, edderkoppemide, thrips eller nematoder at bosætte sig på violer. Hvis du finder tegn på sygdom eller skadedyrs vitale aktivitet, skal planten straks overføres til et andet rum og starte behandlingen.
Afhængigt af problemet skal du bruge det passende fungicid (hvis problemet er sygdom) eller insekticid (hvis problemet er i nærvær af skadedyr). Hold den violette i karantæne, indtil den er fuldstændig helbredt, transplanter derefter, opdater ikke kun jorden, men også blomsterpotten, og returner den derefter til sin oprindelige plads.
Der er ikke så mange grunde til, at violer ikke blomstrer, hvilket betyder, at det ikke vil være svært at identificere og fjerne dem. Vi håber, at disse oplysninger vil være nyttige for dig, og dine violer vil regelmæssigt glæde dig over frodig blomstring.