Hvornår og hvordan man planter clematis i åbent terræn.
Indhold:
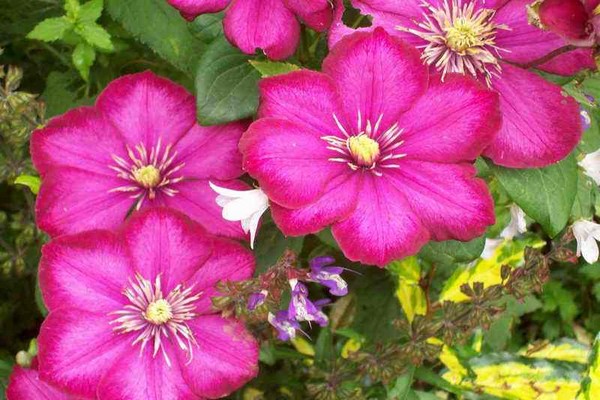
Clematis kan fortjent kaldes havens konge. Dens smukke blomster kan dekorere absolut ethvert område, det er simpelthen umuligt ikke at blive forelsket i det. Blandt mennesker blandt klematis er der flere flere navne, "Lomonosy" og "Knyazhki". Der er flere og flere sorter af clematis hvert år, opdrættere arbejder konstant på at øge dem. Clematis kan også formeres på flere måder: ved stiklinger, opdeling af busken, frø og lagdeling. Clematis blomster kan være af forskellige typer, størrelser og farver. Hvad angår formering ved hjælp af frø, er denne metode kun egnet til de sorter med blomster med lille diameter. Faktisk er disse vinstokke meget lette at dyrke, selvom det ved første øjekast kan se ud til, at det ikke er sådan. Denne flerårige vinstok kan dekorere selv den mest dystre have. Denne plante har som enhver anden sin egen plante- og plejeregler, der skal følges, når man dyrker en frøplante.
Kort om klematis.
For at din plante skal være smuk og sund, skal plantematerialet vedligeholdes korrekt. Plantematerialet har også helt forskellige former: frøplanterne har et lukket rodsystem. Grundlæggende er der tale om frøplanter, der allerede er et år gamle. Meget ofte sælges disse frøplanter straks i potter.
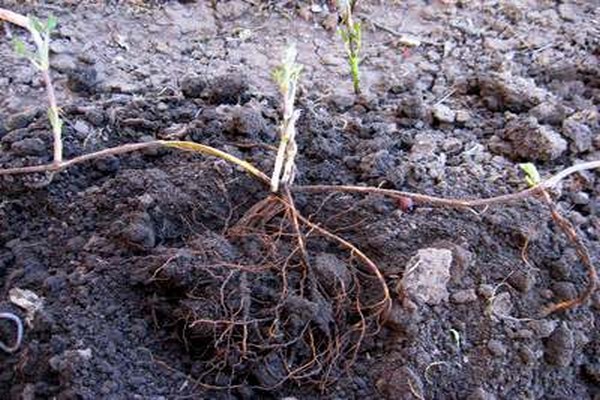
Skud er også ofte allerede rodfæstet, men med et åbent rodsystem. For det meste sælges de simpelthen i en pakke. Ofte er rødderne let støvet med tørv.
Selvfølgelig, hvis du har et valg, så er det bedst at købe de frøplanter, hvis rodsystem er lukket. Disse frøplanter vil vænne sig til det meget hurtigere og slå rod på et nyt, permanent sted. En sådan plante vil også udvikle sig meget bedre og mere aktivt end en frøplante med et åbent rodsystem.
Det bedste tidspunkt at plante en plante som clematis er forår. Der er deadlines for dette. Plantning bør finde sted, selvom der ikke vil være gentagne forårsfrost, fordi de er farlige for absolut enhver plante, der lige er blevet plantet. Det lider meget af dette, netop fordi planten allerede er under meget stærk stress og bestemt endnu ikke har haft tid til at komme sig. Frøplanten har bestemt endnu ikke haft tid til at slå rod. I bedste fald, hvis frøplanten bare lider lidt, i værste fald kan du bare miste den. Ved plantning om efteråret har frøplanten måske heller simpelthen ikke tid til at komme sig og slå rod før begyndelsen af den første frost. Selvom en ung plante har tid til at tilpasse sig og overleve stresset efter transplantation, er den stadig ikke stærk nok og har en meget stor risiko for at fryse om vinteren, selv på trods af al opvarmning til vinteren.
Opbevar erhvervede, rodfæstede stiklinger af clematis før forårets plantning skal være korrekte. Generelt er frøplanter af to typer: med et åbent rodsystem og et lukket rodsystem.
Alt om frøplanter.
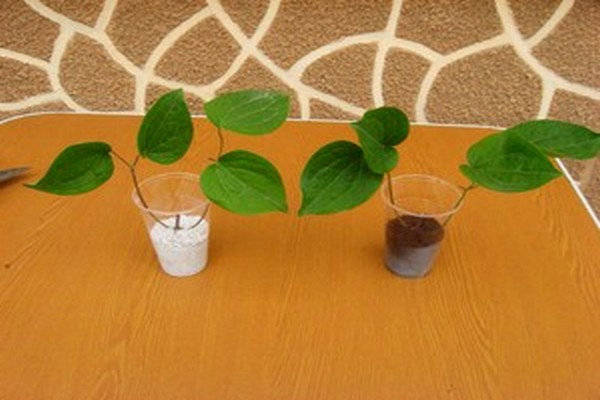
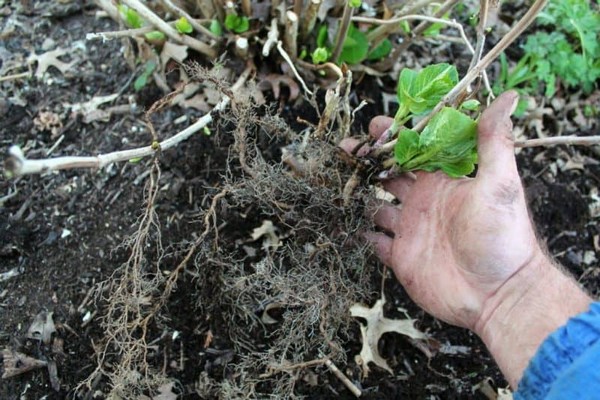
Faktisk er det meget let at bevare planter, men du skal helt sikkert kende alle funktionerne. I første omgang skal frøplanter med et åbent rodsystem tages ud af en pose tørv og meget omhyggeligt undersøge rødderne. Hvis der er noget galt med rødderne, bemærkes en vis skade eller råd, så skal du tage en skarp saks og klippe de syge rødder af. Efter at rødderne er skåret, skal de gennemblødes i fungicider. Sådanne lægemidler som "Maxim", "Fitosporin - M" er meget populære til dette, men der er andre, de skal bruges strengt efter instruktionerne, der er knyttet til hvert lægemiddel.Og du kan købe dem i enhver haveforretning.
En kontrolleret og om nødvendigt behandlet frøplante eller stilk skal transplanteres i en lille beholder, det er ønskeligt, at den er af plast, og der er huller i bunden, så overskydende vand strømmer ud gennem dem, når den vandes. Det land, hvor skæringen vil vokse inden plantning i åbent terræn, skal være frugtbar. Om foråret, når vejret er varmt nok udenfor, skal skæringen begraves i haven lige i en plastbeholder, hvor den vil blive i et helt år. I løbet af dette år vil stilken kunne udvikle sig korrekt og vokse et rodsystem af den nødvendige størrelse. Efter et år kan en færdiglavet og tilstrækkelig stærk frøplante transplanteres til et permanent sted, hvor alt det behøver er korrekt pleje.
I princippet kan du plante en frøplante i åben jord med det samme uden en beholder, men i dette tilfælde skal der udføres mere omhyggelig pleje af det, fordi frøplanten i dette tilfælde vil være svagere og mere krævende.
Men når plantens rodsystem er lukket, er det bedst at erhverve det tidligst en måned før plantning, og bedst af alt et par dage før plantning, men naturligvis, hvis der er en sådan mulighed. Hvis du vil have den tidligere købte frøplante bevaret godt indtil forårets plantning, skal du følge nogle regler: efter at frøplanten er købt, skal den stå i skyggen og afkøle i flere dage. Derefter skal gryden med frøplanten placeres i solen. Disse handlinger er relevante ikke kun for den købte frøplante, men også for stiklinger.
Hvis knopper allerede har vist sig på frøplanten på købstidspunktet, skal de fjernes med et skarpt værktøj. Du skal under ingen omstændigheder have ondt af dem, for hvis de forbliver, vil det være meget vanskeligere for frøplanten at vænne sig til og slå rod på et nyt sted, for i stedet for at lægge al sin styrke i restitution og rodfæste, så er frøplanten vil blive distraheret af udviklingen af disse knopper. Derfor vil det gøre ondt meget længere og derefter komme sig i meget lang tid.
Du skal vande planten regelmæssigt, men ikke meget. Jorden skal være konstant let fugtig.
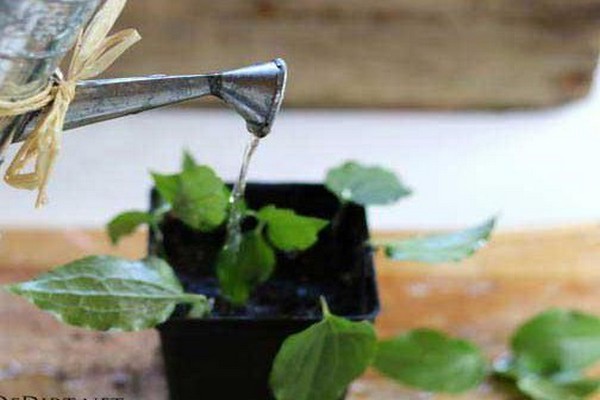
En gang om ugen skal planten vandes og sprøjtes med et fungicid. Dette er nødvendigt for at udføre sygdomsforebyggelse. På denne måde kan du behandle ikke kun frøplanter, men også stiklinger.
Hvis du alligevel har købt en frøplante med et lukket rodsystem meget tidligere end plantningsdatoen, er den naturligvis allerede plantet i en lille krukke, men den skal straks transplanteres i en større beholder, hvor frugtbar og befrugtet jord hældes. I en større beholder vil frøplanten føles mere behagelig.
Hvis frøplanten af en eller anden grund begyndte at falme, hjælper fodring med at bringe den til en sund tilstand. Det er bedst at befrugte planten ved hjælp af komplekse gødninger, såsom: "Agricola", "Fertika-Lux", "Biohumus", disse præparater bør bruges i fuld overensstemmelse med de instruktioner, der følger med dem.
Plantning om foråret.

Clematis plantes bedst udendørs om foråret. Men mange gartnere, der ikke havde nogen tidligere erfaring, spekulerer på, hvornår det præcist skal gøres?
Den bedste tid til at lande i åbent terræn er fra anden halvdel af april til anden halvdel af maj. Du skal vælge et mere præcist tidspunkt for afstigning individuelt afhængigt af det lokale klima i din region.
Hvis din frøplante har et lukket rodsystem, kan plantning ikke kun udføres om foråret, men også i efteråret. Og sommeren er fin for ham. Men dem med et åbent rodsystem behøver kun at blive plantet om foråret, og dette kan kun gøres, indtil plantens knopper når at svulme.
Mange gartnere, når de planter planter, følger meget ofte månekalenderen.Ved månens cyklus kan du finde ud af præcist på hvilke dage plantningen af planten vil være gunstig, og på hvilken det er bedst at nægte at plante. Hvert år er tallene til plantning forskellige, så det er bedst at købe en kalender til tiden.
Inden plantning af clematis i åbent terræn er det bedst at studere alle oplysninger om, hvordan man gør dette. Det afhænger jo af den korrekte plantning, hvordan din plante vil vokse i fremtiden.
Først skal du vælge det rigtige sted. Det afhænger heraf, hvordan din plante vil udvikle sig, blomstre og generelt vokse i fremtiden. Alle stadier af blomsterudvikling afhænger af det valgte sted på dit websted, og af hvilken slags jord det er på det. Dette skal tages med fuldt ansvar, for clematis kan slet ikke lide transplantationer. Stedet til plantning af clematis skal være solrigt, men strålerne bør ikke være direkte, men lidt spredte. Hvis din liana har blomster med lyse farver, så er det bedst at dyrke den i en lille skygge, i solen kan lyse farver falme og falme.
Stedet, hvor clematis vil vokse, skal være fuldstændig beskyttet mod vind og træk.
Plant ikke klematis i et lavland, denne plante vil helt sikkert kunne lide den mere på en bakke. Vand bør heller ikke stagnere på stedet, ellers er der stor risiko for, at rodsystemet af clematis kan begynde at rådne, og du risikerer helt at miste planten.
Der skal være en ledig plads i nærheden af plantegraven, det er nødvendigt, så det i fremtiden, når vinstokken vokser nok, vil være muligt at installere en støtte, der er nødvendig for enhver klatreplante. Og dette er nødvendigt, så plantens stilk ikke går i stykker, fordi vinstokken er en meget lang plante og uden støtte kan den simpelthen gå i stykker.
Hvis du beslutter dig for at plante clematis ved siden af et hegn eller en slags bygninger, skal du huske på, at afstanden fra dem skal være tilstrækkelig til, at rodsystemet kan udvikle sig ordentligt.
Du bør aldrig plante planter ved siden af metalgenstande. Og det gælder ikke kun clematis, men også andre. Et sådant kvarter kan meget skade planter, fordi metallet kan blive meget varmt, om sommeren kan det simpelthen brænde ud og fryse ud om vinteren.
For at planten skal fungere korrekt, skal jorden på stedet være frugtbar, løs og let. Men bestemt ikke surt, for clematis tåler det ikke.
Clematis vil føles godt, hvis du planter den i en forhøjet position. Udover det faktum, at selve planten i dette tilfælde vil føles fantastisk, og dens rodsystem aktivt vil udvikle sig og undgå rådne, hvilket kan opstå ved plantning i et lavland, fordi vand ofte stagnerer på sådanne steder. Dette er især farligt under regn, såvel som om foråret, når sneen begynder at smelte.
Clematis er meget velegnet til at dekorere et lysthus, buer eller som en hæk.

Inden plantning af clematis skal plantningsgraven forberedes på forhånd, mindst en måned i forvejen. Dette er nødvendigt for at jorden skal bosætte sig.
Det første trin er at forberede stedet til gruben. Det skal rengøres fuldstændigt og alt ukrudt fjernes fra det. Hvis jorden er sur, skal den neutraliseres. Almindelig træaske, dolomitmel eller et særligt præparat til deoxidation vil perfekt klare dette, hvis du bruger præparatet, skal du følge instruktionerne. Ethvert stof skal tilsættes til den gravede jord, og det er bydende nødvendigt at udjævne det, så stoffet fordeles jævnt.
Med tung jord er det bedst at tilføje tørv eller sand til det, dette vil give det lethed og endda frugtbarhed.
Hvis jorden tværtimod er for lys, skal den simpelthen gøres tungere med tilføjelse af almindelig græsjord til plantegraven.
Gruben til plantning af clematis skal være mindst en halv meter i bredde og dybde.
Der skal være et drænlag i bunden af gruben.Næsten ethvert materiale er egnet til dette, og brudte mursten, sten, grus osv.
Selve gruben skal fyldes halvt med en jordblanding af jord, sand, tørv, alle disse ingredienser skal være i forholdet 1: 1: 1.
Inden plantning i hullet kan du også tilføje en kompleks mineralsk gødning. Når du har tilføjet gødning, skal jorden vandes, så gødningen trænger så dybt som muligt, og jorden lægger sig på samme tid.
Når du planter flere planter på samme tid, skal afstanden mellem dem være mindst en meter.
Før plantning skal frøplanten være ordentligt forberedt, men dette gælder kun dem, hvis rodsystem er åbent. Frøplanter med et lukket rodsystem behøver ikke at være forberedt på forhånd.
Omkring en dag før du planter din plante, skal du suge den i ethvert præparat, der stimulerer væksten af rodsystemet. Hvis der er problemer med rødder, skimmelsvamp, råd osv., Skal de trimmes med et skarpt værktøj og behandles med et fungicid.
Plantens rodkrave skal begraves lidt, så hvis der er blade over den, skal de fjernes.
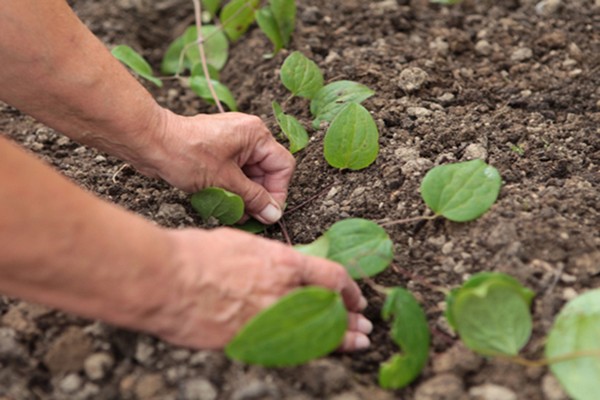
Efter at gruben og selve frøplanten er blevet forberedt, kan du gå direkte til plantning. Til dette er det nødvendigt, at jorden i gruben allerede var tæt, det vil sige bosat. Frøplanten skal placeres i midten af hullet og omhyggeligt dækkes med jorden, så rodkraven er ca. 10 cm dyb. De to første knopper skal også være i jorden. Din plantes sundhed afhænger direkte af dette. Med en sådan plantning vil planten have en mere stabil immunitet og mere korrekt udvikling.
Efter at frøplanten er installeret og dækket med jord, skal den være godt stampet. Der skal graves en lav grøft rundt om planten.
Derefter skal planten vandes rigeligt.
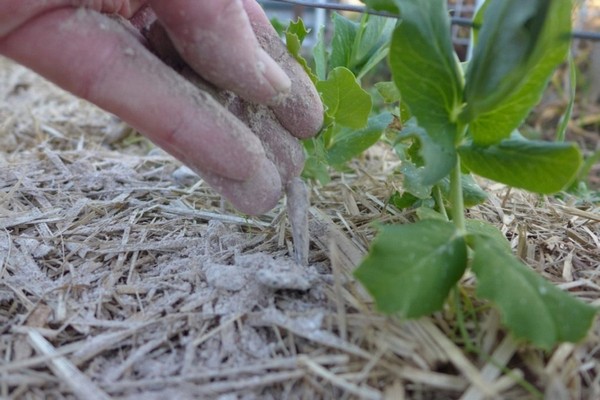
Efter de foranstaltninger, der er truffet, skal der installeres en pæl nær frøplanten, og planten skal bindes til den, og den skal stå sådan indtil øjeblikket med fuldstændig rodning.
Det er bedst at klippe jorden rundt om frøplanten. Til dette kan tørt eller rådnet savsmuld, tørv og andre materialer være passende.
Efter plantning af en frøplante kan den også dækkes, dette gøres for at beskytte den mod tilbagevenden af gentagne frost.
Efter at clematis er plantet, skal den plejes ordentligt. Handlingerne er ganske enkle, men det fremtidige liv og udvikling af din plante afhænger direkte af dem. Men clematis kræver mest af alt opmærksomhed i det første leveår på det åbne felt.
Afgang efter landing.
Naturligvis er planten efter transplantation meget stresset og har brug for hjælp. I løbet af den første måned efter plantning skal planten være dækket af solen; det vil kun være muligt at lade den være alene, efter at frøplanten er fuldstændig rodfæstet. For at dække planten mere bekvemt er det bedst at installere buer over den.
Vanding af klematis i det første leveår skal også være meget forsigtig. Under ingen omstændigheder bør du vande planten ved roden, dette kan kun gøres i en grøft omkring det, husk at det skal gøres på plantningstidspunktet. Vanding bør være regelmæssig, men med måde. Vandet skal naturligvis ikke stagnere. Den bedste vandingsplan. I normalt vejr er det en gang om ugen, og i ekstrem varme eller tørke, ikke mere end 3 gange om ugen.
Det er bedst at klippe efter plantning. Mulching slipper af med fordampning af fugt fra jorden og fjerner også unødvendigt ukrudt.
Planter med en skarp lugt kan plantes ved siden af clematis. Dette er nødvendigt for at afskrække skadelige insekter, der kan tiltrækkes af clematis.
Landet omkring planten skal løsnes og ukrudt fjernes fra det. Takket være dette vil ilt blive leveret til rødderne i den nødvendige mængde.
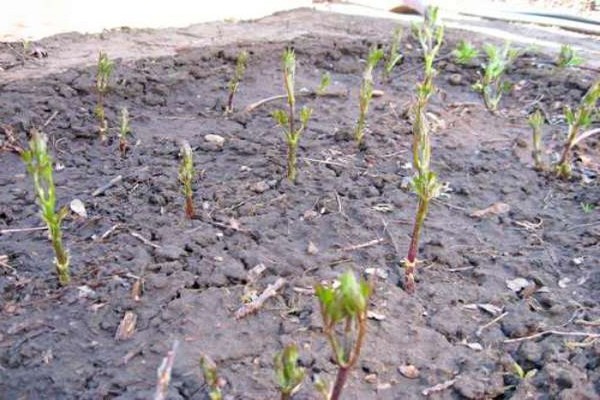
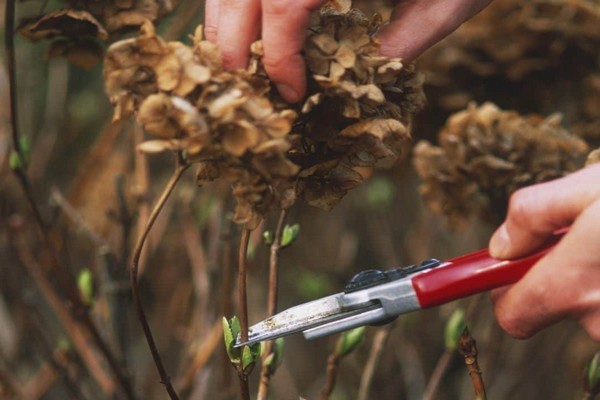
I det første år af plantens liv i efteråret er det bydende nødvendigt at beskære. Dette gøres på denne måde: absolut alle skud skal afskæres og efterlades 30 cm fra jorden.I de følgende år kan beskæring udføres efter plantens udvikling.
Til vinteren skal planter isoleres, da der i mange regioner er risiko for, at planter fryser til under vinterfrost.
Voksende fra frø.
Clematis kan også dyrkes af frø. For at gøre dette skal du i første omgang så frøplanter. Men at dyrke planter fra frø vil være ret svært og kræve en stor indsats. I første omgang kræver frøene forberedelse, og selve frøplanten vil tage meget tid. Ja, og kun visse typer clematis kan dyrkes fra frø, der har blomster med lille diameter. Med hensyn til hybrid sorter, eller de sorter, der har meget store blomster. Det vil bestemt ikke være muligt at dyrke sådanne clematis fra frø, på trods af al din indsats.
Generelt er der absolut intet svært ved at plante planter som clematis, men her som andre steder er der nogle nuancer. Du skal passe på planterne korrekt, men da clematis i sig selv ikke er finurlig, består al pleje i at luge, løsne, vande og fodre, og absolut enhver gartner kan klare denne opgave, selv en der absolut ikke har erfaring. Hvis du gør alt, som det skal være og bruger lidt af din tid på planten, så snart vil din have gnistre med nye, lyse farver. En plante som clematis kan let dekorere selv det mørkeste område eller et kedeligt hjørne af din have.