Plantning af græskar i jorden: vejledning
Indhold:
Artiklen indeholder detaljerede instruktioner om, hvordan man korrekt planter et græskar i jorden: valg af et sted, plantning på kompost, forberedelse af frø og voksende frøplanter.
Før eller siden vil enhver gartner gerne plante et græskar, spændingen og lysten til at dyrke så store frugter som muligt vågner. Denne orange skønhed kan med rette betragtes som havens dronning, ikke kun på grund af dens skønhed, men også på grund af det utroligt høje indhold af næringsstoffer. En bred vifte af retter kan tilberedes af græskar, det er godt opbevaret hele vinteren og giver dig vitaminer. Så selvom dit sommerhus er meget lille, hvis du finder et sted til et græskar, så forsikrer jeg dig om, at du ikke vil fortryde det.
Plantning af græskar i jorden: valg og forberedelse af et sted
Plantning af græskar i jorden: valg og forberedelse af et sted
Når vi vælger et sted til et græskar, husker vi først og fremmest reglerne for afgrøderotation: du kan ikke plante et græskar, hvor repræsentanter for græskarfamilien voksede i det foregående år (agurker, zucchini, squash og faktisk græskarene selv ), i en sådan have vil du bestemt ikke vente på nogen høst. Kulturen i græskarfamilien kan returneres til det samme sted tidligst om 4-5 år. De bedste forstadier til græskar vil være løg, forskellige typer kål, gulerødder, tomater, majs.
Sengen skal være placeret på et solrigt sted, men lys delvis skygge er acceptabel. Det vigtigste er, at jorden har mulighed for at varme godt op. Græskar foretrækker sandede eller sandede lerjord, da de er temmelig løse og hurtigt varmes op.
Forberedelsen af sengene skal startes om efteråret. For at gøre dette skal du fjerne alt ukrudt og planterester af kulturen, der voksede her i denne sæson, grave dybt ned i jorden og omhyggeligt vælge alle de rødder og insekter, som du sandsynligvis støder på. Jo bedre du gør det forberedende arbejde, jo lettere bliver det for dig at håndtere ukrudt og skadedyr i det næste år.
Start om foråret med at grave i jorden igen, mens du påfører gødning. I den indledende fase har græskaret mest brug for nitrogen til vækst. Fortsæt derefter med opførelsen af haven. Jo tættere og tungere jorden i dit område er, desto højere har du brug for at lave bedet - dette er nødvendigt, så vandet ikke stagnerer, og planternes rødder ikke lider. Sengens højde er normalt omkring 25-30 cm, bredden er cirka halvanden meter, og afstanden mellem bedene skal være mindst en halv meter. Græskar er en kraftig klatreplante, den har brug for meget plads til fuld udvikling, så prøv ikke at placere mange planter på et lille stykke jord - i dette tilfælde vil der sandsynligvis ikke være frugter, eller de vil være meget små .
Som gødning under gravning kan du anvende både organisk og mineralsk gødning - dette er dit valg. Det vigtigste er at tilfredsstille græskarens behov for nitrogen, så det kan vokse grøn masse så hurtigt som muligt. Hvis vi taler om organisk stof, kan du bruge gylle, humus, godt rådnet kompost. Hvis du befrugter med gylle, tilføjer du superphosphat og kalium til hver brønd (henholdsvis 20 og 10 g), når du planter planter. Hvis det ikke er muligt at bruge organisk materiale, skal du købe en kompleks gødning og bruge den i henhold til instruktionerne. Glem ikke, at et overskud af gødning ikke kan være mindre skadeligt for planter end mangel på det.
Plantning af et græskar i jorden på en kompostbunke
Plantning af et græskar i jorden på en kompostbunke
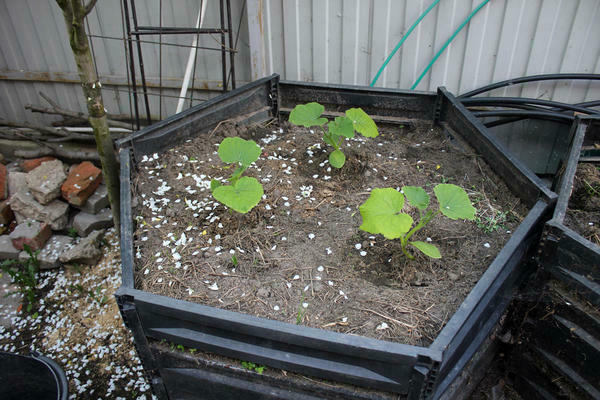
Ganske ofte placeres græskarret på kompostbunken og skaber således en gensidigt fordelagtig symbiose: komposten giver planten den nødvendige ernæring, og planten forbedrer kompostens kvalitet igen. Hvis vi angiver de vigtigste fordele ved denne symbiose, så
1. Græskar forhindrer ukrudt i at vokse på komposten, dets enorme blade skygger for solen og begrænser væksten af ukrudt.
2. Tilstedeværelsen af græskar fremskynder nedbrydningen af store planterester. Det tager normalt omkring tre år for de tykke stængler at nedbrydes fuldstændigt; voksende græskar på kompost gør denne proces hurtigere.
3. Kompostbunken tørrer ikke ud, derfor går processerne indeni ikke langsommere.
4. Set fra et æstetisk synspunkt ser kompost forklædt med en smuk plante meget mere attraktiv ud end uden den.
Plantning af græskar udendørs: korrekt forberedelse af frø
Plantning af græskar udendørs: korrekt forberedelse af frø
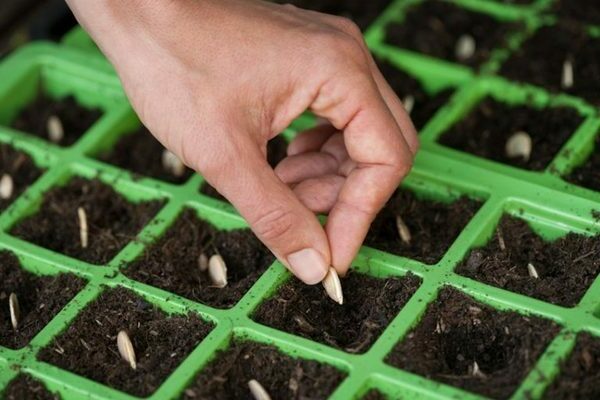
Jeg må med det samme sige, at det kun er værd at plante frø til tidlig modning af græskarsorter eller dekorative, der kendetegnes ved bizarre former, små størrelser og ikke dyrkes til mad, men til indretning. Grundlæggende vokser græskar med frøplante -metoden, men mere om det senere vil vi først tale om at forberede og plante frø.
Græskarkerner kan opbevares i op til fire år, men uden forberedelse til såning kan du aldrig være sikker på plantematerialets kvalitet. Forbered en saltopløsning og nedsænk frøene i den, efter et stykke tid vil nogle af dem stige til overfladen - de kan smides væk, de er ikke egnede til plantning. Frøene, der forbliver i bunden af beholderen, skal vaskes i rindende vand og tørres til yderligere forberedelse: opvarmning, hærdning, "podning" mod sygdomme og spiring.
Opvarmning skal udføres, så frøene spirer på samme tid, hertil opvarmes de til 60 grader og opbevares i denne tilstand i cirka tre timer.
Hærdning udvikler hos planter modstand mod lavere temperaturer, hvilket i vores uforudsigelige klima er muligt når som helst. Til dette opbevares frøene i to dage ved en temperatur på + 1 ... + 2 grader.
For at forhindre yderligere plantesygdomme udføres behandlingen på frøstadiet. Du kan bruge alle fungicider eller forberede en lyserød opløsning af kaliumpermanganat og holde frøene i det i mindst fire timer. En askeopløsning er også egnet, som først skal infunderes i 24 timer, derefter stamme og nedsænke frøene i den.
Når alt det forberedende arbejde er afsluttet, går vi videre til spiring. For at gøre dette har du brug for en bomuldsklud eller vatpinde, hvor du skal pakke frøene i vådt og holde dem fugtige. Efter et par dage åbner frøene, og spirer vises - du kan begynde at plante.
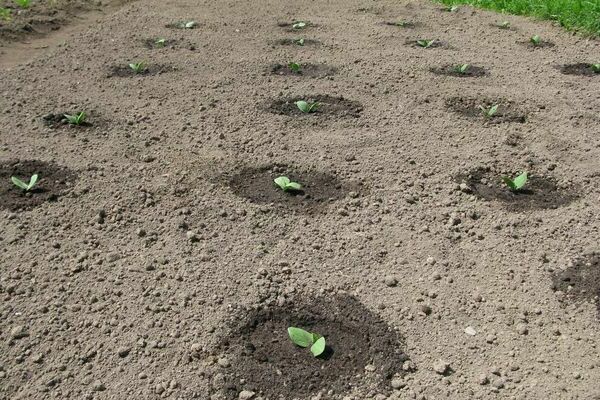
På trods af at vi hærder frøene, er det nødvendigt at plante græskaret, når jorden varmes op nok, det vil sige mod slutningen af foråret. Frø kan rådne, hvis de plantes for tidligt.
Hver plante kræver et stort område, når du køber frø, skal du studere oplysningerne om denne sort, så der ikke er for lidt plads i haven i sidste ende. Plant flere frø i hullet på samme tid i kort afstand fra hinanden (nogle kan ikke spire, i tilfælde af kollektiv plantning har du forsyning).
Voksende græskarkimplanter.
De sene sorter af græskar tager 4-5 måneder at modnes, så i vores klima kan de kun dyrkes gennem frøplanter. Frøplantenes alder på plantetidspunktet bør være mindst en måned - ud fra dette skal du bestemme tidspunktet for hvornår frøene skal plantes.
Voksende frøplanter
Til dyrkning af frøplanter kan du købe plastik, men det er bedre at stadig tørve potter med en diameter på mindst 10 cm. Du kan selv blande jorden (humus og græsgræs 4: 1) eller købe den i en butik.Jeg anbefaler kraftigt, at du forbehandler jorden fra skadedyr (damp den eller frys den i fryseren), dette vil hjælpe med at undgå problemer i fremtiden. Tilsæt den første topdressing til jorden, 4-5 g hver af nitrogen- og kaliumgødning og superfosfat, bland godt, vand og plant frøene i en dybde på ca. 3 cm (forsåning af frø, som vi talte om tidligere) .
Frøplanter vises på cirka fem dage, hvorefter temperaturen i rummet skal sænkes med 5-8 grader (dette kan opnås ved hyppig ventilation), ellers vokser frøplanterne i et meget varmt rum hurtigt og strækker sig for meget, stammen vil være tynd og skrøbelig. Vanding skal udføres, når jorden tørrer. Efter et par uger, og derefter før plantning i jorden, er det nødvendigt at udføre mere topdressing, så frøplanterne bliver stærkere.
Det er kun muligt at plante planter i bedene, når truslen om frost er gået. Hvis dine græskar voksede i tørvkrukker, kan du plante med dem. Hvis beholderne var af plast, vandes frøplanterne godt på tærsklen til plantningen, så fjern den forsigtigt fra potten sammen med en jordklump. Forbered huller af tilstrækkelig størrelse, hæld mindst en og en halv liter vand i hver og plant græskarbuske, drys med jord til cotyledonbladene. Alt er klar, nu er det stadig at tage sig af planten og vente på høsten.
Plantning af græskar i jorden