Sådan formeres chokeberry.
Indhold:
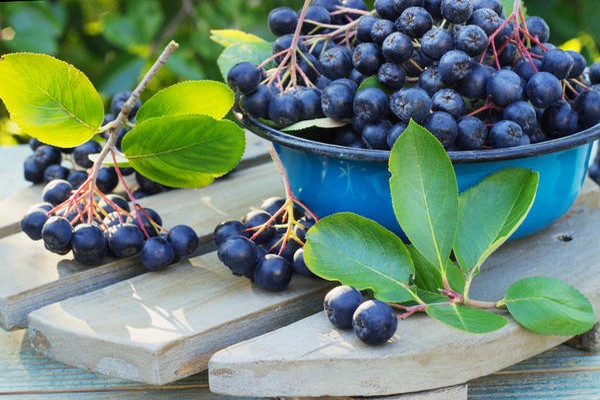
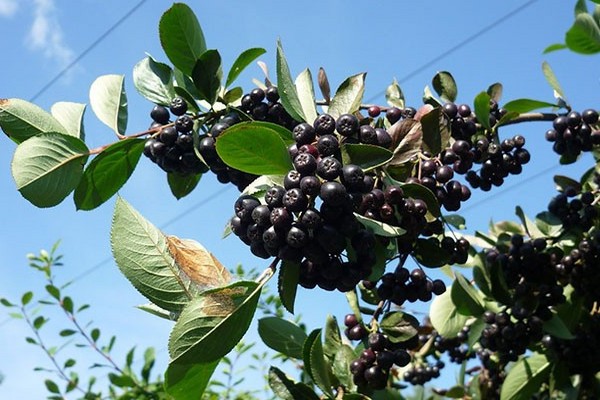
Chokeberry er meget glad for både voksne og børn. Derudover er der mange nyttige egenskaber i dets bær, for eksempel er det chokeberry, der hjælper med at sænke blodtrykket, derfor bruger hypertensive patienter ofte disse medicinske bær. Efter at du har plantet den første rognebusk, stiller du dog straks dig selv spørgsmålet om, hvordan du får flere fra en plante. Vi er glade for at informere dig om, at selv en nybegynder kan sprede denne kultur. Denne plante betragtes som uhøjtidelig, ikke særlig kræsen, derfor vokser den i mange regioner i vores land, og i dag vil vi fortælle dig, hvordan du formerer denne busk.
Avlsmetoder til chokeberry.
Det er bedst at formere denne afgrøde om efteråret. Du kan dog udføre dette arbejde om foråret. Du bør straks foretage en reservation, på grund af det faktum, at i forskellige regioner, forskellige klimatiske forhold, vil timingen af arbejdet med reproduktion af buske selvfølgelig være fremragende. Derfor bør du først og fremmest tage højde for vejrforholdene og koordinere dem med havekalenderen. Hvis du formerer chokeberry om efteråret, er det bedst at gøre dette i september eller oktober. Det er ikke svært at tage sig af plantningerne i fremtiden, og hvis du formerer busken om foråret, er det bedre at udføre plantearbejde i marts eller april. Overvej dog de klimatiske forhold i den region, hvor du bor. Derfor skal alt gøres rettidigt. Chokeberry formeres ved mange metoder. For det første er dette stiklinger og for det andet fjernelse af stiklinger samt opdeling af buske. Du kan formere den sorte chokeberry ved frø, gennem podning og også ved dannelse af rodsuger. Det skal siges, at multiplikation med frø og podning er den mindst effektive i sammenligning med de tidligere foreslåede metoder, så hvis du er en nybegynder gartner, er det bedst at gøre for eksempel stiklinger. Men kun erfarne gartnere kan plante en plante eller plante frø. Hvis vi taler om stiklinger, kan det udføres både om foråret og om efteråret. For at afskære de ønskede grene er det bedst at vælge unge skud. Stiklinger skæres i slutningen af maj eller begyndelsen af juni. Og så dyrkes de i drivhuse eller hotbeds. Det skal siges, at de også overvintrer der. Men det vil være muligt at plante stiklinger på et permanent habitat først i næste sæson. Meget ofte er gartnere engageret i stiklinger om efteråret. Til dette bruges allerede lignificerede etårige, det er disse skud, der er bedre tilpasset nye forhold. Desuden plantes disse processer straks et nyt sted. I princippet slår de rod normalt. Hvis vi taler om at dele busken, skal det bemærkes, at det er bedst at dele de gamle planter. De skal have stærke skud og et godt rodsystem, det er bedre at gøre dette om foråret, før denne procedure anbefales det at vande chokeberry intensivt, efter transplantation vandes planterne også rigeligt med vand, og jorden omkring er løsnet. Lag er hovedsageligt rodfæstet om foråret. Til dette bruges både et-årige og to-årige. Det er disse skud, der slår rod bedst i jorden og danner rødder. For at formere chokeberry ved lagdelingsmetoden skal du grave en slags riller ud, bøje skuddene til jorden, dække med løs jord og vente på dannelsen af rodsystemet. Men det vil være muligt at adskille skuddene fra moderbusken først i næste sæson. Det skal også siges, at nogle gange slår nye planter ikke rod. Mange skud dannes normalt i nærheden af chokeberrybuske, derfor transplanteres rotsuger ofte til nye levesteder og adskiller dem fra moderbusken. Og de gør det hele sæsonen. Det er dog mest effektivt at udføre disse procedurer om sommeren og foråret. Nye planter skal have tid til at tilpasse sig nye forhold. Men for at formere sort chokeberry med frø i meget lang tid, skal der også stratificeres sådant plantemateriale, men på trods af dette er spiringsgraden af frø stadig meget lav, planten udvikler sig i meget lang tid. Chokeberry kan formeres hurtigere ved podning, dette skal gøres om foråret, men for at skæringen kan slå godt rod på den nye plante, skal du give busken gunstige vækstbetingelser og passe den ordentligt . I dette tilfælde slår vaccinen dog ikke særlig godt rod. Nå, vi har beskrevet de vigtigste avlsmetoder for sort chokeberry, og nu vil vi gå videre til en mere specifik beskrivelse af de præsenterede avlsmetoder.
Stiklinger.
Det er let og enkelt at formere chokeberry ved stiklinger. Desuden har du ikke brug for særlig viden. Det er bedst at lave stiklinger om efteråret, da resultatet normalt altid er positivt efter det. Men du behøver ikke at tage sig af planten intensivt, men hvis du ikke havde tid til at rode plantematerialet om efteråret, kan du gemme det til foråret, der sker ikke noget med stiklingerne. Skuddene skal være lange nok, inden for 10-20 cm. Snittet skal være skråt, de lignificerede skud skal skæres af. Det er bedst ikke at bruge de øvre dele af grenene, afskære grenene i midten. Hver skæring skal have cirka seks aktive knopper. Dog er snittet oftest stadig gjort lige. Det vil være muligt at plante stiklinger med det samme i løs og frugtbar jord. Det er tilrådeligt at placere dem et godt oplyst sted. Over jorden skal der forblive to knopper på hver skæring. Normalt slår skuddene om en måned rod, derfor begynder planterne i begyndelsen af foråret, allerede i marts eller april, at vokse og udvikle sig intensivt. Stamcirklen nær skæringen anbefales at blive mulket. Dette hjælper planterne med at overvintre normalt. Hvis der er mindre end en måned tilbage før frostens ankomst, er det bedst at forlade stiklingerne til foråret, for dette kan du sortere dem efter type og derefter binde dem i bundter. De nedre dele af stiklingerne skal enten pakkes ind i en fugtig klud eller placeres i godt fugtet sand. Lad ikke underlaget tørre ud; til dette placerer gartnere ofte også stiklinger i en pose. Så grenene vil bestemt ikke tørre ud. Sikkerheden ved stiklinger skal overvåges indtil foråret, det er tilrådeligt at inspicere dem hver uge og så vidt muligt fugtige sandet eller stoffet. Naturligvis skal du opbevare stiklinger på et køligt sted. Et køleskab eller en kælder er ganske velegnet til dette. Du kan placere bundter af stiklinger på sommerverandaen. I det tidlige forår skal stiklinger plantes i separate beholdere; engangskopper er gode til dette. Derefter skal du vande skudene godt, og så snart der er etableret stabilt varmt vejr udenfor, kan stiklingerne sendes til det åbne terræn. Sørg for, at jorden er godt opvarmet. Nogle gange formeres sort chokeberry af grønne stiklinger. For at gøre dette skal du afskære etårige, unge stiklinger med en længde på ikke mere end 15 cm. Du kan kombinere forretninger med glæde, samle de resterende toppe fra buskens grene efter beskæring. De nederste blade skal skæres af, to øvre blade skal forblive på hver skæring, og de skal også forkortes. Det tilrådes at skære en lille del i bunden af håndtaget; rødder vil danne sig på disse steder i fremtiden.Derefter vil det være nødvendigt at opbevare stiklinger i en vækststimulator i en halv dag, og først derefter kan de plantes i drivhuset. Afstanden mellem skuddene skal være omkring 3 cm. Efter plantning skal jorden vandes godt. For at stiklinger kan slå godt rod, bør lufttemperaturen i drivhuset være omkring plus 22 grader. Hvis det bliver meget varmt i drivhuset, skal du ikke glemme at ventilere det. Normalt om en måned slår stiklinger rod, lægger rødder, så det beskyttende hus kan fjernes lidt efter lidt. For at frøplanterne skal vokse mere intensivt, vil det være muligt at fodre dem med en lille mængde organisk stof eller mineralsk gødning. Derefter er det tilrådeligt at løsne jorden, vande planterne og mulch det øverste lag. Normalt slår stiklingerne perfekt rod, men hvis du gør noget forkert, kan skuddens rodsystem ikke dannes.

Lag.
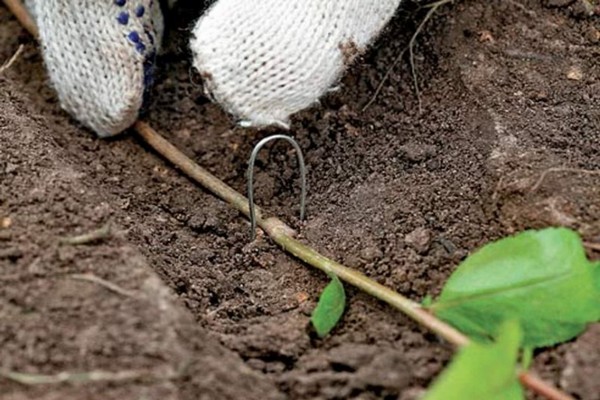
Chokeberry formerer sig også godt ved lagdelingsmetoden. For at gøre dette skal du vælge sunde årlige skud, helst dem, der er placeret direkte i roddelen. Du kan tilføje fem lag ad gangen, men for mange skud kan nedbryde busken, så brombæret i sig selv muligvis ikke har nok næringsstoffer, så det er bedre at rode ikke mere end to eller tre grene på samme tid. De valgte lag skal først afkortes med et par centimeter og først derefter vippes til jorden og knækkes. Det er på stedet for bruddet, at rødder vil dannes i fremtiden. For at fastgøre skuddene på jordoverfladen kan de presses ned med sten eller fastgøres med hæfteklammer. De forberedte riller er dækket af frugtbar og løs jord. Om et par måneder slår skud normalt rod, derfor tættere på efteråret danner rodsystemet af nye planter en god, men det er bedre at adskille lagene fra moderbusken i den næste sæson.
Buskens opdeling.
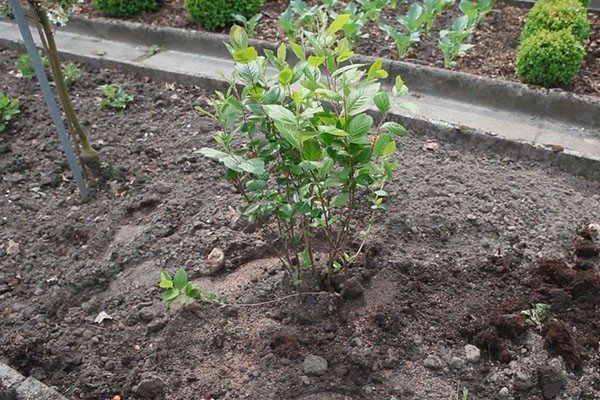
Når modne brombærbuske graves op, deles de ofte. Desuden bør der på hver ny plante forblive kraftige skud samt et veludviklet rodsystem. Hver busk skal også have mindst 3 unge skud. For at forhindre infektion i at komme ind i sårene, skal de behandles med enten knust kul eller haveplads. Landingsgravene selv er også forberedt på forhånd. For at gøre dette skal du grave huller i passende størrelser, placere frøplanter der, dække dem med frugtbar jord, meget ofte tilføje lidt superfosfat og humus der. Afstanden mellem planter skal være omkring halvanden til to meter. I fremtiden skal du passe disse frøplanter på samme måde som for modne buske. Glem ikke at fugte jorden, fodre planterne. Under vanding forbruges normalt 5-10 liter vand pr. Busk. Glem ikke at forkorte skuddene umiddelbart efter plantning af planterne. I slutningen af efteråret skal buskestammen blive busket med tørv, humus eller halm. For at planten kan tilpasse sig bedre på et nyt sted, skal du omhyggeligt rette rotsystemet under transplantation, hvis du transporterer frøplanter, så beskadig ikke planterne. Det er bedst at transportere disse buske ved at pakke dem ind i en fugtig klud. Inden plantning af frøplanter i åben jord anbefales det at placere chokeberry i vand i flere timer, så rodsystemet er mættet med fugt. På den tredje dag plantes frøplanterne normalt efter opdeling af busken. Nogle gange, før plantning, forbereder gartnere en særlig blanding af ler, smør rødderne med denne taler, så råd ikke udvikler sig.
Rod afkom.
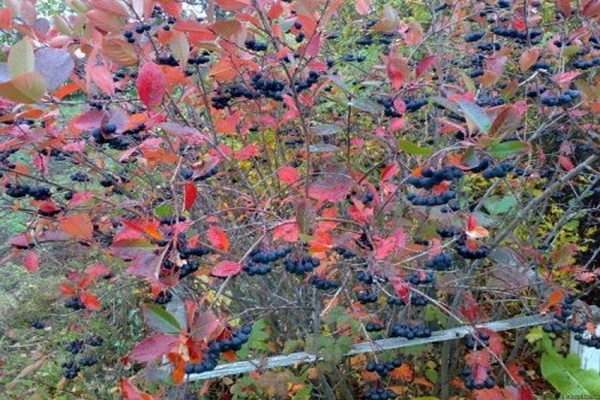
For at adskille de unge skud fra chokeberrybusken skal du bruge en skovl. Glem ikke, at denne vækst skal have gode rødder, før du planter afkommet på et nyt sted, skal du forkorte deres længde lidt, bogstaveligt talt med et par knopper.Først da vil du være i stand til at rode buskene i det nye område. Det er bedst at vælge et godt oplyst sted til plantning. Hvis vi taler om jordtypen, er der ingen grundlæggende krav. På saltvandsjord udvikler planter sig imidlertid ikke godt. Men grundvandet kan godt ligge tæt på jordens overflade, chokeberry stiller ikke særlige krav til jordfugtighed. Det er derfor, disse buske ofte plantes som hække. Et smukt grønt hegn fås fra sort bjergaske, og sunde og velsmagende bær dannes på dets grene.
Frø.
Du kan formere chokeberry røn frø, men det er ikke let. For at gøre dette skal du være tålmodig. Det vil tage lang tid at dyrke buske fra frø. Først skal du vælge de mest modne bær, efterlade dem i rummet, så de kan gæres. Først efter et par dage kan bærene gnides gennem osteklud, frugtkødet fjernes normalt, og de resterende frø vaskes med rent vand. Således kan du forberede chokeberry til dyrkning. For at frøene skal komme ind sammen, skal de blandes med vådt sand, fjernes i flere måneder på et køligt sted, for eksempel i en kælder. Nogle gange opbevares dette substrat også i køleskabet. Mange fagfolk taber simpelthen en beholder med dette substrat i sneen, og efter vinteren spirer de frøene. Frøbedene tilberedes i midten af april, dæk dem ikke for dybt, ellers vokser planterne muligvis ikke. Frø fordeles jævnt over stedet, dækket med løs og frugtbar jord. For at plantningen skal se hurtigere ud, kan du mulch det øverste lag af jorden med humus. Frøene vil imidlertid spire i meget lang tid, de første skud vil dukke op tidligst en måned senere. Men det vil kun være muligt at transplantere unge skud til et nyt habitat om et år. Som du forstår, vil det tage dig meget lang tid at dyrke sorte koteletter ved hjælp af frø. Glem ikke, at frøplanterne stadig skal passes, og derfor er gartnere ikke særlig glade for denne avlsmetode. Når det første par blade vises på planterne, skal bedene tyndes ud. Alle syge og svage spirer anbefales at kasseres. Efterlad en afstand på 5 cm mellem buskene. Når et andet par blade vises på hver stilk, tyndes plantagerne ud igen. Den sidste udtynding udføres, når skuddene er de stærkeste og sundeste. Afstanden mellem frøplanter bør ikke være mindre end 10 cm. Chokeberry har brug for lidt plads til vækst og udvikling. Glem ikke at vande frøplanterne rettidigt, fodre dem. Landet omkring bedene skal løsnes, ukrudt fjernes fra stedet. Til topdressing bruges organisk gødning oftest, tidligere fortyndet i vand. I dette tilfælde indføres organisk stof i jorden flere gange om sæsonen, dette gøres for at frøplanterne får styrke og vokser mere intensivt.
Pode.
Chokeberry formeres ofte ved podning. Men for korrekt podning af planten skal du følge nogle retningslinjer. Lageret tilberedes på forhånd. For at gøre dette vandes frøplanten rigeligt, støv fjernes fra bladene og skæres også af. Spaltningen skal være dyb nok. Desuden skal alt arbejde udføres omhyggeligt, haveredskabet skal være skarpt og sterilt. For at transplantere planter skal du bruge en robust stilk. Det er bedst at vælge de øverste skud, skærelængden skal være cirka 15 cm, den skal have 2-3 aktive knopper. I et år vil løvet vokse, i bunden skærpes kvisten som en kile, så stilken passer tæt ind i den dannede spalte. Efter podning skal lageret vikles med folie, og alle sår skal smøres med knust kul eller havelak. Bestanden slår godt rod, hvis luftfugtigheden er høj udenfor.Til dette pakker gartnere ind podningsstederne med en plastikpose og skaber dermed en slags drivhus. Normalt er dette hus fastlagt under selve vaccinationen. Efter en måned kan filmen fjernes, hvis der kommer unge blade på scion, hvilket betyder, at reproduktionen var vellykket. Glem ikke, at dette skal gøres inden starten af saftstrømmen. Hvis du er lidt forvirret i begreberne, forklarer vi dig: Grundstammen er frøplanten, som du vil podede denne eller den kultur på, og transplantatet kaldes selve stilken. Det er simpelt. For at formere sort chokeberry på denne måde skal du vælge sorter, der er beslægtede, vinterharde, i hvilket tilfælde podningen vil blive en succes.
Konklusion.
Chokeberry formeres, som du forstår, på forskellige måder. Derfor, før du deltager i denne begivenhed, skal du tage stilling til metoden og studere funktionerne i en bestemt procedure. I efteråret er det lettere at formere den sorte chokeberry, hvis du gør dette om foråret, så om sommeren bliver du nødt til at tage sig af plantagerne særligt kvalitativt. Chokeberry formeres perfekt ved stiklinger eller ved at adskille rodskuddene fra moderbusken. Disse planter er ikke dårlige og deler. Men sort chokeberry formeres normalt kun af frø af erfarne gartnere. Hvilken måde at vælge er op til dig. Vi fortalte til gengæld dig om hver, så du er i det mindste teoretisk forberedt, og nu er det op til at øve.