Drivhus sommerfugl
Indhold:
Hvis et almindeligt drivhus ikke kan passe i et lille rum, forsøger sommerboerne at lave et lille drivhus.
Den mest populære måde er at strække dækmaterialet over buer, der drives ned i jorden. Hvis du bruger en kreativ tilgang, kan du lave et sommerfugledrivhus, så det bliver lettere at passe på vegetationen. Butterfly drivhus fremstilles både uafhængigt og samles på bestilling.
Sommerfugl drivhus størrelse og egenskaber
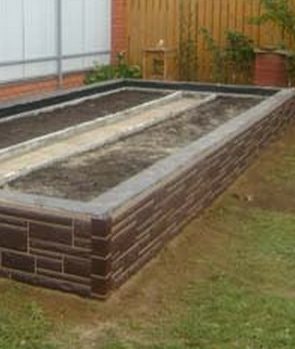
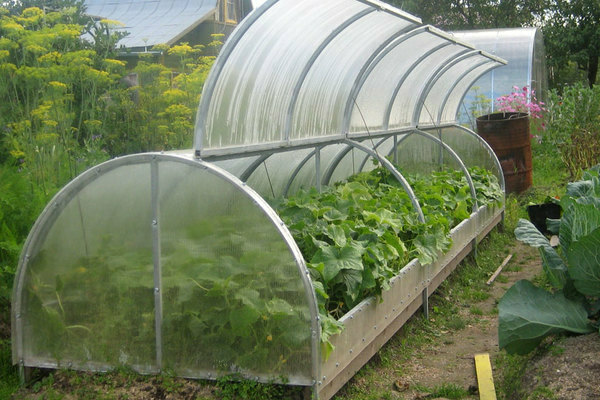
Drivhus sommerfugl: foto
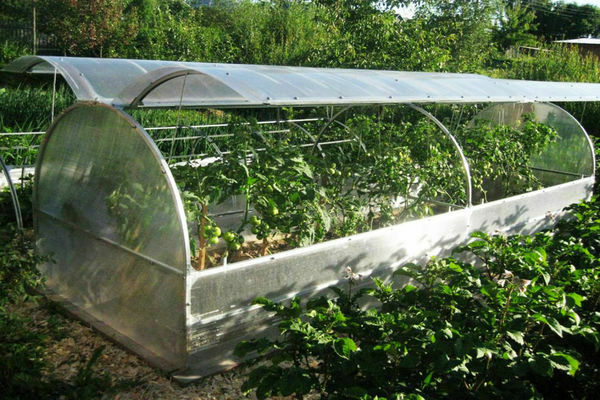
Et sommerfugldrivhus med lukkende døre ligner en kasse med buet top. Klapperne på siderne åbner opad. På den ene side er der installeret 1 eller 2 døre, det afhænger af, hvor lang kvien er i længden. Helt åbne klapper er som vingelåg. Derfor er dette navn sommerfugl.
Producenter laver næsten de samme designs på fabrikker, men de er kun forskellige i størrelse. De mest populære drivhuse er 1,1 m høje og 1,5 m brede. Sommerfugledrivhuset er 4 m langt. Produktvægten er cirka 26 kg.
Rammen er lavet af en profil. Rammen af metal-plast har stor pålidelighed. Polymerbelægningen forhindrer metallet i hurtigt at forringes. Rammer er også lavet af galvaniseret profilmateriale. Zinkbelægningen tjener mindre end den polymere. Korrosionsbestandigt drivhus i plast. Produktet har en lille masse, men det er ikke så stærkt som en metalprofil.
Shelter materiale. Som regel er et sommerfugldrivhus lavet af polycarbonat, men der kan også findes filmmateriale eller agrofibre. Det anbefales at fastgøre polycarbonat til rammen. Fordi disse plader er holdbare, godt fastgjort med hardware til basen, giver polycarbonat et positivt mikroklima inde i drivhuset. Plus, dette materiale vil gøre strukturen endnu mere stiv.
Hvis drivhuset er beklædt med polycarbonat, så vil det være det samme drivhus, kun mindre i størrelse. Selvfølgelig vil det ikke være muligt at dyrke planter med høj statur i et sådant drivhus, fordi det er begrænset i højden. Strukturen kan rumme en stor mængde jord, derfor er den perfekt til dyrkning af kimplanter. Jorden i drivhuset i polycarbonat opvarmes snart, så planterne vokser og udvikler sig hurtigere.
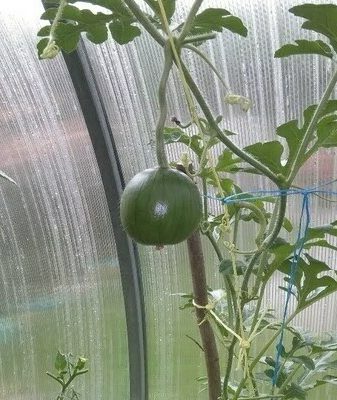
I sommerfugledrivhuset kan der dyrkes tidlige vandmeloner, meloner, rodfrugter og alle grøntsager med lav vækst. Mange sommerboere dyrker blomster i et drivhus af dette design.
I den varme sommersæson står drivhuset åbent. Skodderne lukkes i slutningen af efterårssæsonen, når der opstår frost. På denne måde forlænges grøntsags produktionstid. Tidligt på foråret lukkes dørene om natten for at sikre plantens komfort og for at beskytte dem mod kolde snaps.
Det er også muligt at tilpasse varme i drivhuset med et varmekabel. Således skaber du ideelle betingelser for dyrkning af tidlig kål og lavvækst tomater.
Hvis der vokser forskellige planter i drivhuset, der negativt kommer i kontakt med hinanden, kan du indeni lave en sommerfugl drivhuspartition lavet af polycarbonat eller polyethylen.
Sommerfugledrivhus: behageligt eller ej? fordele og ulemper ved drivhus
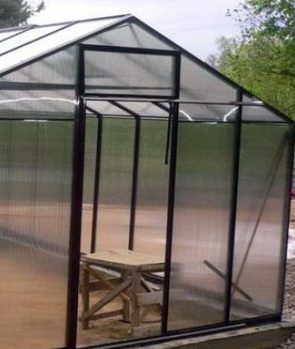
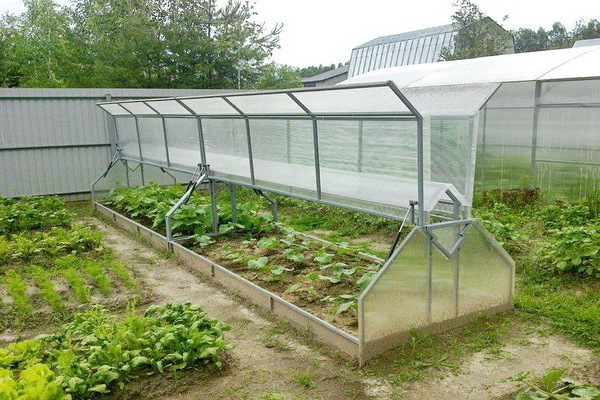
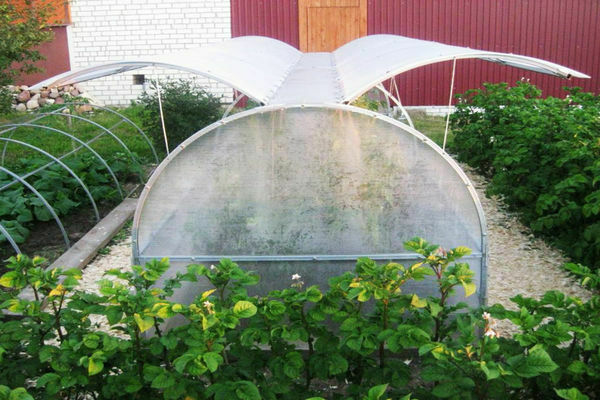
Drivhus sommerfugl: foto
Fordele ved sommerfugl drivhus drivhus
- Fabrikanter og sommerboere hævder, at dette design kan vare 10 år eller mere. Ja, en sådan indikator kan opnås, hvis rammen er beklædt med polycarbonat.
- Dørene åbnes fra 2 sider, så det bliver lettere at vedligeholde højderyggen.Du kan udvide dit selvfremstillede drivhus til at rumme mere vegetation.
- Drivhuset er let og kompakt. Det kan placeres hvor som helst på stedet, hvis du skal adskille for at transportere, kan du også hurtigt samle det.
- Det er meget godt, når et sådant drivhus er placeret et fast sted på fundamentet. Det buede tag, dækket med slidstærkt polycarbonat, vil ikke falde sammen under vægten af en stor mængde snedække og fra vindstød. Om sommeren, når drivhuset er helt åbent, frigøres normalt lange agurker fra det. Med andre ord bruges sommerfuglen året rundt, den kan ikke skilles ad, og det er ikke nødvendigt at omarrangere den til et andet sted.
Minusser.
- I butikker er der sådanne drivhuse, hvis rammer er lavet af en simpel metalprofil, den er dækket med maling. I fremtiden kan malingen skrælle af, og hvor boltene er fastgjort, skrælles den øjeblikkeligt af. Ifølge sommerboere er kvaliteten af malingen konstant dårlig. Rustning af rammen begynder, hvis den ikke er malet fra tid til anden.
- Boltehuller er næsten altid grise. Sommerbeboere fjerner dem selv med en fil, og de kan ikke rigtig lide det.
- Nogle firmaer anbefaler at kappe drivhuset med polyethylen, hvis der ikke er polycarbonat. Dette er en dårlig anbefaling, fordi designet bliver mindre stift. Plus, de hårde kanter i polycarbonat giver endnu et stop for de lukkede døre i selen herunder.
- På sommerfugle, der produceres i store mængder, er der store huller mellem de lukkede døre og karosseriet.
- Til tider kan du finde svage hængsler, der bøjer, når dørene åbnes.
- Bagsiden af de strukturer, der skilles ad, er den konstante tætning af samlingerne. Hvert år, når drivhuset er samlet, skal du investere i køb af silikone.
For at undgå ulemperne ved et drivhus sommerfugl fra fabrikken kan du lave det selv.
Indsamling af sommerfugle fra planten
Når du selv samler drivhuset, skal du følge producentens anvisninger. Algoritmen angiver, hvad der skal forbindes til.
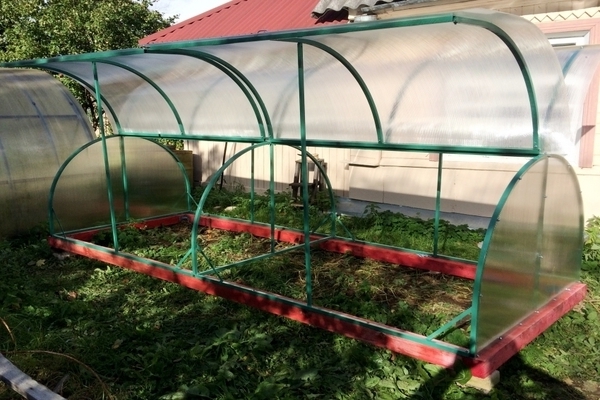
Et omtrentligt monteringsdiagram.
Vedhæftet er en tegning. På det, ved hjælp af hardware, bør drivhusets ramme samles. Hvert element er forbundet i form af bogstavet "t" eller fastgjort med et hjørne.
Forankring i form af et kryds er påkrævet for at styrke støtteelementerne over en længde på mere end to meter.
Den samlede ramme skal være beklædt med polycarbonat eller polyethylenmateriale.
Algoritmer for fabrikker kan variere, men grundlaget for rammemontering er identisk.
DIY sommerfugl drivhus
At lave et sommerfugledrivhus selv er meget enkelt.
- Uddannelse.
For at lave et pænt æstetisk drivhus skal du tegne et diagram over det. I grafen angives alle indramningskomponenter, deres størrelser og boltfastgørelsespunkter. Beslut straks hvilken type dør. De kan være halvcirkelformede eller endda.
Det er lettere at lave døre af en jævn form, for det er ikke altid muligt at bøje buer, der er identiske med hinanden på egen hånd. - Valg af et sted til installation af et drivhus.
Et drivhus eller drivhusrum er placeret fra nord mod syd. Et område uden skygge eller godt oplyst før frokosttid anbefales. Strukturen kan placeres i enhver del af territoriet, men gør det stadig, så du let kan nærme dørene fra begge sider. Overvej det faktum, at høje planter og bygninger vil skygge, men på samme tid vil fortykkede hække beskytte drivhuset mod kolde vinde. - Vi lægger fundamentet.
Skilte drivhuse placeres sjældent på fundamentet. Hvis du vil bruge en sommerfugl som et stationært drivhus, så er det bedre at placere det på en base. Strukturen er let, så det er ikke nødvendigt at lave et stort og stærkt fundament. Optimalt set skal den placeres i en dybde på 500 mm. Basen kan være en kasse lavet af træ, men der er en nuance her - den kan hurtigt rådne i jorden.Det anbefales at lave en bund af røde mursten, hule blokke eller lave forskalling rundt om rillen og hælde beton der. - Sådan laver du en ramme lavet af træ.
Konstruktionen kan udføres uafhængigt ved hjælp af trælameller og gamle vinduer.
Gør-det-selv forberedte tegninger til et sommerfugldrivhus, der tages, derefter overføres dimensionerne til trælameller med en sektion på 30x40 mm eller 40x50 mm. Alle komponenter, der er markeret, saves af med en nedstryger. - Samlingen af rammen udføres i henhold til ordningen. Taget vil være fladt og trekantet. Træbuerne kan ikke bøjes, så stop ved jævne skær.
Dørkarme fastgøres ovenfra til den færdige bund ved hjælp af hængsler. De er dækket med polyethylen på toppen. Hvis der er gamle vinduer eller rettere deres stel, så kan de tjene som færdige døre. Beklædningen vil være glas fra vinduet. - Rammens side er beklædt med bræddermen de vil ikke være gennemsigtige. Forstærket film, plexiglas eller polycarbonatmateriale kan fungere godt her.
Hvis du ønsker det, kan du dække rammen med agrofibre. - Sådan laver du en ramme fra en metalprofil.
Montering af en ramme fra en metalprofil ligner montering af en træramme. Den eneste forskel er, at dørene er lavet i form af halvcirkler. Du bliver nødt til at bøje buerne på et specielt sted.
Drivhuset vil være stationært, derfor skal alle komponenter i basen svejses. En fælles ramme er lavet i henhold til tegningen, som har et centralt tværsnit for at fastgøre dørene. Hængslerne er boltet til overliggeren og rammen. Efter at den færdige ramme er installeret på fundamentet, skal den beklædes med polycarbonatmateriale. De udskårne elementer fastgøres med specialiseret hardware med skiver til tætning. Polyethylen og ikke-vævet materiale til en metalprofilramme fungerer ikke særlig godt.
Drivhus sommerfugl: anmeldelser
Alexandra Vasilievna, 60 år, Irkutsk -regionen: ”Manden byggede et drivhus i form af en sommerfugl ud af gamle vinduer. Dørene blev bygget på en sådan måde, at de kan være lodret åbne i hele sommersæsonen. Derfor kan du plante og dyrke høje tomater og agurker. "
Viktor Sergeevich, 59 år, Tomsk -regionen: “Rammen til sommerfuglens drivhus blev købt færdiglavet på et specialiseret sted. Da jeg samlede, rediderede jeg hængslerne, fordi dørene ikke passede så tæt til karmen. Resten er fin. Drivhuset var beklædt med polycarbonatmateriale. Drivhuset har allerede stået i tre år. "