Tomatørnæb
Indhold:
Takket være opdrætternes arbejde er der allerede et stort antal af de mest forskellige sorter af tomater. Og også deres hybrider. Valget er så stort, at du i butikken endda kan fare vild foran et stativ med tomatfrø. Nogle er zonet mod nord, andre mod syd. Atter andre har en usædvanlig farve. Og den fjerde har frugtens oprindelige form. Eagle's Beak -tomaten tilhører netop den sidstnævnte kategori. Fordi det er navngivet, og derfor er det så usædvanligt. Ud over sin interessante form har denne sort andre fordele. Det giver en meget god høst. Og også meget velsmagende og saftige frugter.
Tomatørnæb: beskrivelse og egenskaber ved sorten
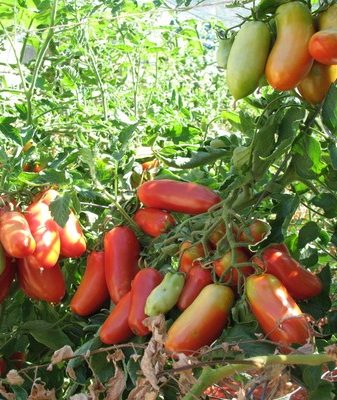
Ørnæbstomater: sortfoto
Tomatsorten Eagle's næb blev opnået takket være arbejdet hos sibiriske opdrættere. Det kan dyrkes i et drivhus. Og også i et åbent område. Med hensyn til modning er denne sort midt i sæsonen. Dette er en ubestemt kultur. Busken har en spredende form. Skuddene er dog ikke særlig kraftige.
Denne sort er selvbestøvet, og derfor dyrkes Eagle's Beak-tomaten ofte under åbne markforhold.
Ørnæbstomaten har en god grad af modstandsdygtighed over for lave temperaturer. Denne sort viser anstændige resultater, selvom sommeren var meget kort, og selv med returfrost om foråret er planterne i stand til at udvikle sig normalt og danne æggestokke. Om efteråret er tomaterne som regel allerede fuldt modne. Hvis du følger de grundlæggende regler for dyrkning, kan du opnå meget anstændige resultater, for eksempel kan du fra en plante få omkring 8 kilo grøntsager. Busken i sin højde når omkring 1,5 meter, løvet har en standardform. Og heller ikke anderledes end bladene på andre tomatsorter. De er ret store, farven er lysegrøn. Blomsterstanden dannes som regel oven på den tiende indlægsseddel.
Omsorg for tomatsorten Eagle næb
Ved plantning af Eagle's Beak tomatsort skal der observeres et bestemt plantemønster. Planter bør ikke være for tæt på hinanden. Det er bedst at plante ikke mere end tre tomatbuske på en kvadratmeter.
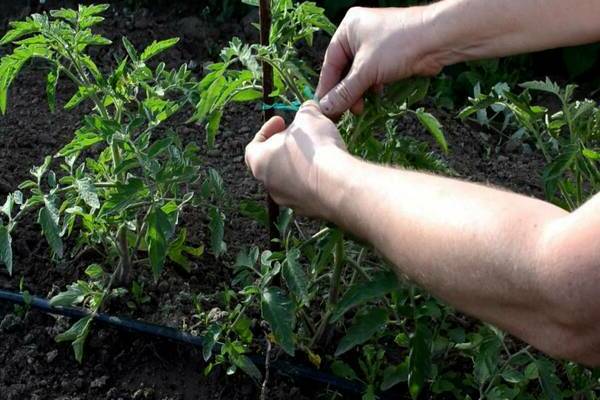
Hvor længe skudene af en given sort vil nå, afhænger meget af ørnebæks vækstbetingelser. I åbne terrænforhold når højden cirka 120 centimeter. Hvis landbrugsteknologien opretholdes på det korrekte niveau, kan planten vokse 150 centimeter i længden. Med hensyn til betingelserne for drivhuse og drivhuse når buskene 180 - 200 centimeter. Under alle omstændigheder skal planterne fastgøres til understøtningerne. Fordi stilkene i denne sort er ret skrøbelige i strukturen. Og de kan bryde under frugtens vægt. Og også fra et vindstød.
For normal vækst og udvikling af planter er det nødvendigt fra tid til anden at deltage i dannelsen af en busk. Og fjern også unødvendige stedsønner. Det vil ikke være overflødigt at bruge lægemidler, der stimulerer vækst. Således vil det være muligt at påvirke kvaliteten af den fremtidige høst positivt.
Æggestokkene i Eagle's Beak -tomatsorten dannes i løbet af sommeren og op til efterårsperioden. Af denne grund er udbyttet af ørnæbstomater så stort, at afgrøden høstes i mere end en gennemgang. Som regel høstes grøntsager to til tre gange om sæsonen.
Karakteristika for frugterne af sorten Eagle næb
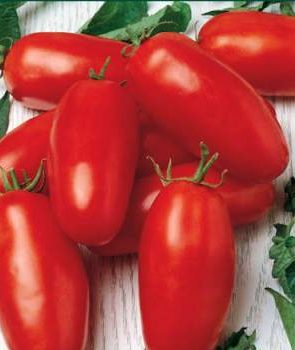
Tomatsort Eagle's næb: foto
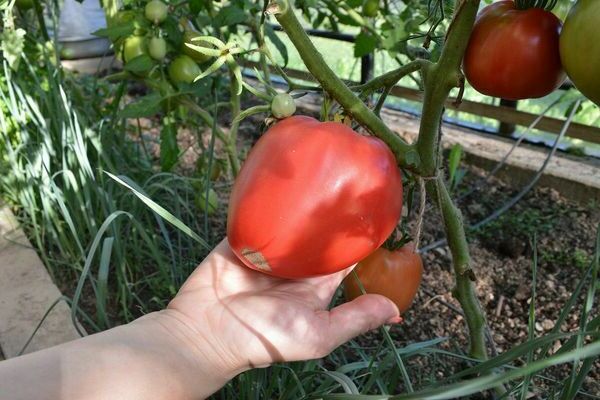
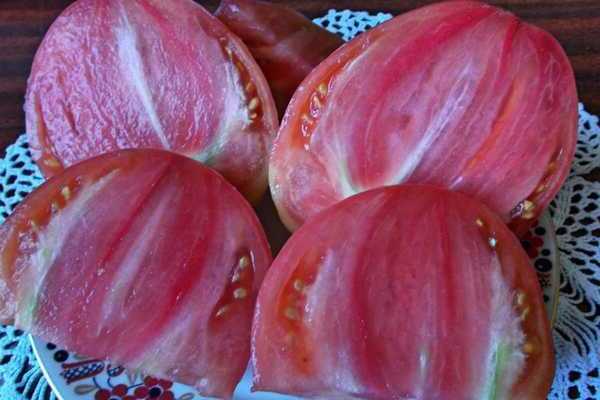
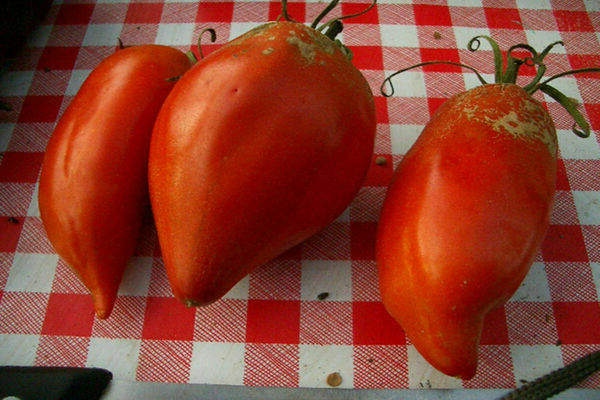
Det er værd at bemærke, at frugterne af denne sort har en meget interessant form. Spidsen af en sådan tomat er let strakt og bøjet og ligner derved næbet på en rovfugl. Når frugten endnu ikke har nået modenhed, har den en lyserød farvetone på indersiden og ydersiden. Og den modne frugt bliver til en smuk mørkrosa farve.
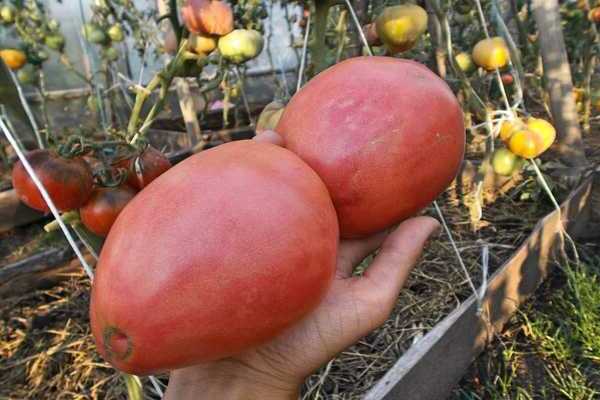
Frugterne af denne sort vises ganske hurtigt. Fra det øjeblik skuddene dannes til den første høst, tager det normalt omkring 100 dage. Mange gartnere, der dyrker Eagle's Beak -tomaten på deres parceller, bemærker, at denne sort giver ret store frugter. Som regel vokser de største prøver i begyndelsen af høstperioden.
De største tomater kan veje mellem 800 gram og 1 kilo. Yderligere vejer frugterne som regel omkring 400 gram. I gennemsnit dannes en frugt med en vægt på cirka 500 gram. Smagen af sådanne tomater er på et højt niveau. Indersiden er en frugt med en kødfuld struktur. Det har også en masse saft og sukker. Frugter kan bevare deres kvaliteter, når de plukkes fra grenen, normalt i en uge.
Hvad angår omfanget af denne sort, er den universel. Tomater vil perfekt supplere friske salater. Og også egnet til forberedelse af forskellige emner til vinteren. Meget velsmagende juice, saucer, pastaer fås fra tomater. I det hele taget bruges sådanne tomater normalt ikke på grund af deres størrelse.
Eagle's næb tomater: fordele og ulemper ved sorten
Som enhver anden sort eller hybrid har Eagle's Beak en række positive kvaliteter. Selvfølgelig kan du ikke undvære ulemper. Lad os overveje de vigtigste. Smagere vurderer smagen af disse tomater på det højeste niveau. Frugterne af Eagle's Beak har en usædvanlig form. Og også en attraktiv farve. Denne sort viser meget gode resultater med hensyn til udbytte. Frugterne er store i størrelse, de kan opbevares i lang tid. Denne række tomater har en temmelig stærk immunitet mod de vigtigste sygdomme af svampe- og viral oprindelse.
Hvad angår manglerne, vil det desværre ikke undvære dem. Denne sort bærer ret store frugter. Af denne grund skal planter regelmæssigt fodres med næringsstoffer. Og også overvåge det korrekte vandingsregime. Denne sort skal fastgøres fra tid til anden. Fordi hans stilke vokser ganske aktivt. Ulemperne omfatter behovet for at binde buske. Dette komplicerer processen med at passe lidt på planter. Det gør også konstruktion af espalier obligatorisk.
For at opsummere kan vi sige, at der er langt flere fordele. Og de faktorer, der er ulemper, ifølge sommerboere, er ikke mere end anbefalinger til pleje af planter.
Sådan dyrkes et tomatørnæb korrekt
Hvis du vil opnå en anstændig høst med store og velsmagende tomater, skal du følge nogle plejeregler. Dette er vigtigt på alle stadier af plantevækst og udvikling.
Nogle af sommerboerne kan ikke lide at komplicere deres liv for meget. Og han køber bare færdige frøplanter i butikken. Det er dog bedst ikke at gøre dette. For der er ingen garanti for, at du får præcis den sort, du forventer. Du ved heller ikke, hvilken kvalitetsfrø der blev brugt til at opnå disse frøplanter. Det er meget vigtigt at vælge de rigtige frø til dyrkning af frøplanter. Det gælder frø købt i butikken. Og også valgt blandt tomatfrugter.
Kalibrering af frø påkrævet. De skal omhyggeligt sorteres ud for dette. Og fjern dem, der ikke passer. De er deformerede, for små, rådne. Derefter skal de udvalgte frø holdes i saltopløsningen i ca. 15 minutter. Tomme frø ender på overfladen af vandet og skal fjernes. Derefter er det nødvendigt at desinficere med en 1% manganopløsning. Frøene skal hærdes og spire. Dette gøres med en underkop og en fugtig klud.
Sådan sår frøplanter af tomatsorter Eagle næb
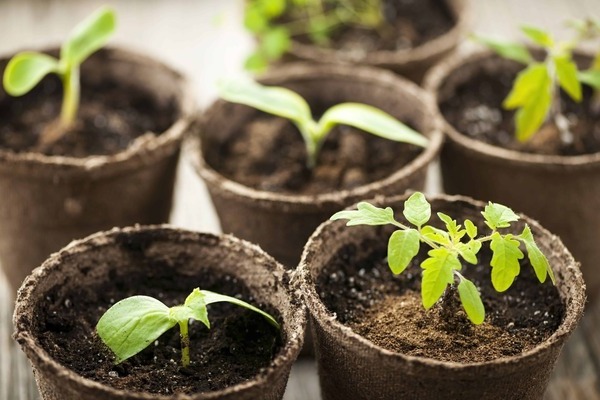
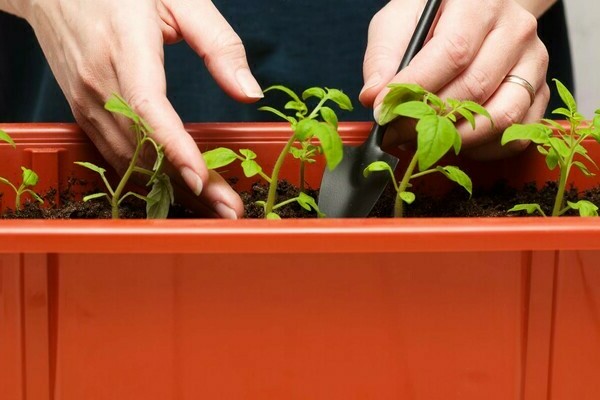
Ørnæbstomater: foto af frøplanter
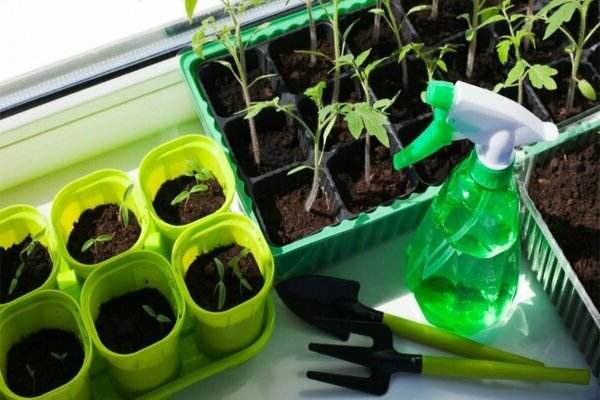
Frøene af Eagle's Beak -tomatsorten bliver normalt sået i marts. På tidspunktet for såning skal de behandles fuldstændigt og i frøplantefasen. Planter plantes i et permanent habitat efter 60 dage. Uden fejl skulle det allerede være varmere nok til dette. Tomatfrø sås i beholdere eller kasser. Hvad angår jorden, kan du tage den fra bedene. Det skal være frugtbart nok. Det vil ikke være overflødigt at kalcere jorden i ovnen på forhånd. Og tilføj også humus.
Det er bedst at bruge færdiglavet jord til dyrkning af tomatplanter til dette, som kan købes i en havebutik. Denne blanding indeholder en tilstrækkelig mængde af de nødvendige næringsstoffer i dets sammensætning.
Når jorden er klar, placeres den i en beholder og hældes lidt vand over den. Derefter laves riller, mellem dem skal der være en afstand på cirka to til tre centimeter. Hvad angår dybden af sådanne riller, bør den være halvanden centimeter. Der skal også være et mellemrum mellem kornene fra en centimeter til tre. Derefter dækkes med et tyndt lag løs jord og fugtes med en sprøjteflaske. Dæk beholderne med plastik. De skal være i denne form, før de første spirer vises. Derefter fjernes polyethylen, og beholderne overføres til et godt oplyst sted. Hvis du har brug for ekstra belysning, skal du bruge specielle lamper. Der vælges i separate glas, når der vises et par ægte blade på planterne. Derefter skal kopperne flyttes til skyggen. Planter skal vokse lidt og blive stærkere, og så kan de returneres til et solrigt sted. I syv til ti dage skal frøplanterne hærdes, derfor skal de tages ud i frisk luft.
Vi planter tomater i jorden
For at plante planter på et permanent sted har du brug for stabilt varmt vejr, og jorden skal varme godt op. Som regel er dette slutningen af maj - begyndelsen af juni. På plantetidspunktet skal jorden forberedes. Det skal desinficeres, løsnes og godt befrugtes med organisk materiale. Cirka halvtreds centimeter skal være tilbage mellem plantegruberne. I hver brønd skal du tilføje en spiseskefuld gødning baseret på fosfor og kalium. Rotsystemet er dækket af løs jord. Når plantningen er udført, skal du vande planterne. Vandet skal ikke være koldt.
Vanding og befrugtning
Denne sort er meget krævende for rigelig vanding. Dette bør gøres mindst en gang om ugen. Meget afhænger af vejret. Det er nødvendigt at tilføje næringsstoffer til tomater fra tid til anden, dette gøres mindst tre gange om sæsonen. Mange sommerboere bruger ammoniumsulfat, Plantafol eller Kemira til dette. Det gælder mineralsk gødning, men organisk gødning kan tilføjes oftere. Kompost kan bruges til dette formål. Hvad angår husdyrgødning eller fuglesand, er det mere præcist her. Proportionerne skal overholdes korrekt, ellers er der risiko for, at du forårsager uoprettelig skade på plantens rødder.
Når blomsterstande dannes, er det nødvendigt at udelukke nitrogenholdige forbindinger. Hvis der er for meget nitrogen, er der risiko for, at æggestokkene ikke dannes. Overflødige stedbørn af denne sort skal fjernes med jævne mellemrum, det samme gælder for de nederste blade. Hvis du ser, at busken er for tyk, skal du delvist fjerne bladene. Så solens stråler falder jævnt på hele planten. Dannelsen af tomater begynder i juli. Dette bør udføres med cirka ti dages mellemrum. Planter skal også bindes til sikre understøtninger.
Denne sort kan undertiden blive angrebet af sen rødme. For at forhindre, at dette sker, er det nødvendigt at sprøjte planten med Bordeaux -blandingen med henblik på forebyggelse.Hvis svampen alligevel blev fundet på planten, kan Fitosporin bruges til behandling. Hvad angår skadedyrsbekæmpelse, klarer en opløsning med sæbe eller en celandine bouillon dem godt.