Echeveria blomst eller sten rose. Hjemmepleje og reproduktion. Billeder af arter med navne.
Indhold:
En eksotisk plante og Echeveria, eller som det også kaldes stenrosen, kom til os fra Mexico. I princippet er det allerede klart heraf, hvilket klima der passer bedst til hende. Generelt er selve denne plante helt uhøjtidelig, og selv en nybegynder kan klare sin dyrkning. Denne plante kan vokse godt både på vindueskarmen og i florariet eller i drivhuset.
Kort om planten.
Stenrosen tilhører jumbo -familien. Dette er urteagtig plante er en lille busk. I form minder det noget om en rose. Den første omtale af denne plante var for mange århundreder siden, men nu dyrkes den aktivt af avancerede gartnere. Bladene ved rødderne er tykke, tætte og indeholder meget saft. Længden af disse blade afhænger af plantetypen, den kan enten være 5 cm eller 30. Højden afhænger også af dette, stort set er den 2 gange mindre end længden. Rosetterne er ikke for tætte, men tykke. Bladene kan have helt forskellige farver, det afhænger også af plantetypen. Nogle arter har stort set ingen stamme. Nogle gange kan det være op til 70 cm. I nogle arter af denne plante kryber skuddene, og rodsystemet er ret omfangsrigt, men tyndt og trådlignende. Blomsterne er små, klokkerne samles i blomsterstande, en blomst kan være op til 5 cm i diameter. Se meget originalt ud, at pedunclen kastes op, afhængigt af sorten, kan længden nå op til en halv meter. Jo bedre forholdet er, jo lysere bliver blomsterne, og i halvskygge vil de være kedelige. Echeveria ligner udadtil en plante som forynget. Nå, hvad angår denne eksotiske, kan de kun være indendørs og ikke vokse i haven. Hvis du planter i åbent terræn, vil det i den nærmeste fremtid simpelthen dø, fordi det slet ikke tåler temperaturændringer. Stenrosen har bare et stort antal arter, eller rettere mere end 200, så hver gartner kan vælge sorten eller den type, han kan lide.
Nødvendige betingelser for dyrkning.
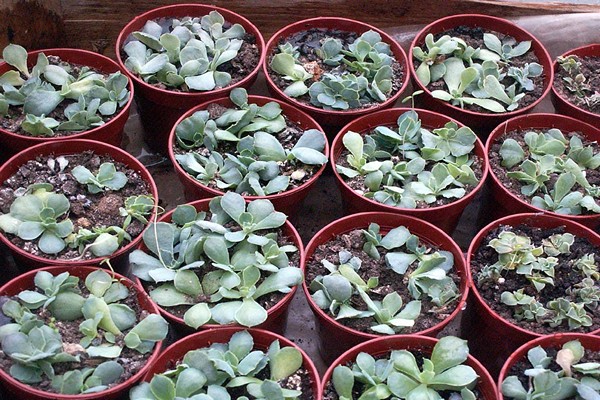
For en stenrose er der brug for særlige forhold, da denne plante er vant til at leve i ørkenen. Det er bedst, hvis der er nok tør luft i rummet, da hun ikke kan lide befugtning specielt. Og hun kan næsten ikke udholde skyggen, hun har brug for lyse, solrige, direkte stråler, så vil hun føle sig hjemme. Om foråret og sommeren er den mest ideelle temperatur + 25 °, men om efteråret og vinteren kan den sænkes til 15. Men hvis dine planter blomstrede om vinteren. Temperaturen skal være mindst + 20. For at vande stenen steg for ofte, er det også bedre ikke at vente, til den tørrer, mindst halvvejs. Selv om sommeren kræver de for meget vanding, og om vinteren skal de vandes endnu mindre. Om vinteren, for at bevare blomsten, er det generelt nødvendigt at skabe en kunstig tørkeefterligning. Derfor mener jeg, at det er bedst at efterlade opvarmningen ved siden af enhederne, da det i tør luft vil føles meget behageligt. Det er ikke nødvendigt at sprøjte planterne godt, og det er tilrådeligt at vandes omhyggeligt, så vand ikke falder ind i midten af udløbet, det er bedst at gøre dette under roden. På samme tid skal vand til kunstvanding være varmt og afregnet. Ideelt set bør sådant vand indeholde sporstoffer.På et tidspunkt, hvor blomsten aktivt vokser og blomstrer, skal du en gang om måneden foretage yderligere befrugtning, dette gøres sammen med vanding, og doseringen skal overholdes nøje. Under plantens blomstring er det bedst at bruge en gødning, der er beregnet specifikt til blomstrende planter. Men i efteråret og vinteren behøver du ikke at befrugte blomsten. Forresten er sådanne gødninger, der indeholder en stor mængde nitrogen og organisk gødning, absolut ikke egnede til denne eksotiske. Når du har købt en dør, er det bedst at transplantere den med det samme, da jorden, hvor den voksede i butikken, ikke er egnet til blomsters aktive vækst. Selvom erfarne gartnere siger, at en plante i et stykke tid hjemme kan sidde i det land, den voksede i butikken, men det er stadig bedre at begynde at transplantere med det samme, fordi udviklingen af en blomst på dette tidspunkt ikke sker, jorden er simpelthen ikke beregnet til dette. Der er ingen næringsstoffer i den, så planten står på et vækstpunkt. Selvom du ønsker det, kan du efterlade blomsten i denne jord et stykke tid, for at bringe den hjem vil den vænne sig til det lokale klima bedre og ikke opleve for meget stress. Men efter at hun har vænnet sig lidt til det og har vænnet sig til et nyt sted, kan det transplanteres. I tilfælde af en transplantation er valget kun dit, hvordan du bedst gør dette, se nøjagtigt på din plante. Inden du genplanter en nyerhvervet blomst, skal du huske på, at jorden i den skal tørre godt ud, og såkaldte luftrødder skal vises. Grundlæggende gælder dette for præcis de blomster, der blev bragt fra naturlige levesteder. Men sådanne planter er meget ofte vanskelige at tolerere transport og dør, derfor er det bedst for hver gartner at vælge en plante, der blev dyrket i en lokal planteskole. Sådanne planter er allerede tilpasset det lokale klima, og sælgerne i butikken vil fortælle dig i hvilket klima planterne er vant til at eksistere, og du kan skabe det til at tænke selv. Selvfølgelig koster sådanne planter fra planteskolen lidt mere, men ikke desto mindre er det bestemt mere pålideligt, og det er bedre at betale for meget en gang, men at have en sund plante, der har god immunitet, end du køber den, du bragte, og den kan dø når som helst. Stenrosen er meget krævende for den jord, den vil vokse i, så jordblandingen skal være speciel. I betragtning af at denne eksotiske hjemland er en stenet ørken, skal jorden til plantning være passende. Det er bedst, hvis jordblandingen er sådan: almindeligt land er lavt og frugtbart, småsten, tørv og lidt kul. Alt dette skal være i et 3: 1: 1 forhold. Du kan også bruge almindelig jord, som er beregnet til kaktusser, den skal blandes med små sten i et forhold på 4: 1. Hvis du vil have din blomst til at vokse langsomt, kan du bruge små småsten og lidt zeolit til dette. For at sikre, at du har forberedt blandingen korrekt, skal du vande den, tage et lille stykke jord i din hånd og klemme det i din knytnæve, efter at du har slukket din knytnæve, skal jorden simpelthen smuldre, men hvis det er blevet til nogen , det betyder, at du har gjort noget forkert. En krukke til dyrkning af en plante skal vælges af den korrekte størrelse, men i princippet vil det ikke være svært, for den burde være, og et par centimeter større end rodsystemet på en voksen plante. En god mulighed ville være, hvis du køber en gryde fra den samme haveforretning, hvor du købte din plante, så vil sælgeren fortælle dig, hvilken størrelse der passer til dig. Husk, at når du transplanterer i en gryde, er det bydende nødvendigt at hælde et drænlag, og i bunden af gryden skal der være mange små huller, så overskydende vand hurtigt forlader gryden ved vanding.I princippet, hvis du har købt små skud, kan du i første omgang plante i små beholdere, og efter at planten vokser til den nødvendige størrelse, kan den transplanteres i en gryde til et permanent sted.
Sådan plantes.
En stenrose kan plantes ikke kun en plante i en gryde, men også vælge en beholder af den passende størrelse og plante flere stykker der. Desuden kan du plante sammen ikke kun den samme sort, men også plante flere forskellige sorter og typer. Husk, at planter skal vandes meget omhyggeligt og lidt efter lidt, så vandet ikke stagnerer. Det er nødvendigt at plante planter i jorden omhyggeligt, så rodhalsbåndet ikke lukkes, og i stedet for jord til plantning kan du kun bruge småsten eller små småsten. Sagen med sten er lettere, da de er evige, behøver du ikke tilføje dem, men i tilfælde af jord skal den regelmæssigt tilføjes. Mens planterne er små, kan de transplanteres en gang om året, efterhånden som den vokser og hente en gryde til blomstens rodsystem. Men voksne planter kan transplanteres 1 gang 3 år, og så gøres dette kun, når det er nødvendigt. Et par år efter plantning kan stenrosen allerede begynde at lede. Men dette vil kun ske, hvis alle betingelser for hendes liv er opfyldt i henhold til alle reglerne, det vil sige, at luften i lejligheden skal være varm og tør nok, og vanding skal være moderat. Selvfølgelig er der mennesker, der ikke rigtig kan lide blomster af echeveria, og i dette tilfælde bliver de simpelthen afskåret om dem, forlader og beundrer den sædvanlige dekorative roset. Hvis du bare ikke kan vente, indtil din plante blomstrer hele tiden er gået, og du aldrig har set blomster, så er der ikke nok belysning til det, og så vil kunstigt lys komme til undsætning. Og i to måneder er det bedst at holde Echeveria i tilstrækkelig kølig, det er bedst, hvis det er omkring 15 °. Temperatur sammen med belysning giver det ønskede resultat, og snart vises knopperne. Det er under knoppernes udseende, at der skal laves en topdressing, og det vil være nødvendigt præcist til blomstrende planter.

Store sygdomme og skadedyr.
Ved døren er der ligesom andre planter både sygdomme og skadedyr. Hvis der er noget galt med planten, så er den umiddelbart synlig eksternt. Meget ofte påvirkes en stenrose af et sådant skadedyr som en mælkebug. På samme tid vises plak på plantens blade. Tyndt web. Planter begynder at visne, og der vises små lyse insekter på den. For at slippe af med dette skadedyr skal blomsten behandles med en opløsning af karbofos, dette skal gøres strengt efter instruktionerne. Men hvis planten har lidt meget af et skadedyr, så vil intet redde det. I dette tilfælde skal du trække planten ud af potten, adskille den sunde del fra den, den kan plantes i en ny krukke og i ny jord, og resten af den berørte del af planten skal simpelthen være smidt væk, uanset hvor ked af det er, men der vil ikke ske noget godt, hvis du gemmer det. Det sker, at planter påvirkes af rodormene, i dette tilfælde, og tynde hvide tråde vises i jorden, og bladene bliver meget sløve og mister al deres elasticitet. for at slippe af med dette skadedyr, skal planten straks transplanteres i en ny jord, helst med mig i en gryde og en plante fra den gamle krukke: den skal fjernes meget omhyggeligt, og al jorden fra rødderne skal vaskes af under rindende vand. Efter transplantation af planten en gang om ugen, og Echeveria skal vandes med lægemidler som arkade, er dens koncentration skrevet i vejledningen, som skal overholdes nøje. Det sker, at et skadedyr som en galnematode forekommer i en stenrosen. Hvis det starter, starter det meget hurtigt på rodsystemet, der dannes særegne ærter, og hvis du ikke hurtigt træffer foranstaltninger, begynder rødderne simpelthen at rådne.For at slippe af med dette skadedyr skal planten straks transplanteres i en ny jord, alle berørte dele af rødderne skal bare fjernes med et skarpt instrument, det er ønskeligt, at det desinficeres. Efter at de berørte områder af rødderne er fjernet, skal planterne placeres i varmt vand, som ikke vil være varmere end 40 °, der skal det stå i cirka halvanden time, ikke mere. Inden en plante plantes i et nyt land, skal den spildes med en løsning af Arcade -præparatet. Men svamp og meldug, inficerer meget ofte planter, hvis du vander det for meget, så for at slippe af med dem skal du tørre din plante lidt og behandle den med fungicider, men hvis dette ikke hjælper, skal du adskille den fra planten den del, der ikke er inficeret og simpelthen transplanterer den i ny jord, resten af planten skal stadig smides væk. Hvis du har medlidenhed med din plante og lader den være inficeret, mens du forsøger at helbrede den, risikerer du, at resten af blomsterne også bliver inficeret.
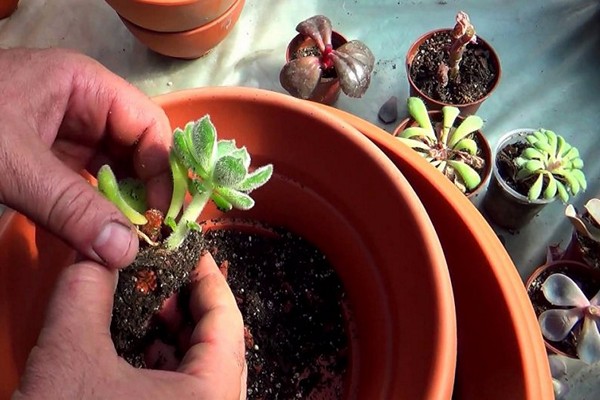
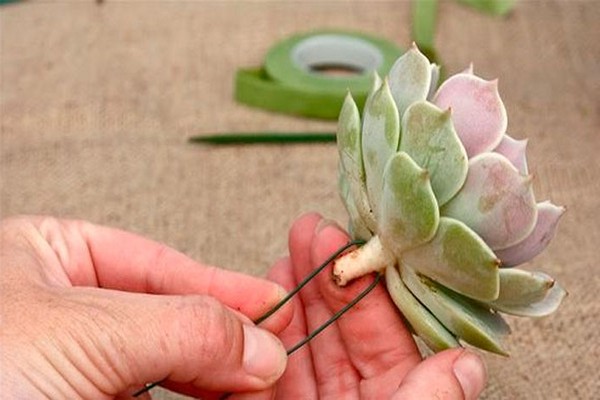
Sådan gengives korrekt.
Echeveria kan formeres på flere måder: for eksempel kan det gøres med et blad. Desuden vil dette være ganske let at gøre. Du skal vælge et sundt blad i bunden af planten og bryde det af. I flere timer skulle han simpelthen ligge på vindueskarmen og tørre lidt ud. Mens bladet tørrer, skal du forberede jordblandingen, blande den frugtbare jord med sand i et forhold på 2: 1. I en beholder med en blanding skal du stikke dette blad i en vinkel og sprøjte det fra en sprøjteflaske og derefter dække med en film. Indtil elevatoren slår rod i planterne, skal du ventilere dagligt og også sprøjte, når jorden tørrer. Den bedste rodtemperatur for dette blad er omkring 25 °. Derfor er det bedst at lægge beholderen med et ark lige under batteriet, men du kan også lægge den på batteriet, som du vil. Bladet vil slå rod i cirka 3 uger, hvorefter selve bladet tørrer ud, og børn vil dukke op omkring det, efter en måned kan det transplanteres i en ny beholder i størrelse. I princippet kan reproduktion på denne måde udføres endnu lettere: til dette skal det valgte blad skæres af, ellers skal den voksne plante sættes et varmt og mørkt nok sted, så den ligger der i cirka en måned i løbet af denne tid, rødder skal vises på bladet, og efter at bladet skal vises, kan du bare plante det, men i en beholder med jord. Landet skal også være frugtbart, blandet med sand og tørv. I dette tilfælde er det bedst at tage mere end et ark, og ikke kun på et ark kan der være flere børn, og på den anden side er der ingen garantier i dette tilfælde. Stone rose, kan formeres ved hjælp af forretninger. For at gøre dette skal du afskære udløbet fra den voksne plante og fjerne alle de nederste blade fra den. Sættes på et mørkt sted i 3 timer til tørring. Mens udløbet tørrer, skal du forberede en beholder med jord, til dette skal du tage jord, små småsten og sand i et forhold på 1: 1: 1. I bunden af beholderen skal der lægges et drænlag; hertil kan lidt større småsten være egnede. Jorden skal fugtes let, og udløbet skal placeres i det, temperaturen for at rode udløbet må ikke være mere end + 25 °. Efter cirka en måned vil rosetten allerede slå rod, men umiddelbart genplantning er ikke nødvendig, den kan vokse og udvikle sig aktivt i denne gryde i op til et år. Du kan også forplante denne eksotiske ved hjælp af toppe, for dette med et skarpt værktøj skal du skære toppen af en voksen plante, fjerne alle de nederste blade og sætte det i skyggen, så det tørrer, tre timer vil være nok til dette. Derefter kan toppen plantes til rodfæstelse, hvordan du laver din egen jordblanding er allerede beskrevet ovenfor. Snart vil toppen slå rod og give børn omkring den. Echeveria kan også formeres ved hjælp af frø, men denne metode er ret kompliceret og er hovedsagelig velegnet til opdrættere.Almindelige gartnere bruger denne metode kun i tilfælde af økonomi, fordi frø er meget billigere end at købe en voksen plante. I dette tilfælde er der selvfølgelig ulemper, fordi det er ret svært at dyrke denne plante fra frø, som allerede nævnt er der ingen garanti, da spiring af frø er tilstrækkelig, og enhver dårlig fejl kan føre til, at selv hvis dine frøplanter er kommet ind, kan de bare dø. Meget ofte er der sådanne tilfælde, at du køber frø af den sort, du har brug for, men de viser sig at være af en helt anden type. Men hvis du stadig vil så og dyrke dine egne planter, planter og frø, skal du i midten af foråret forberede en særlig jordblanding, den skal bestå af tørv og sand i forholdet 1: 1. Fyld en beholder med denne blanding og spred frøene over overfladen. Efter at frøene er spredt, skal de fugtes med en sprayflaske og dækkes med folie. I næsten en måned, og beholderen med frø skal være på et mørkt, varmt sted, men filmen skal regelmæssigt fjernes og ventileres og også sprøjtes på jorden. Når frøene spirer og de første frøplanter vises filmen, skal du fjerne og flytte beholderen til vinduet, og hele tiden skal du overvåge temperaturen. Efter cirka 60-70 dage kan frøplanterne plantes i separate beholdere.
Almindelige fejl gartnere laver.
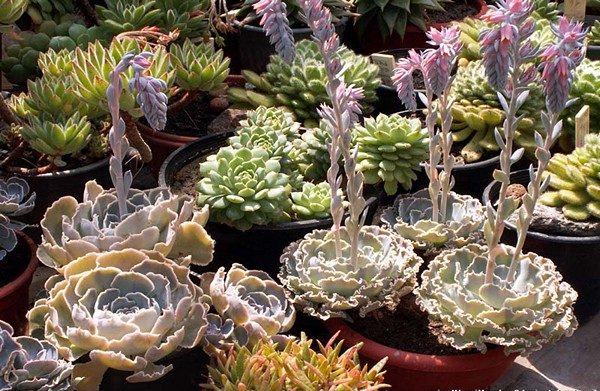
Alt for ofte laver gartnere de samme almindelige fejl. Husk først, at deres tro vokser meget langsomt, så der er ikke behov for justeringer for at den kan vokse. Hvis din plante døde af en eller anden grund, skal du ikke fortvivle over at lede efter årsagen i dig selv, det sker, så plant bare nye planter og prøv at dyrke den igen. Hvis du bemærker, at der er noget galt med dine planter, og du har begået en fejl, skal du ikke gå i panik, du skal bare rette det med det samme. Udadtil vil Echeveria straks vise dig, at hun ikke kan lide noget, og at du gjorde noget forkert. For eksempel, hvis stænglerne på en plante eller blade er blevet mørkere, blevet sorte, betyder det, at du vander det for ofte, og temperaturen til dyrkning er ikke egnet, det er naturligvis meget lavere end det burde være. For at løse denne fejl meget hurtigt er det nok at flytte planten til et varmere sted og heller ikke vandes et stykke tid, så jorden kan tørre godt ud. Hvis echeveria begyndte at strække sig opad, og fatningen ikke blev så elastisk, betyder det, at der simpelthen ikke er nok lys til det, i dette tilfælde vil yderligere belysningslamper hjælpe dig. Hvis du mener, at den er holdt op med at vokse, og bladene er små nok, er vanding ikke nok, og du skal også udføre ekstra fodring. Planten begyndte at strække sig opad og mistede sin form, hvilket betyder, at du sjældent vander den, i dette tilfælde skal du bare øge vandingen og sætte den i skyggen. jo ældre og større planten er, desto værre tåler den tørke. hvis du straks retter alle dine fejl, vil Echeveria finde styrken til at komme sig hurtigt nok. Nogle erfarne gartnere ønsker at arrangere et florarium derhjemme. Det vil sige en slags lille glasdrivhus. Florariet er perfekt til eksotiske planter, fordi det vil være muligt at skabe alle de ideelle betingelser for hver af dem. Generelt ser plantesammensætninger under glas meget originale og smukke ud, derfor bruges florariet som indretning. Enhver glasbeholder, akvarievase og så videre er velegnede til dette. Afløb skal lægges i bunden af beholderen. Hæld et lille lag små sten oven på det. Og allerede på toppen skal du hælde jordblandingen. Og allerede i denne jord er blandingen plantet. Du kan oprette absolut enhver sammensætning ikke kun fra forskellige typer echeveria, men også ved at plante andre planter til den.Du kan skabe absolut enhver komposition, så længe din fantasi er nok! Men før du planter flere planter sammen, skal du læse oplysningerne om dem, om de kan eksistere i mange år i en beholder. Husk, at mens de er i florarium, kræver planter endnu mere sjælden vanding. Da jorden vil tørre meget langsommere ud. Selvfølgelig er transparente beholdere bedst egnet, og det vil se meget smukkere ud, men du kan også bruge en uigennemsigtig beholder, men så skal du aldrig begrave planterne. Hvis du har plantet planter på denne måde, skal du omhyggeligt og regelmæssigt beskære, så planterne ikke tykner og ser meget imponerende ud.
Populære sorter med beskrivelser.
Som nævnt ovenfor har Echeveria bare et stort antal sorter og arter. Eksempelvis er Echeveria agavaviform. Denne plante er praktisk talt rosetfri, tæt og vokser direkte fra jorden. Bladene på denne plante er selv lysegrønne. De kan være gullige eller lyserøde. De mest populære sorter af denne art er tyr og romeo.
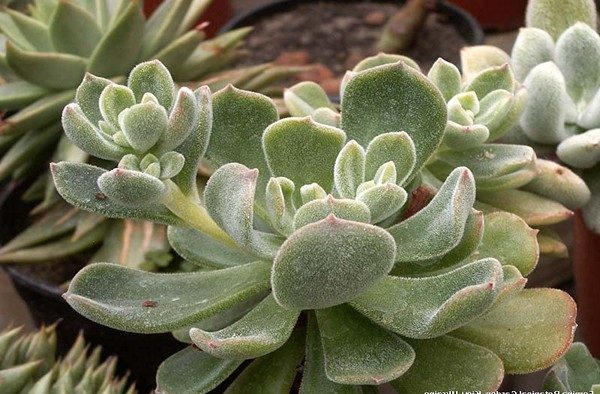
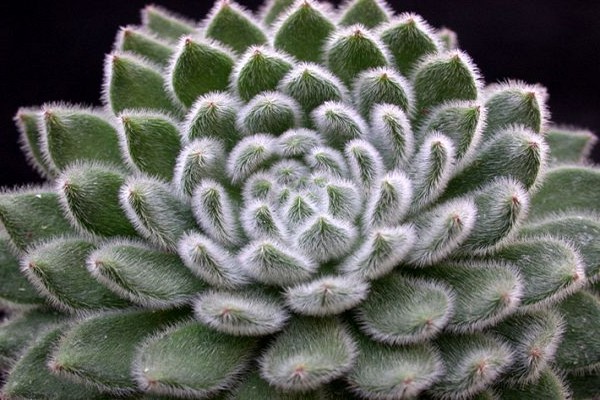
Echeveria hvidhåret... Denne plante har også praktisk taget ingen stilk, og rosetten vokser op til 15 cm i diameter. Bladene på denne blomst er grønne og har en brun kant. I princippet fremgår det klart af navnet, at bladene har hvide hår.
Echeveria genialt... Denne art vokser til en stor busk, hvor en stor roset producerer tykke skud, hvor små rosetter udvikler sig.
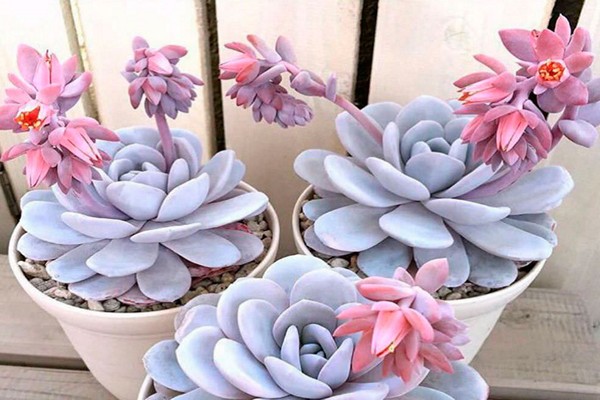
Echeveria pukkelryggblomstret. Denne art har løse rosetter, der producerer en tyk lang stilk. Bladene kan være grønlige grålige med en lyserød eller brun nuance. Blomsterstanden kan vokse og af forskellige størrelser, nogle gange når den 15 cm i diameter. Men hvad angår peduncle, kan den vokse op til 1 m i højden. De mest populære sorter af denne art er: Metallica, Garunculata, Grispata, Pearl of Nürnberg.

Echeveria Derenberg. rosetter i denne art vokser op til 6 cm i diameter, og de er meget tætte. Peduncles vokser til gengæld kun 5-6 cm i længden, og hver peduncle har 5 små blomster.
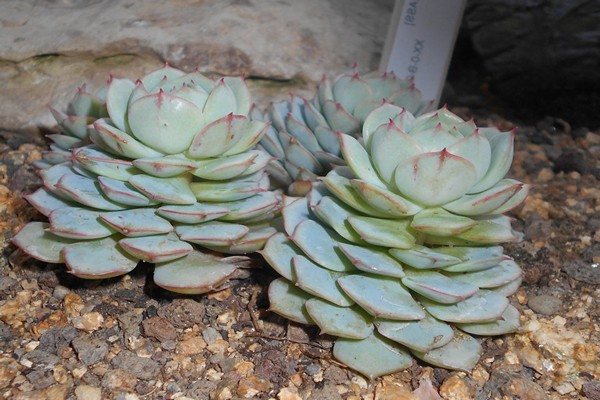
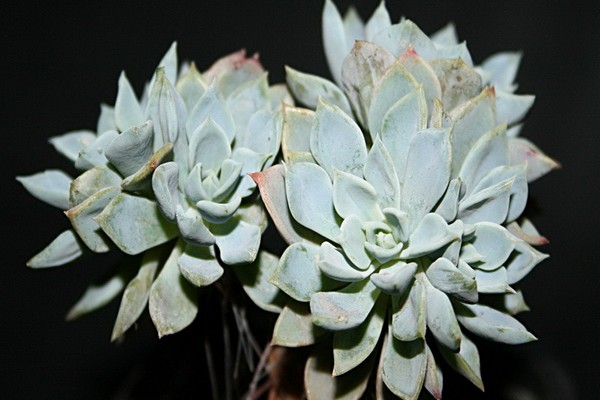
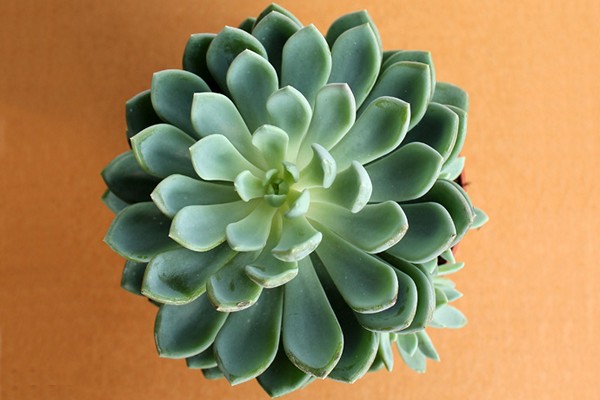
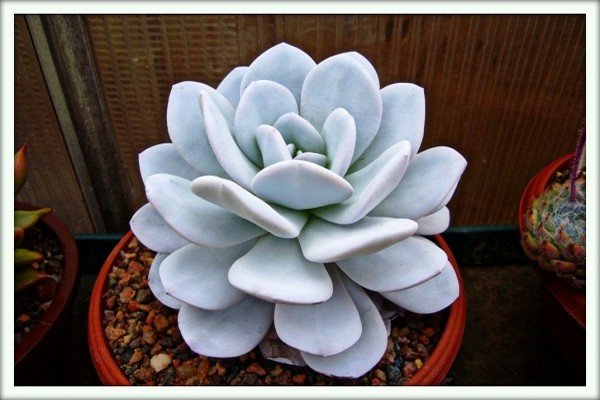
Echeveria er klar. Åh, du stenroser er ikke en stilk, men der er tætte og ret store rosetter. Hendes blade er lysegrønne. De har en bestemt slags hvid blomst, som under ingen omstændigheder bør fjernes fra bladene. Denne type echeveria ser meget smuk og dekorativ ud, som den er meget glad for gartnere.
Echeveria pude... Denne eksotiske vokser temmelig lavt med en roset; den vokser i diameter, ikke mere end 10 cm. Pedunculen er også kort, bogstaveligt talt 10 cm, og har små gulrøde blomster.
Echeveria Peakotsky. Rosetter i denne art vokser ikke mere end 15 cm i diameter, og bladene er bogstaveligt talt 5. Denne art ser dekorativ ud på grund af det faktum, at bladene er malet med en lyserød farvetone. Det, der ser meget imponerende og usædvanligt ud fra denne blomst, er simpelthen umuligt at tage øjnene af.
Echeveria Shaviana eller Shaw... Denne plantetype ligner på en eller anden måde en almindelig kål, dens stilk er meget kort, og bladene er store, trukket til midten, deres farve er grågrøn.
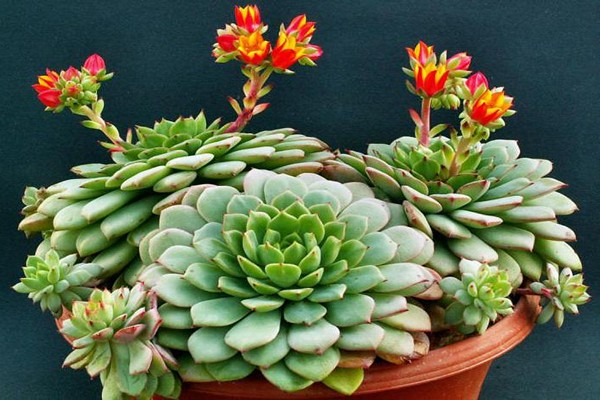
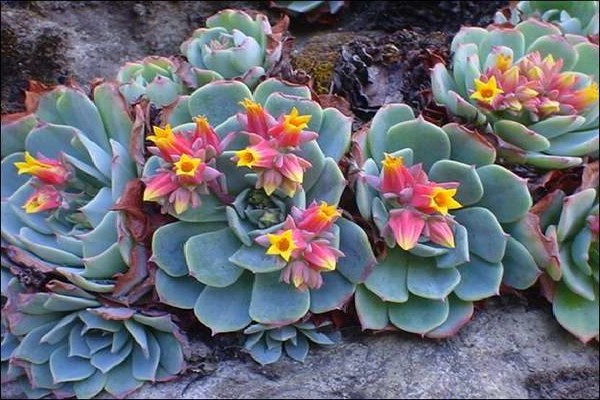
Echeveria strålende... Denne plante er en lille busk. Og blomsterne minder lidt om krysantemumblomster. Rosetten vokser ikke mere end 10 cm i diameter, og stænglen kan blive op til 30 i højden. I slutningen af foråret og forsommeren er denne busk simpelthen oversået med stængler henholdsvis med blomster.
Echeveria Lau. Denne blomst ligner udadtil kunstige blade; den er stor og tyk. Han har praktisk talt ikke en stilk. Hans blomster vokser ganske sarte, kun halvanden centimeter i diameter og kræver meget opmærksomhed.
Runion Echeveria. Den mest populære sort af denne art er Topsi Turvi. Blomster af denne plante ligner også krysantemum blomster. Dens blade er ret hårde, tynde og lange, med buede ender, de ser op.

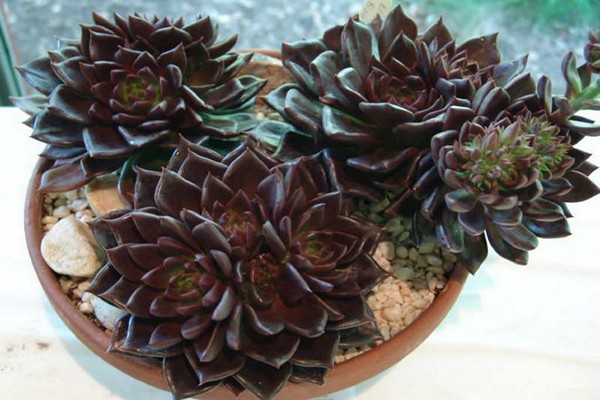
Echeveria den sorte prins. Denne eksotiske ser meget smuk og usædvanlig ud, fordi den har en brun bladfarve. Men hans roset kan blive 15 cm i diameter, mens den ikke vokser mere end 20. Generelt er en stenrosen meget smuk, men ikke så vanskelig at dyrke, som den umiddelbart kan se ud, alt hvad der er nødvendigt for den er korrekt omsorg og meget lidt af din tid, så vil hun takke dig med sin skønhed.