Hvordan man formerer hortensia.
Indhold:
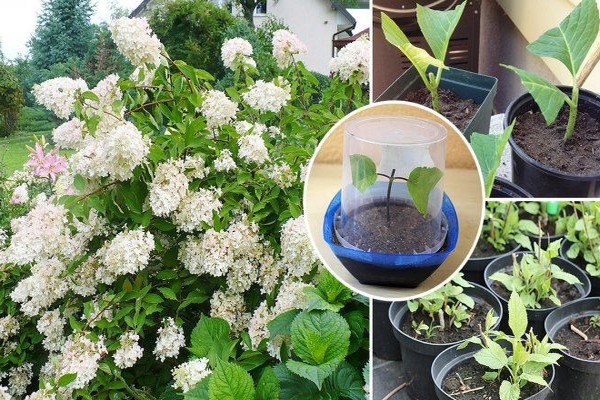
Den frodigt blomstrende hortensia, der er slående med blomsterstandens skønhed, på grund af hvilken nogle gange endda buskens grønt ikke er synligt, vil efterlade få mennesker ligeglade, og gartnerne vil simpelthen miste deres ro, indtil denne skønhed er på deres websted . Ved første øjekast, selv for erfarne gartnere, der ikke har erfaring med at dyrke hortensiaer, synes reproduktionen af denne busk at være ret vanskelig. Faktisk kræver denne proces ingen særlige færdigheder. Du skal bare kende nogle regler samt følge enkle anbefalinger, og selv en ikke alt for erfaren gartner vil uafhængigt kunne dyrke den nødvendige mængde plantemateriale. Så i denne artikel vil vi fortælle dig, hvordan du korrekt formerer en hortensia.
Hvilke muligheder kan du forplante hortensia.
Det skal bemærkes, at det slet ikke er svært at skaffe hortensia plantemateriale på egen hånd, og der er mere end én mulighed for reproduktion af en busk, herunder: frø, lagdeling, skud, stiklinger, opdeling af busken.
Det skal bemærkes, at de angivne muligheder har både fordele og ulemper.
For eksempel er det ikke altid muligt at købe hortensia af den ønskede sort, og mange bestiller frøene af planten, de kan lide. I dette tilfælde skal du være forberedt på, at processen med at dyrke frøplanter vil kræve mere indsats og tid, og resultatet vil ikke opfylde forventningerne. Det er faktisk ikke ualmindeligt, at kun halvdelen af frøene kan spire, og den resterende halvdel vil derfor ikke fuldt ud besidde alle moderplantens kvaliteter og egenskaber. Dette er i øvrigt en ret almindelig ulempe ved netop denne avlsmetode. Af denne grund formeres busken oftere ved stiklinger, lagdeling og også ved at dele busken. Da mange mennesker bemærker letheden og på samme tid effektiviteten af de tre anførte metoder, vil vi analysere hver af dem mere detaljeret.
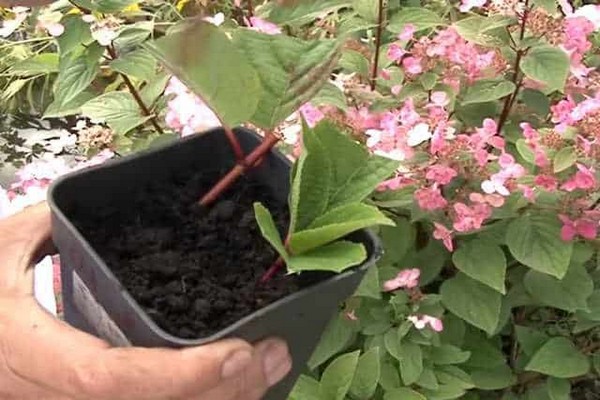
En busk fra en skæring.
Skæring er måske en af de nemmeste måder at formere hortensiaer på. Så med dens hjælp fra en lille plante, men med stor omsorg og opmærksomhed fra din side, kan du dyrke en fuldgyldig busk med smukke blomsterstande, som bliver et vartegn for din have, hvorefter du ikke længere kan kaldes en uerfaren gartner.
Når du begynder at reproducere hortensiaer, skal du bare tage hensyn til nogle af nuancerne.
Stiklinger skal skæres fra antallet af sunde skud uden tegn på sygdom, skadedyr eller mekanisk skade. Det anbefales også, at stiklinger laves af unge, endnu ikke lignificerede nedre skud, der vender ud mod solsiden. Derudover bør du ikke skære stiklinger fra skud af unge buske, der endnu ikke er et år gamle. Rooting af sådanne stiklinger er usandsynligt. Desuden er busken selv endnu ikke modnet, rodsystemet er ikke udviklet nok til at genoprette de skud, der vil blive afskåret. Som et resultat kan du helt ødelægge planten.
Det skal bemærkes, at hortensia kan skæres igennem hele sæsonen, fra den første sommermåned til oktober. Derfor, hvis det første forsøg i juni ikke var særlig vellykket, under hensyntagen til de mulige fejl, kan du øve dig i at skære hortensia selv indtil efteråret.
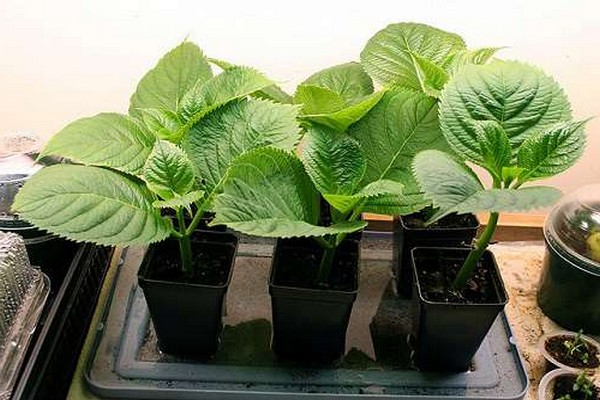
Om sommeren plantes afskårne stiklinger normalt direkte i jorden og om efteråret i specielt forberedte beholdere, som derefter placeres i et rum, hvor stiklingerne slår rod og vokser til foråret. I sidstnævnte tilfælde vil der naturligvis være mere omhu og opmærksomhed, det vil være nødvendigt at opretholde en vis lufttemperatur og forhindre jorden i at tørre ud.
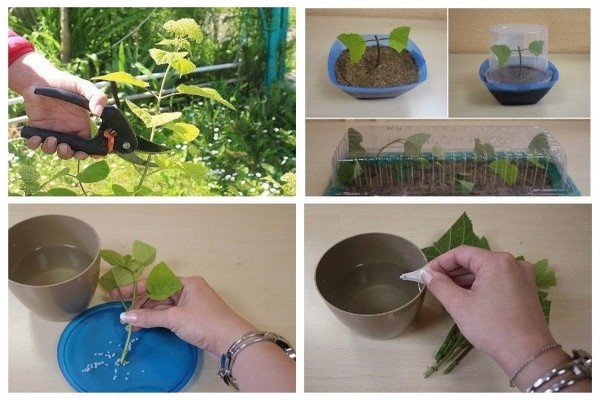
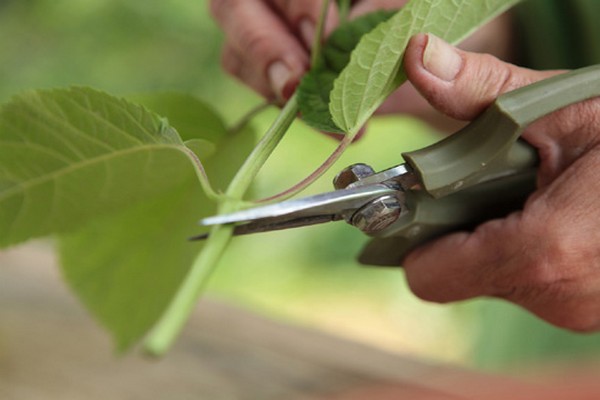
Til skæring af skud og skæring af stiklinger bør der kun bruges godt slibede værktøjer.
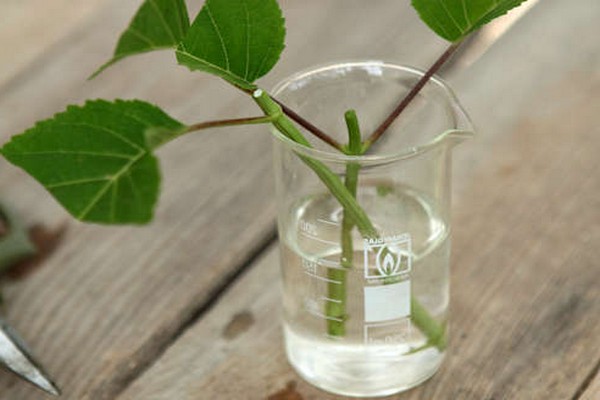
Eksperter anbefaler at skære grene til stiklinger om morgenen eller på en overskyet dag, så mister de mindre fugt, hvilket er vigtigt for deres rodfæstning og fremtidige vækst. Desuden skal grenene, umiddelbart efter at de er skåret, lægges i vand og ikke mindst efterlade dem uden fugt.
Efter beskæring skal hver af stiklingerne have tre, mindst to par blade. I det laveste par skæres bladene helt af, i andet og tredje forkortes de med mindst halvdelen. Både de øvre og nedre udskæringer af stiklingerne laves skråt. Afstanden fra begyndelsen af snittet til de internoder, hvorfra bladene vokser, skal være mindst 1 cm.
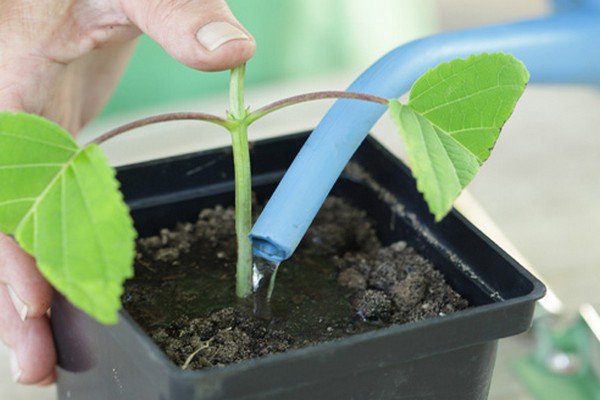
Inden hortensia plantes i jorden, skal stiklingerne efterlades i opløsningen i tre timer og placere dem, så skudbladene er over vandoverfladen. Denne opløsning består af vand med tilsætning af et par dråber af et vækstfremmende lægemiddel. Beholderen med stiklinger placeret i opløsningen efterlades i mørket. Forresten, i fravær af vækststimulerende midler kan du simpelthen tilføje en lille skefuld honning til et glas vand. Som erfarne gartnere bemærker, vil rødderne fremstå endnu hurtigere i dette tilfælde.
Ved plantning af stiklinger skal det huskes, at et solrigt sted ikke er egnet til dem, da frøpladernes blade kan brænde. Den optimale jord til dyrkning af stiklinger af hortensia består af sand og tørv i et forhold på en til to. Disse komponenter skal blandes godt. I mangel af disse ingredienser skal du bruge en kommerciel jord beregnet til dyrkning af azaleaer, ideelt afbalanceret i sammensætning og til unge planter. hortensiaer.
Det er nødvendigt at smelte voks, paraffin på forhånd, eller du kan simpelthen forberede strålende grønt. Inden plantning, på et hvilket som helst af de angivne midler, vil det være nødvendigt at sænke det øvre snit af stiklinger.
Plantejorden er let fugtet, og stiklinger plantes. Dybden af deres plantning er ikke mere end 3 cm, og bladene må ikke røre jorden. Oven på jorden skal der hældes et lag sand med en tykkelse på mindst 2,5 cm. Yderligere, for at stiklingerne lettere kan slå rod, skal de dækkes. Du kan bruge udskårne plastflasker, glasglas og endda simple plastposer til dette. Ved brug af poser skal de dog fjernes hver anden dag, og frøplanterne skal ventileres. Dækning af stiklinger giver dig mulighed for at vande dem sjældnere i løbet af ugen, bare et par gange er nok. Forlader frøplanterne åbne, ud over at øge antallet af vandinger, er det nødvendigt at sprøjte dem yderligere op til to gange om dagen.
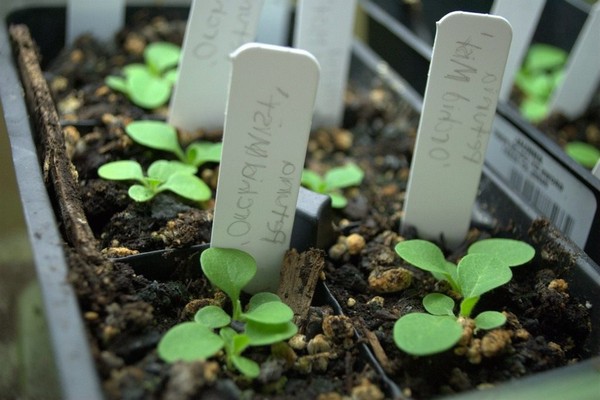
Normalt tager rodning af stiklinger mindst en måned, uanset om de er plantet i åbent terræn eller i en beholder. Hvis du gjorde alt korrekt, steg stiklingerne og slog rod, så efter dette tidspunkt begynder knopperne at svulme op, og snart vil nye blade klække. Du skal ikke skynde dig at fjerne krisecentre, du skal gøre dette tidligst, når du bemærker, at stiklinger er begyndt at vokse.
Ydermere er det vigtigt at sørge for, at frøplanterne er konstant plejet, overvåge lufttemperaturen og jordfugtigheden. Husk, at du bliver nødt til at vande og sprøjte planterne mindst 2 gange om ugen. På dette stadium er frøplanterne meget svage og reagerer på tilsyneladende mindre ændringer. F.eks. Kan temperatursvingninger på 5-7 grader allerede forårsage deres død.
Om foråret, et par uger før hortensiaerne plantes, begynder de at hærde. Beholdere med planter i flere timer om dagen efterlades først på en lukket veranda. Når planterne derefter tilpasser sig en given temperatur, bliver de fortsat hærdet og taget ud på gaden, startende fra en time om dagen, gradvist stigende denne gang.
Så snart positive temperaturer er etableret, plantes planterne på et valgt sted eller i separate senge til efterfølgende dyrkning.
Del hortensiabusken.
Lad os tage en reservation med det samme, at opdelingen af busken er uacceptabel for kun en type hortensia - panicle. Muligheden for at bruge denne metode er også begrænset til en bestemt periode - midten af september. Delenki plantet på et senere tidspunkt vil sandsynligvis ikke have tid til at vokse rødder samt forsyne sig med mad og næringsstoffer, der er nødvendige for at overleve vinteren.
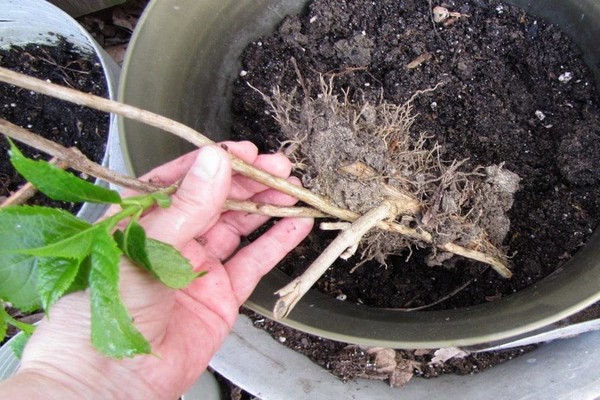
Opdeling af busken kræver omhu og nøjagtighed. Til at begynde med graver de lidt i bushen, så langsomt, helt graver det ud med en høgfork, og forsøger at skade rødderne så lidt som muligt. Den udgravede busk er opdelt på en sådan måde, at der forbliver mindst 2 knopper til fornyelse på hver af divisionerne, det vil sige knopper, hvorfra skud vil udvikle sig i fremtiden.
Plantehuller skal forberedes på forhånd. Derudover skal der tilsættes komplekse mineralgødninger til jordblandingen, hvormed hullerne skal hældes, hvilket bidrager til tilpasning af planter efter opdeling og transplantation. Endvidere bør buskene vandes rigeligt. For at planterne kan slå rod hurtigere og opbygge rodsystemet, vandes der hver anden dag. Men hvis faldet er regnfuldt, er der ikke behov for vanding.
Det er muligt at få et snit uden at grave en hortensia op. For at gøre dette graves busken ind og frigør nogle af rødderne fra jorden. Yderligere adskilles skuddene sammen med rødderne fra busken ved hjælp af et godt skærpet og rent værktøj. Det resulterende snit plantes uden tøven i et hul forberedt på forhånd. Denne opdelingsmetode er naturligvis mindre smertefuld for busken. Derudover er denne metode velegnet til dem, der gerne vil forynge allerede modne buske.
At få stiklinger af planten.
Det tilrådes at starte forplantning af en busk ved lagdeling efter endt blomstring. Denne metode kræver måske næsten ingen indsats, mens du i foråret får den nødvendige mængde plantemateriale.
Til at begynde med skal stammecirkelens jord graves op med ca. 15 cm.I dette tilfælde behøver du ikke være nidkær, da du let kan beskadige rødderne. Endvidere er jorden jævnlagt, og vinkelret på busken laves små riller, kun et par centimeter dybe. Et skud lægges i hver rille og fastgøres med metalnåle, for eksempel lavet af tråd. Prøv at lægge skuddet, så toppen af skuddet forbliver over jorden og er lodret. Lagene skal drysses lidt med jord, så de spirer, der begynder at dukke op efter 2-3 uger, kan bryde igennem jordlaget. Når spirerne når 8-10 cm i højden, skal de også hældes. Det er vigtigt at huske, at det bedste resultat vil blive givet ved endnu ikke lignificerede skud.
Når du vander din hortensia, skal du ikke glemme at vande de afskårne furer. Du kan opdele lagene ikke tidligere end foråret eller næste efterår.
Det skal bemærkes, at denne avlsmetode stadig ikke er særlig almindelig. Busken, der plejes regelmæssigt, har ikke mange skud, da den gennemgår regelmæssig sanitær beskæring såvel som formativ beskæring. På grund af sin effektivitet og lette udførelse er den imidlertid ganske velegnet til opdræt af buske.
Konklusion
Således vil ovenstående metoder til opdræt af en busk ikke forårsage vanskeligheder, selv for en nybegynder gartner. Det vigtigste at huske er, at hortensia er en meget fugtelskende plante, og derfor er regelmæssig vanding nøglen til en korrekt og rettidig udvikling af busken. Belønningen for det omhyggelige arbejde vil være frodige blomstrende knopper, glædeligt for øjet og dekorere haven.